
I love Yoda… LOL
but I guess most people do
It would be neat to see how you finish up the post processing, like if you do any sanding/bondo, and how many coats to get your intended result.
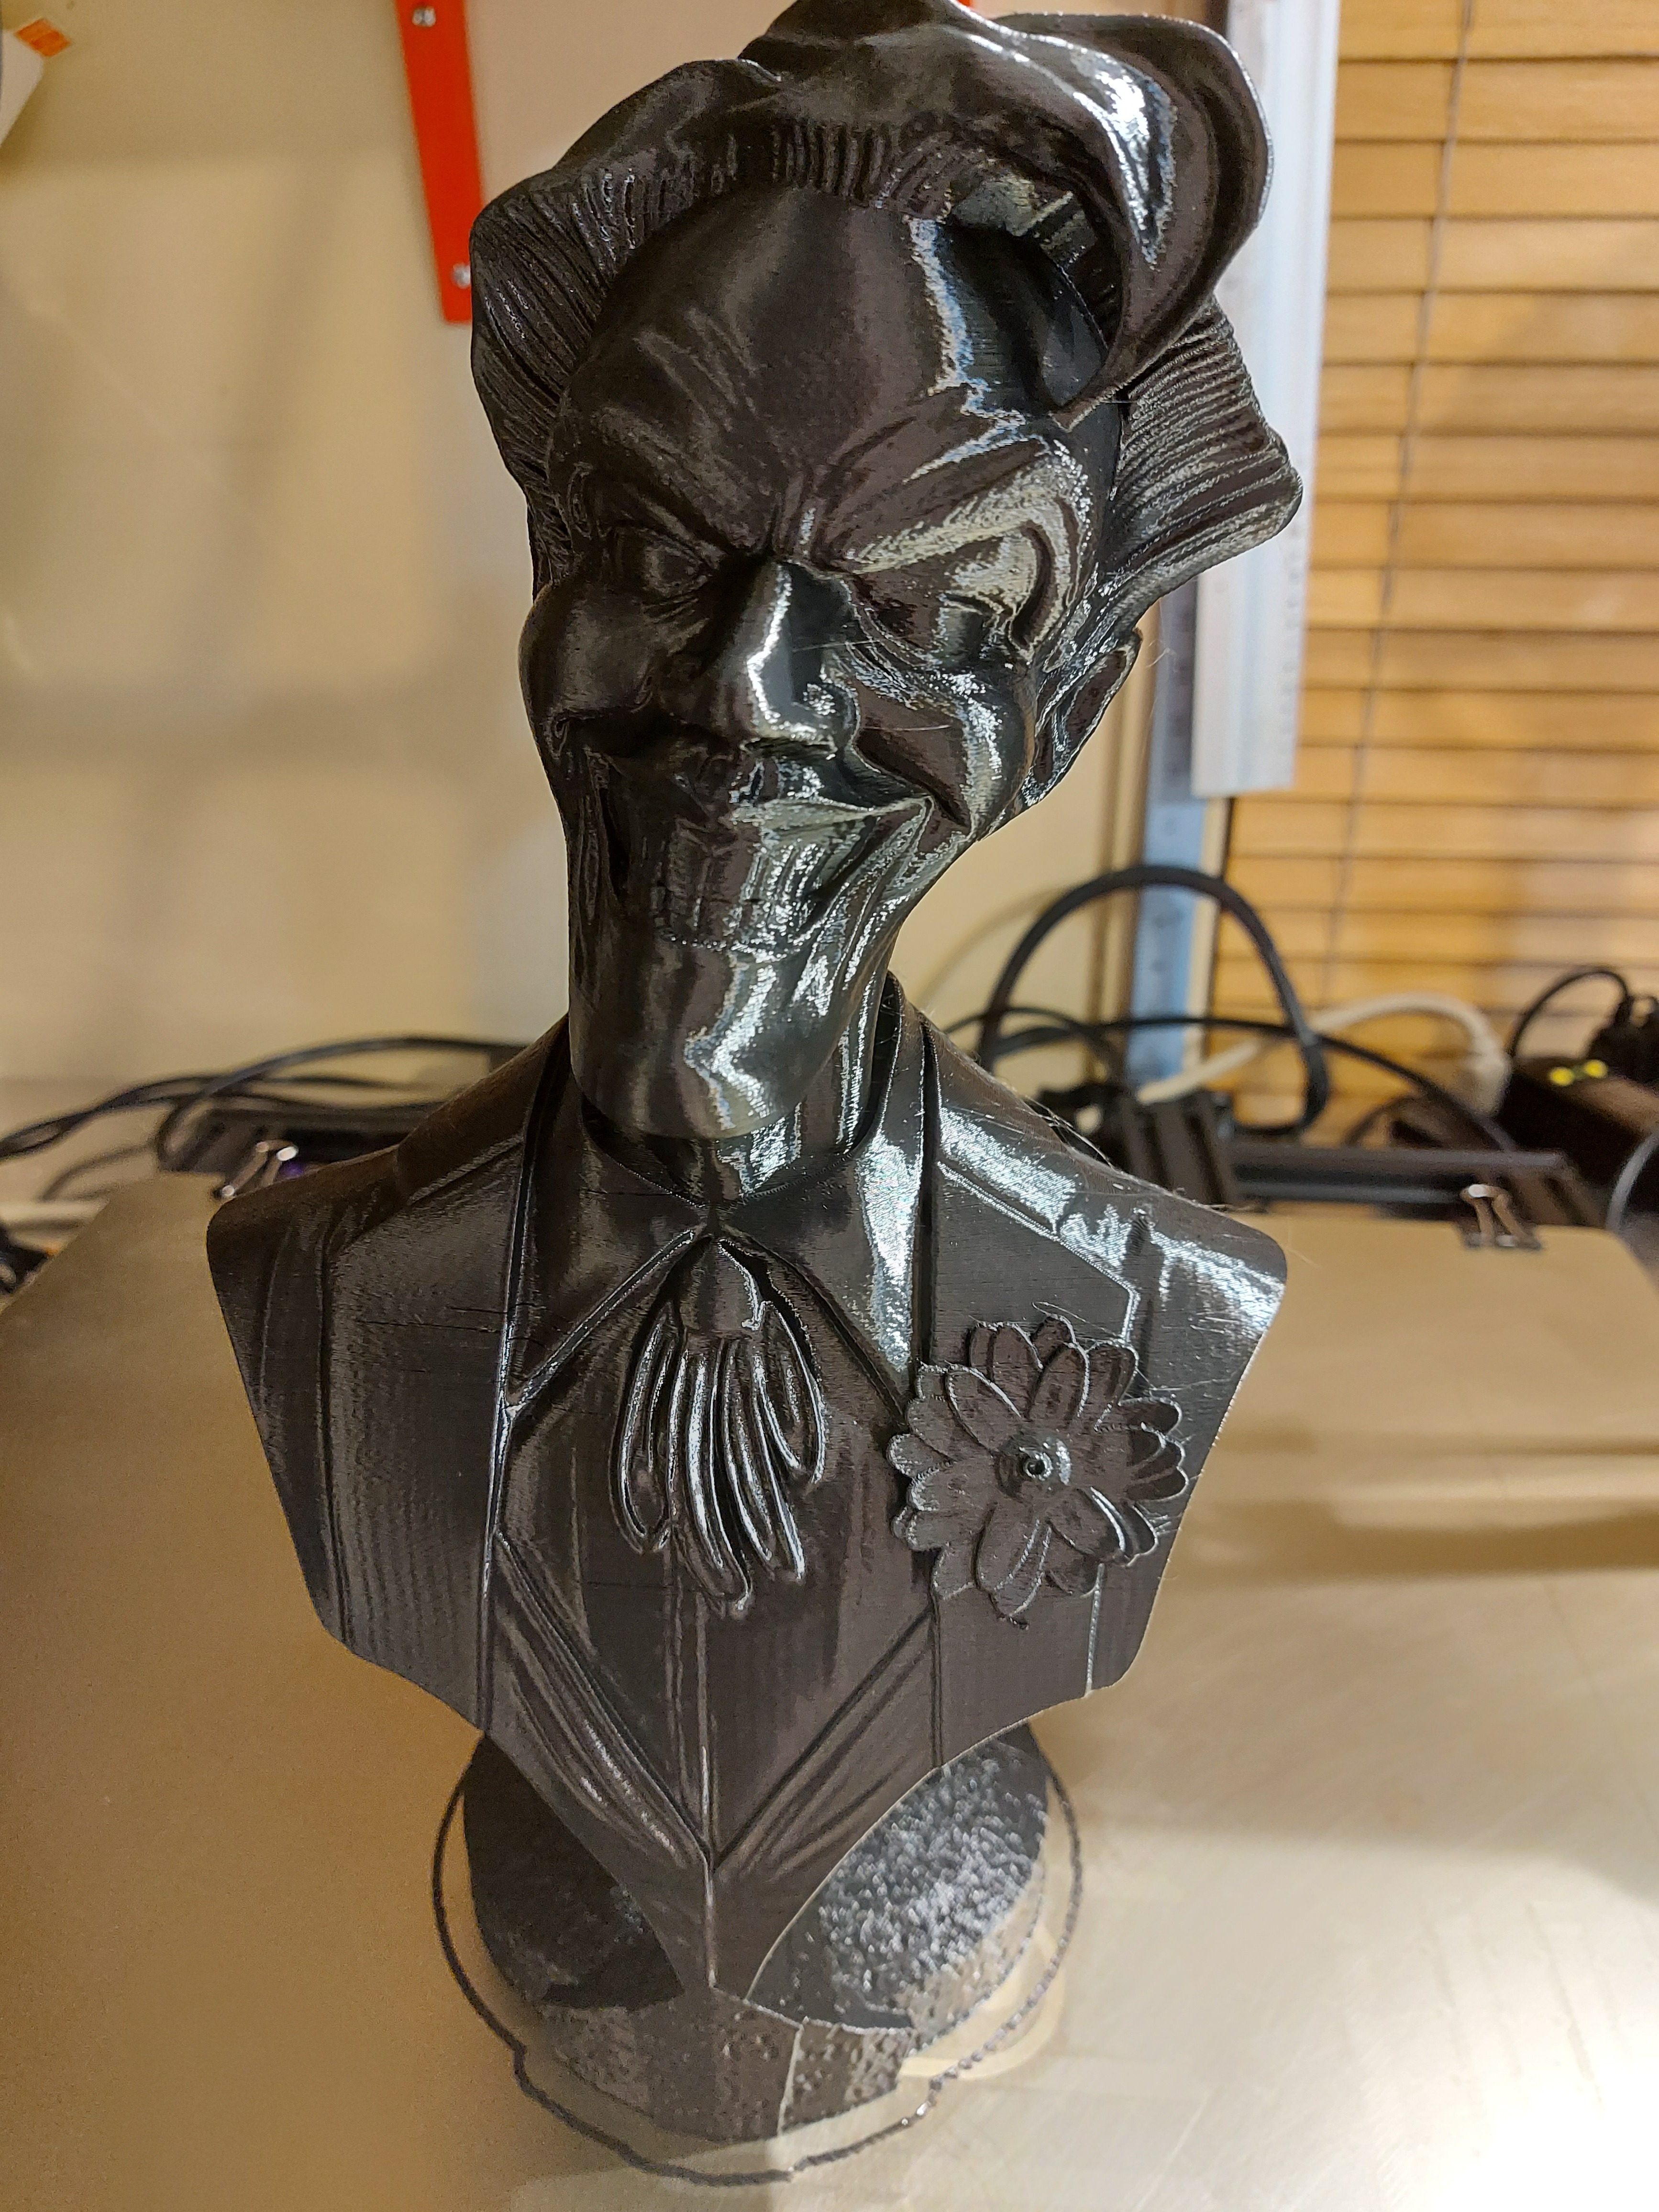
Also yeah they look great  what is the joker printed in?
I print busts at .16 layer height so I don’t have to do much if any sanding.
Joker was printed with 3DPC standard black, Yoda in standard white and I also have a Thing from Fantastic 4 on the go.
I’ll post the painting process for all three.
I look forward to it
I havent really done much post processing, but soon ill be doing some helmits so ill be getting into it one way or another.
Do you have particular painting tools? Preferred paints? Or any tips on your process?
Cool pieces for sure. I’m printing a locomotive these days and I use a fairing compound called Mr Surfacer. It’s a fast drying filler available as brush-on or rattle can and comes in 3 “grits” from 500, 1000 and 1500. One coat of 1000 fills the seams and wet sands to a baby’s bum smoothness. I buy it at Sunward Hobbies in Toronto.
In my post processing tool box is a complete set of 3DPC ceramic knives, a 3D pen and a hot knife from Digitmakers.
I hardly ever use sand paper.
My painting tools are my airbrushes and some cheap brushes from the Dollar store.
As for paint, Krylon primer for plastic, airbrush acrylic, cheap acrylic paint for the Dollar store as well as some cheap nail polish.