My BL is close to my clips in places, to where I need to move one so the BL doesn’t take a level off that… I’m sure you’ve watched it, in just grasping at straws now
Maybe the heating in the corners is less than in the middle, worse as the bed gets older maybe? Maybe add 5-10C?
For me, every time I have adhesion issues I start with cleaning my glass with dish soap and warm water like I’m trying to excise demons.
Are you sure your problem is “printing too high” or a lack of adhesion?
If it’s genuinely printing too high, the initial layer will likely not adhere properly and you’ll end up with a mess, but what I see in your photos is a print that looks to have been properly formed at the ends but which eventually warped and lifted off the bed. This is caused by the lower levels (in closer contact with the heated bed) remaining warm while the upper levels cool down in the air. The cooler levels contract slightly causing the print to warp.
Suggestions in no particular order:
Try printing with a brim. It adds a very thin “skin” of plastic around the model that is too thin to warp while significantly increasing the contact area.
In Cura, under “Experimental”, select “Enable Draft Shield”. I find 10mm height is usually enough. This builds a thin wall around the model which traps the heat, somewhat, and reduces warping. I’ve had pretty good success with it.
Make sure your printer isn’t in a drafty area like under a vent, or near a window or door.
Consider putting a cover over the sides of the printer to limit drafts.
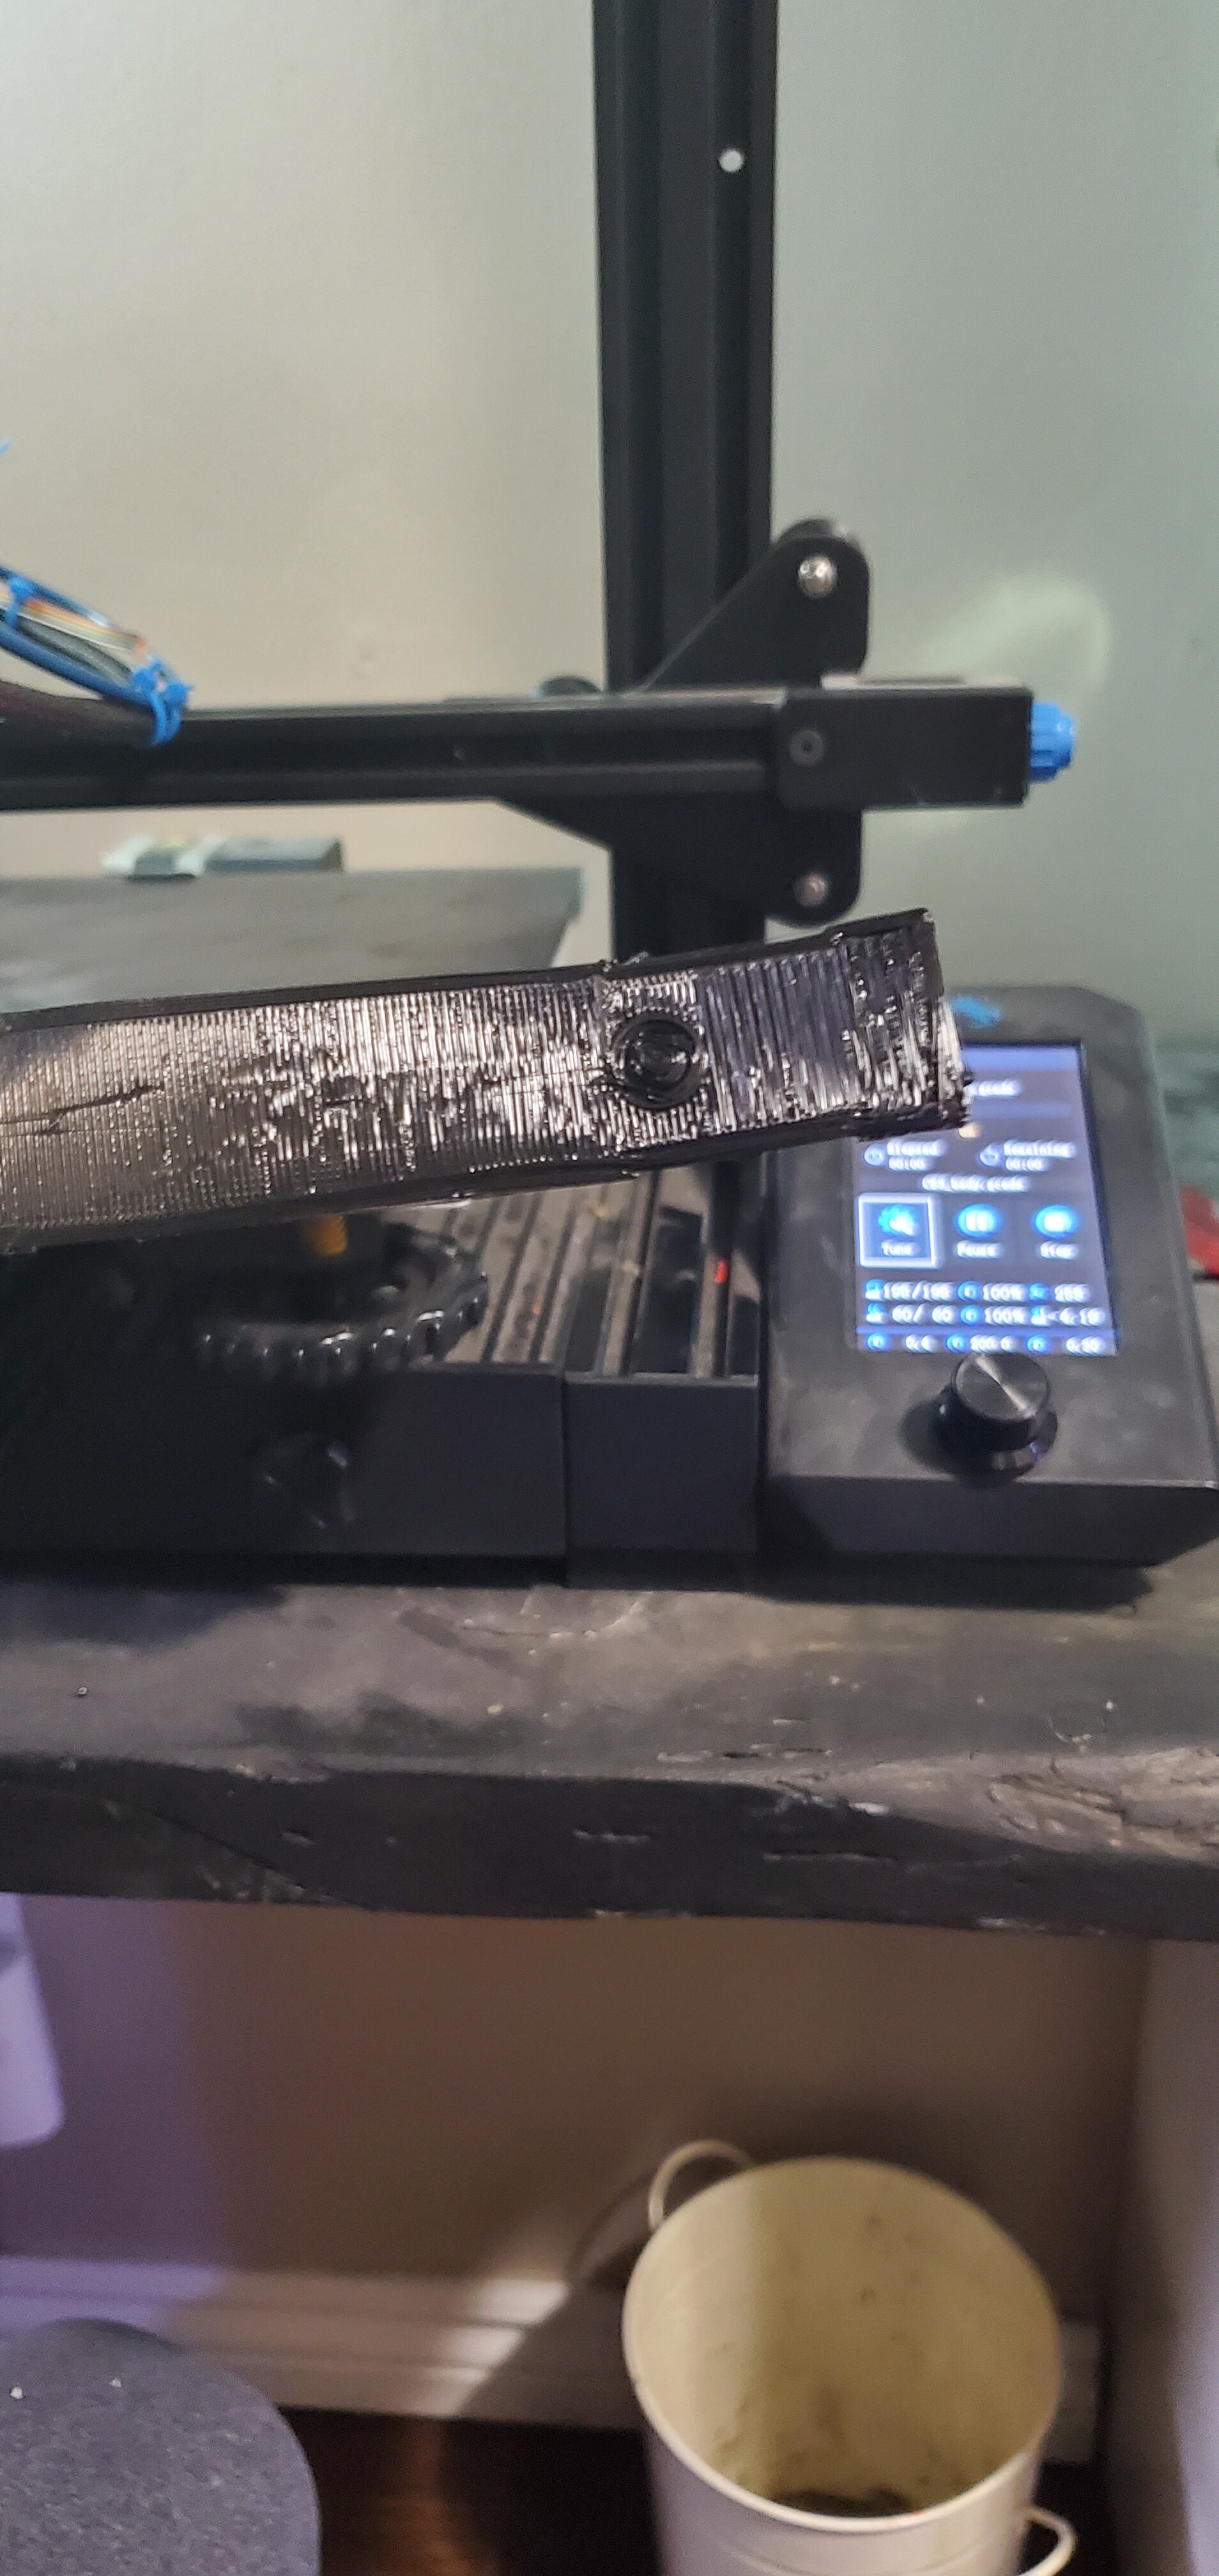
when I was having my issues it was always parts like that in the photo. thick with only a little surface contact area, and closer to the edge of the bed. as the upper layers cool it tends to want to pull away from the bed as they contract is my thinking. A single layer might not expose this problem.
I use a ton of glue. I’ll take a video next time to show what is actually happening is the nozzle at that point seems way high and the PLA is coming out but curling up around the nozzle instead of being applied to the print due to the height.
then it’s not properly level. if you have calipers you can turn the machine off and measure around the bed and some convenient spot on the X. this error is big enough you might be able to see what’s out of wack. Also on my printer if the vertical columns are not parallel and perpendicular to the bed the X-axis can not be leveled to the bed even with BL touch working properly. this happens on mine if I’m not careful working underneath and bump one of the vertical parts. I have to re-square everything then it’s perfect again. The symptoms are just like your first layer… seems to level itself then won’t print the one side
First off, is the gantry frame itself square? Check the top-right corner in your picture. Once that is square, you would next need to check that the X-axis is at 90 degrees to the gantry, as you’ve done above.
If the frame is square but the X-axis isn’t, you’ll need to adjust one end of the X-axis. How you do it depends on whether it’s a single or dual Z-screw design. I don’t own one, but from the photos I can find online, it appears to have only one Z-screw on the left.
Sorry. I never finished my earlier post because our furnace started making an unholy noise. I’ve had to switch it off for the night.
Anyway…If your printer has only 1 Z-axis lead screw (obviously, on one side), then the X-axis will be held level by the wheels on the guide rails. Make sure the wheels on the X-axis on the outside of the gantry (2 on each side) are tight, but still turn freely. Once that’s done, adjust the single wheel on the inside of each side. That one uses an eccentric nut (not to be confused with people who buy 3D printers) which will adjust the grip each side has on the vertical rail. You want it tight enough that it doesn’t allow for wobble but loose enough to allow the wheels to turn with a bit of resistance (ie. you shouldn’t be able to “spin” them but you should be able to turn them with your finger without too much effort.