Latest Newbie Question

Yes, it’s me again.

My hobby for the last 20 odd years has been scratch-building (every part hand made) model racing cars, boats and later (display only) steam locomotives from my youth in Scotland. I decided that I’d like to learn Fusion 360 and get a printer to make some of the more tedious parts for yet another steam locomotive. That agenda has now expanded to the point where I have now printed all but 2 parts!

I’m at the stage where I’m drilling down on the slicing software (Cura mostly but sometimes IdeaMaker and recently Prusa) and looking for settings that will give me the best possible finish regardless of print times. In Cura I’ve switched to their “Super Quality” settings (one of 4 packaged groups) and in that group I’m now experimenting further:

1: reduced layer height to .1 mm
2: reduced line width to .3 from .4 mm
3: reduced print speed to 50 mm/sec from default 100
4: introduced “ironing” to top layers

Must say I’m really pleased with how much nicer parts are coming out so I’m keen to explore the settings even more. Unfortunately the number of variables is mind boggling.

Given that I don’t care how much it slows things down and I should also mention that strength of the parts is not a factor are there selections/areas in the settings that I should concentrate on with the goal of producing the best finish for my parts? I sure hope that’s a valid question to ask … LOL.

Thanks in advance.

Frank

Frank have you tried a finer nozzle? A 0.25 or similar? I don’t have much experience with that end rather looking at 0.8 personally. Fine nozzles allow accurate finer layer heights.

I usually suggest spending a bit extra on an real E3D rather than a clone I have found they just print better.

1 Like

Good suggestion on the smaller nozzle and I just might try that. I guess I don’t know anything about the origins of my machine and I bought it on the strength of a comparative review of FDM printers. Don’t know what a “real E3D” is (guessing Ender 3D) but I’m not disappointed I bought this one … yet.

E3D is the company is one of the original hot end manufacturers. They are ‘cloned’ often and most of the time the clones are very cheap and have corners cut to keep the price low. I personally find genuine not clones print better fewer blobs and such. I believe the nozzles have a rounder aperture and the point where the taper in the nozzle happens is actually a taper and not a step.

They are available in Canada most stores have clones and originals. the originals are 2x to 5 x the price but given clones are 1-2$ it still isn’t a lot usually.

If this will fit the ender (I think it will but not certain)

It might be what you are looking for. It is quite pricey for a nozzle but if it does what you want not that expensive.

If you do go with a super fine nozzle keep in mind it will be prone to jams. You might want to buy a premium filament rather than bargain. The higher end filaments seem to me to be more consistent and cleaner. A filament filter maybe helpful.

There are lots, i printed this one and use it on mine, but any will work.

https://www.thingiverse.com/thing:190118

1 Like

Oh boy, what a great reply. Lots for me to digest but I like what you’re telling me. Now your original reply to my question is making more sense (to me) … I thought you were saying my BiQu was a clone of an E3D and I’d bought the wrong machine.

I’ve looked at that nozzle on 3DPC’s site but there are no dimensions and only Prusa machines listed as candidates so far. I think I’m too much of a beginner to go down this road at this point as I’m not keen to deal with jams … and now a dust filter/cover? Never knew that was a thing either.

I really appreciate the time you took to tell me all this. It’s amazing how much we newbies don’t know!

I have a couple of spare nozzles that came with my printer and I also have a machine lathe … hmmm. So, you’re saying the shape of the nozzle tip is actually significant … better to be tapered right off than flat? Makes sense. Now where did I put those tips?

1 Like

@Albergman please don’t make it your last newbie question, We like the new ones and the old ones too… Keeps us all sharp. :slight_smile:

we are in process of updating the website and creating “collections” of parts that will work with your specific machine. The only downside to the BiQu is that they take nozzles that are specific to that machine. If they do not make a .2 nozzle for it then we cannot get it. If you do change the hotend out for something else( E3D or micro swiss) then you can get a more “universal” nozzle option.

1 Like

INVESTIGATING-3D-printer-nozzle-WEAR-12-30-screenshot

The interior shape is often poor on the clones. I can say from experience the ones the E3d company make print cleaner. If it is evident at a 0.4 nozzle it would (I think) more so at smaller diameters. Smaller diameters are prone to clogging so dust filter should help a bit with just general dust. I notice when I print white I get flecks of black that is dust on the filament and gets melted in.

Some people (I have played with this) use sharpie to tint filament. That is when I realized dust was the flecks. Light colours I always use a filter now. Most prints to be honest, sometimes I forget.

There are a lot of variables, one at a time simplest to complex. It becomes less daunting that way. Also when you make a change you understand what it does. Changing a bunch of things at once you never really know.

I didn’t realize Biqu had a specific nozzle. Sorry

1 Like

Yes, that’s very revealing how mis-shaped the clone is. In fact, I can’t imagine how those sides are so crooked. You would think that hole had to be drilled out … but maybe it was cast. If anything though, the clone actually looks like it has a finer tip.

Interesting what you are saying about dust playing a part. Didn’t know that was important and I just noticed how much dust/particles has been trapped around the metal feed rollers (wrong terminology no doubt) on mine. Maybe I should give it a cleaning.

Agree with your advice on changing one thing at a time for those reasons.

Thanks again for being so helpful.

Dust will clog a smaller nozzle where a big nozzle it passes clean through. I have used an acupuncture needle (sold as nozzle cleaning tools) to ‘feel’ the inside of a clone you can feel it snag on ridges. I have had 2 jobs much of my life (no longer) a photo tech and a boat builder. The clone creates turbulence for lack of a better word. When it extrudes the extrusion flow has ripples and corkscrews some. The better nozzles it is straight as an arrow. I found the poor quality nozzles created more stringing and blobs on the print surface.

The rollers that pinch the filament and draw it through the extruder are ‘drive gear’ There are systems with a single drive gear and idler or a bearing, and dual drive gears.

Well thanks once again for all this interesting background info.

Might be best to take it offline but I’d be interested to hear a bit about your boat building experiences as I’ve been sailing all my life and my last boat was an Alberg 37 sloop … hence my username.

As an example of how I’ve been able to improve my prints here’s a pair of prints of the driver wheels for this locomotive I’m building. They’re only an inch and a half diameter. First print and latest.

Main Driver 20210608_094441 b

I don’t know if I can expect to improve on this but I’d like to try.

1 Like

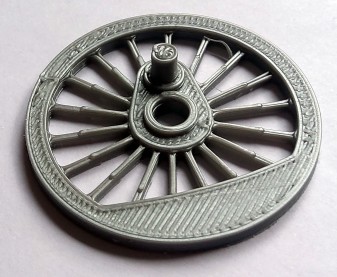
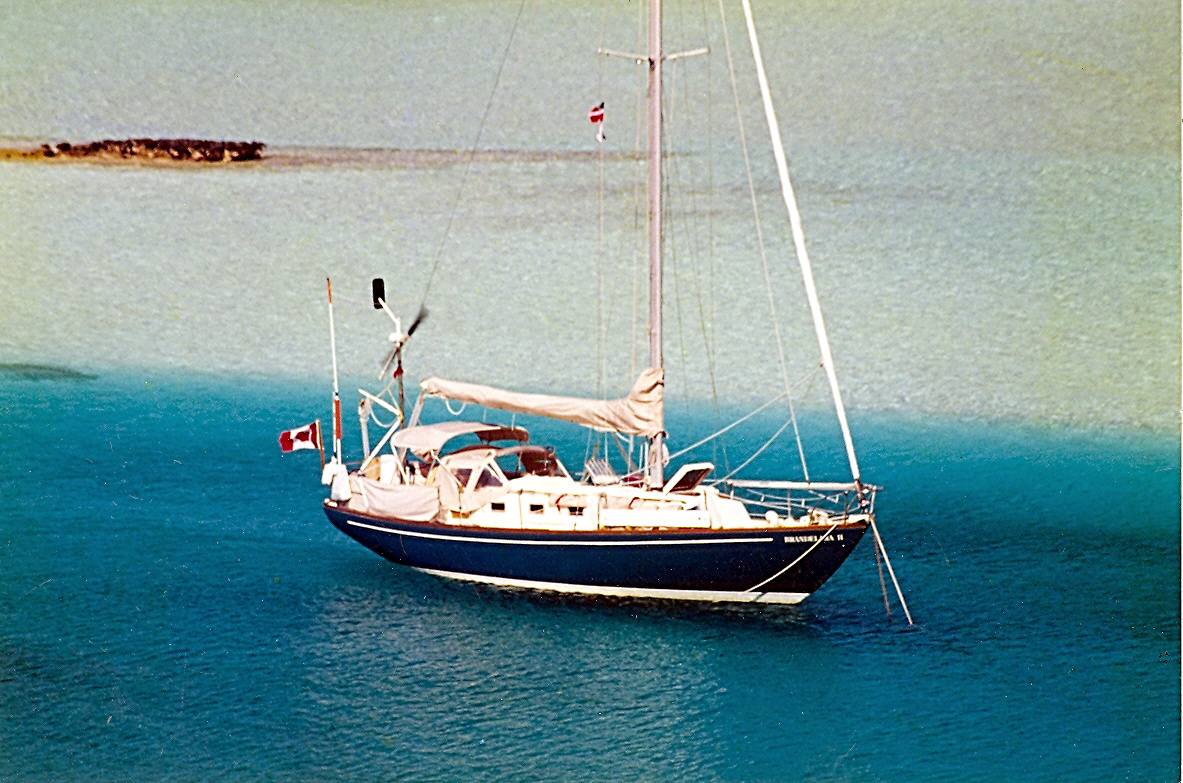
That is a beautiful print and quite an improvement.

I have a BFA so building things is part of the territory. I am something of a romantic so that moment when you are building something and it starts to have its own ‘life’ Houses take quite a while to take on a personality, too many 90º. boats do that before they are build they ‘tell’ you their names.

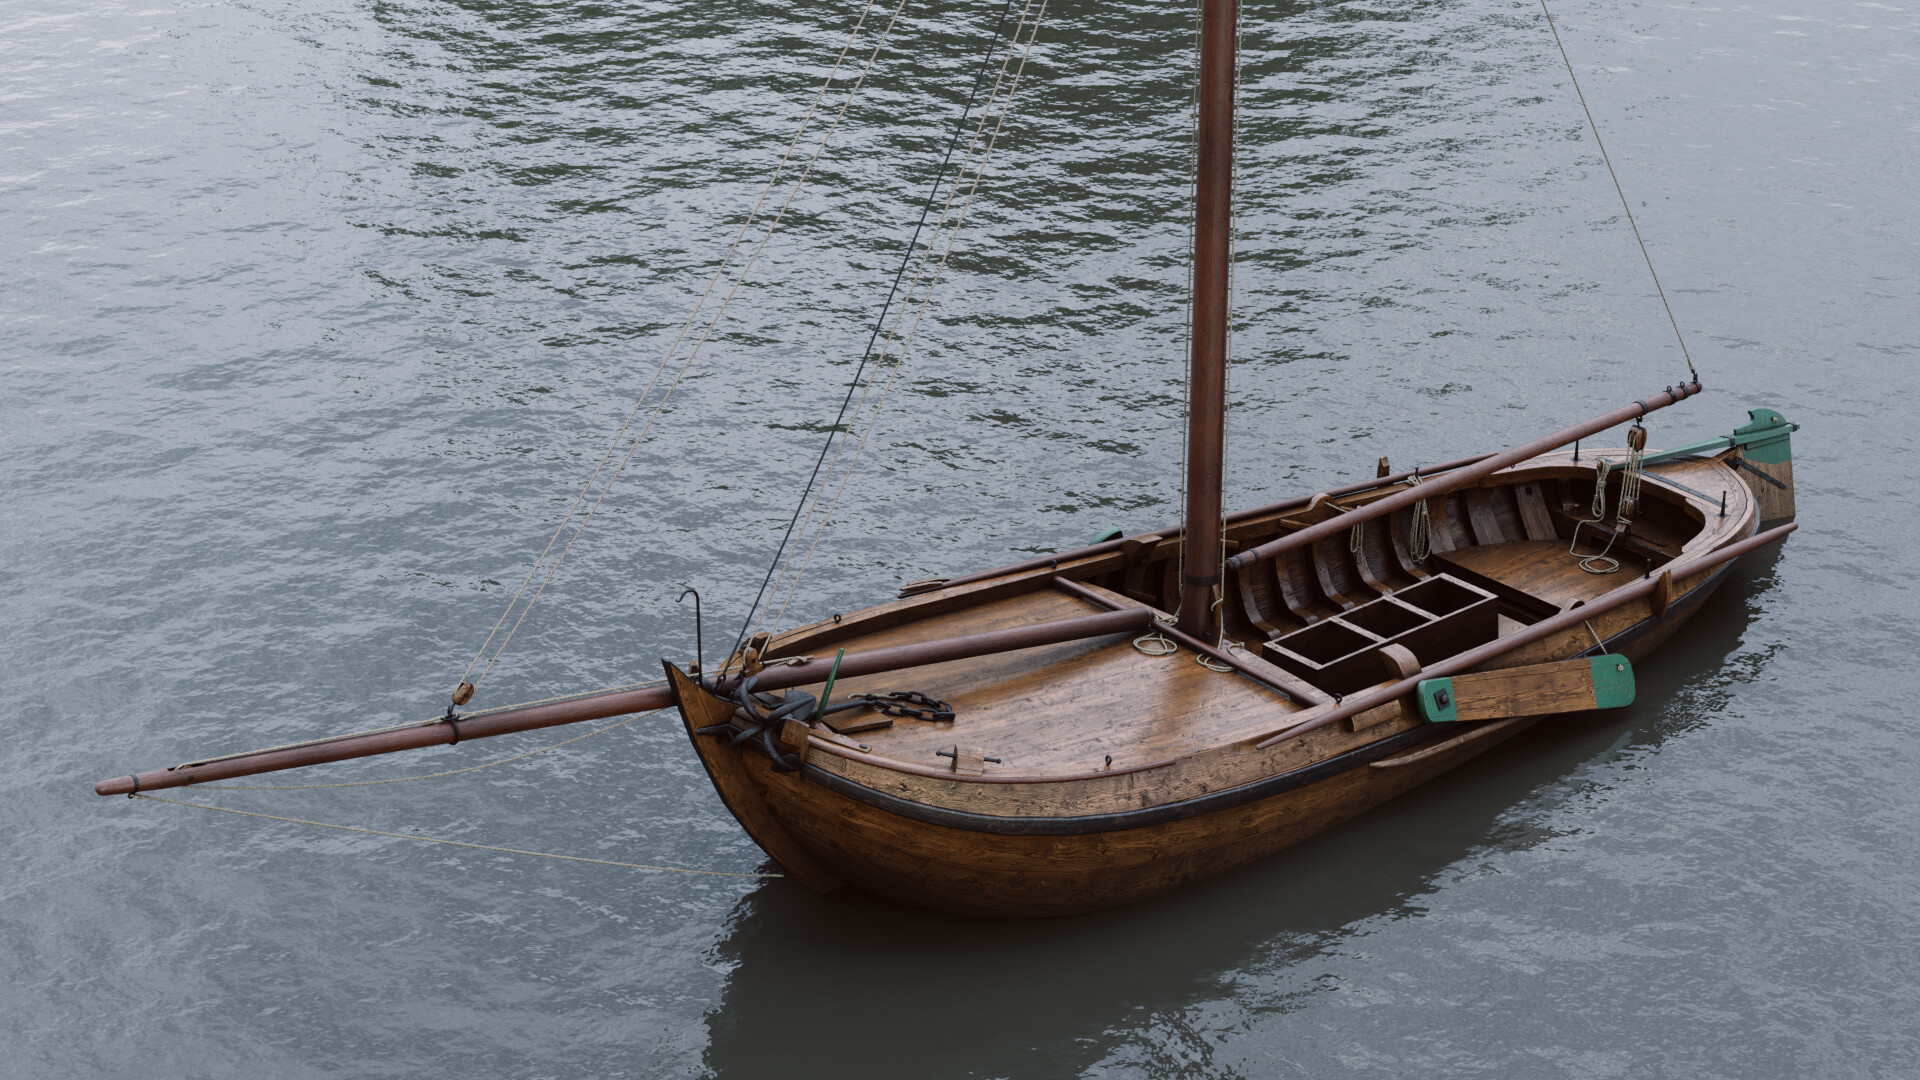
My first boat was a 17 foot botter. similar to this one.

I put a balanced Lug rig on it. I had been sailing most of my life before building her, Ravin. I then built a phillip bolger windsprint same sail…

windsprint8

I raced it in match races for a handful of years. I built a volkskayak in between sailing these two.

dj01build3

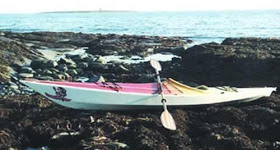
I ended up making some changes to the design and during a meet up the VK designer Gerry and I met and ended up talking design for hours. At that time I was laid off every summer and ended up doing workshops with Gerry for ten or twelve years. I had fingers on many hundreds of boats. The insurance killed us, It went from a company manufacturing to a school and they added a pair of decimal places and that was that. Sad it is a fantastic design.

The whole time I raced on light schooners and full sized schooners. I love the light schooners 23 foot skiff hull. We had a rule they couldn’t cost more that $ 1000 all in. So tarp sails and line for canadian tire no high tech expensive stuff allowed. Protests were solved by who could throw who in the water. I am 6.4 265 lbs, I never got protested. Nobody took it seriously. The funny part is an ex olympic sail racer, professional delivery captain, tactician for americas cup and a invitational match racing skip. So serious skill in silly schooners. Random photo from online but that is actually us racing. The Spirit of Mahone. I built a couple of these guys too. there are a few others one has us limping back after breaking the foresle jaws but the caption says we scandalized it for a fast reef. Reef during a race NEVER! LOL

unnamed

Life got in the way there skips (all older people) started to age and that sorta fizzled out. Very sad.

After this I build a Proa super fast and did not suffer fools. Every mistake was punished with watery humiliation. She would pull 18 knots stable and if you could fly the ama 25 give or take (you can’t look at anything doing that 100% focus or you are wet and hurting.

I started playing with big kites at this point. on water than on land. For a while I held the 5 faster buggy land speed in Canada. Just checked Still 5th almost 79 km/h. (78.8) I did that for 8 years I guess. Then I broke my neck white water rafting I stopped all the water things in its tracks. I am super lucky I have some lingering nerve damage and a reduced rang of motion in one shoulder.

Haha life story. I am thinking of an ultra light catamaran with a very modest sail this summer perhaps. I have not finished the design yet.

Alex

I built a 19 foot proa after that. FAST FAST FAST.

1 Like

Wow thats quite a bit youve got under your belt there :slight_smile:

I now see why your username is what it is XD

1 Like

What sort of changes have you done to get that finish? Ironing?

1 Like

Hi Doc

Most of my changes I documented in the original post above. Basically, just using the “Super Quality” grouping in CURA. Within that grouping I’ve been choosing settings that to me would indicate better/finer quality … but I’m just guessing. And, yes, ironing has been selected too but I haven’t played with many of that command’s settings other than “Iron only highest layer”.

I know it only makes sense to try one thing at a time but with almost 500 variables you really have to be adventurous.

Here’s a section of the loco boiler that I printed with the above settings and you can see how fine the grooves are.

MWSnap198 2021-05-09, 17_03_45

One coating of the surfacing compound I mentioned above filled them to a mirror finish. Sure it took a longer time to print but I just left it on overnight.

Hope this is useful.

PS … I’m supposed to be the one asking questions LOL.

Frank

1 Like

Fascinating stuff Alex. Always wanted to try kite surfing as I was seriously into windsurfing for years with my 2 sons and made many trips to Hatteras. Anyway, I don’t want to get this too far off topic. Thanks for the info though.

Just one … this was my home for four years after I retired.

2 Likes

Lol my mistake. Sorry i had read this post earlier, then came back to the comparison pictures.

The only thing that could help i think would be arc welding. I believe it to help smooth round edges, though I haven’t used it yet. Its a feature in marlin (the firmware on most printers) that needs to be activated when you compile new firmware. So it may be a bit much to attempt at this time. There are lots of online reasources to follow to buuld your own firmware. All being said i havent made use of it yet, but will likley give it a go this weekend.

Here is a facebook post from my 3d printers group.

“Little experiment I did last night. This is on my Gantry-S. Circle on left has 256 segments. This is printed through Octoprint. Same circle on right was processed through ARC Welder then printed through Octoprint. Wow, this really helps. You have to enable arc support in Marlin to use this. Thanks to Jeff Dickison for the tip.”

I did not do this test, but the guy who did is quite reputable, so i dont think the left object was an under/over extrusion. Just a simple cylinder with many many faces, and used the arc welder feature to smooth it out.

1 Like

Thanks … that’s an impressive improvement. I don’t know what marlin is at this time but maybe I’ll look into it. Meanwhile I’ll keep trying out new (to me) features in my slicers.

1 Like

I am a bit out of my element with the detail quest, mine is one of speed, likely no surprise there.

That said Marlin is the name given to one (most common) firmware (os equilavelant of sorts) in 3d printers. Commands can be coded directly into the version saved on the printer. Can be issued to the printer with something like Pronterface (print run) or can be added as commands when a file is sliced. In Prusa Slicer that is under the Printer settings custom code setting.

I printed some very low temp material and Prusa (my printer) has a safety code written in it will not attempt to extrude below 180 so to extrude at 100 I had to use a code in the slicer to over ride that. This is the perfect place as I want that safety feature to be there. Adding it when I slice means I will only use it with that material.

If I was to change the extruder to a different one I would need to calibrate how much plastic was being pushed out per turn. This setting since it is a hard ware change would be better to stay on the printer, Make sense? How to get that calibration might be best done with pronterface where a extrude a given amount could be given with out it actually printing a file.

https://www.pronterface.com

OK thanks, I think … LOL. You guys are back to speaking Chinese to me. It’s OK though. I’ll tuck this away and maybe in a while I’ll come back to it and it’ll make perfect sense. I believe that Jason talked about attaching an external (display) apparatus to the BiQu that ran Marlin. I think for now I’m sticking with the on board menu.