very nice job, looks like you have all possible angles looked it
2 Likes
My thoughts, for what they are worth:
-Any big particle board cabinet like that is prone to torquing on the Z axis. I can envision wobble when your plate moves. If so, and if it affects print quality, add structural support mimicking a hurricane bar with one or more wide boards facing you at the front of the cabinet.
-heat build-up could be addressed with an arduino/DHT22/fan set up. This could be coupled to a relay powering your printer, and can be programmed to your phone an alarm and/or shut down when when heat reaches the glass temp of your filament and should also ensure you don’t start a fire.
Fun thing about the DHT22 is it also measures humidity so you could add another relay hooked up to a dehydrator (vented) to keep your plastic dry in real time.
2 Likes
Upon reflection, you could bolt the cabinet to the wall to minimize cabinet movement, and if the printer is used regularly, a dehydrator will be unnecessary if the cabinet is vented. - the heated bed and electronic waste heat should accomish the same goal. The trick will to regulate it, especially if you store filament at the top.
1 Like
Thanks for the thoughts Ted! Much appreciated!
With regards to the torque on the Z, this cabinet has 1 fixed shelf that the printer sits on (ie bolted into the walls) along with the top and bottom panels that are also bolted. There are also 2 additional shelves that are sitting on pins but are a snug fit against the walls. Would you expect a lot of torque in that case? I guess I can do some testing with some temporary bracing against the walls vs none to see if it makes any difference.
I was hoping to figure out a setup similar to what you described but adjustable based on the filament I’m using (eg fairly cool for PLA but hotter for other filaments). I had originally thought I’d use the enclosure plugin to Octorprint to do that with a DHT22 connected to my Pi but that plugin is deprecated and there isn’t a new version yet so I’m not sure I’ll go that route. Still will have to give it some thought. I had also given some thought to perhaps sealing off the shelf at the top where I’m storing filaments and adding a small dehydrator up there but living in Alberta humidity is rarely a problem (especially in my basement) but it’s something I’m still considering. Might set up something with 2 DHT22’s - one for the print chamber and one for the storage box. Not sure… haven’t thought that far ahead yet LOL
1 Like
If you are a pla guy, humidity might not be a problem at all, but heat will rise in that cabinet, sealed shelf or not.
You will probably want to poke a hole or two up there at minimum, if you are committed to storage up top.
I have a 300watt dehydrator in a kitchen cabinet, with unsealed doors and Temps push 45c. Anything over 50 and you will start ruining your pla spools.
Your nozzle and bed will push more BTUs than that.
It’s a fun project, and hope you dial it all in!
2 Likes
These are all good things to note. I don’t HAVE to use the upper shelf as filament storage but that’s where I’ll be feeding the filament to the printer so there’ll be at least one up there. I guess we’ll see once I get something figured out for temperature regulation if I need to make any adjustments up there too.
1 Like
My unit is different, because it isn’t enclosed, but I put the dehydrator in the very bottom to draw outside air, then the storage, then a super heavy epoxy countertop.
I have a spool holder in the chamber with a tube that runs through a hole in the epoxy to the printer. The whole thing is on TPU locking wheels, so very mobile and very stable.
The reason I did it this was Ender 6, mostly enclosed.
I use a 3mil contractor bag to seal the top if the print demands and so far, so good.
1 Like
Update time!
Still puttering around with my setup but I figure I’d share where I am so far:
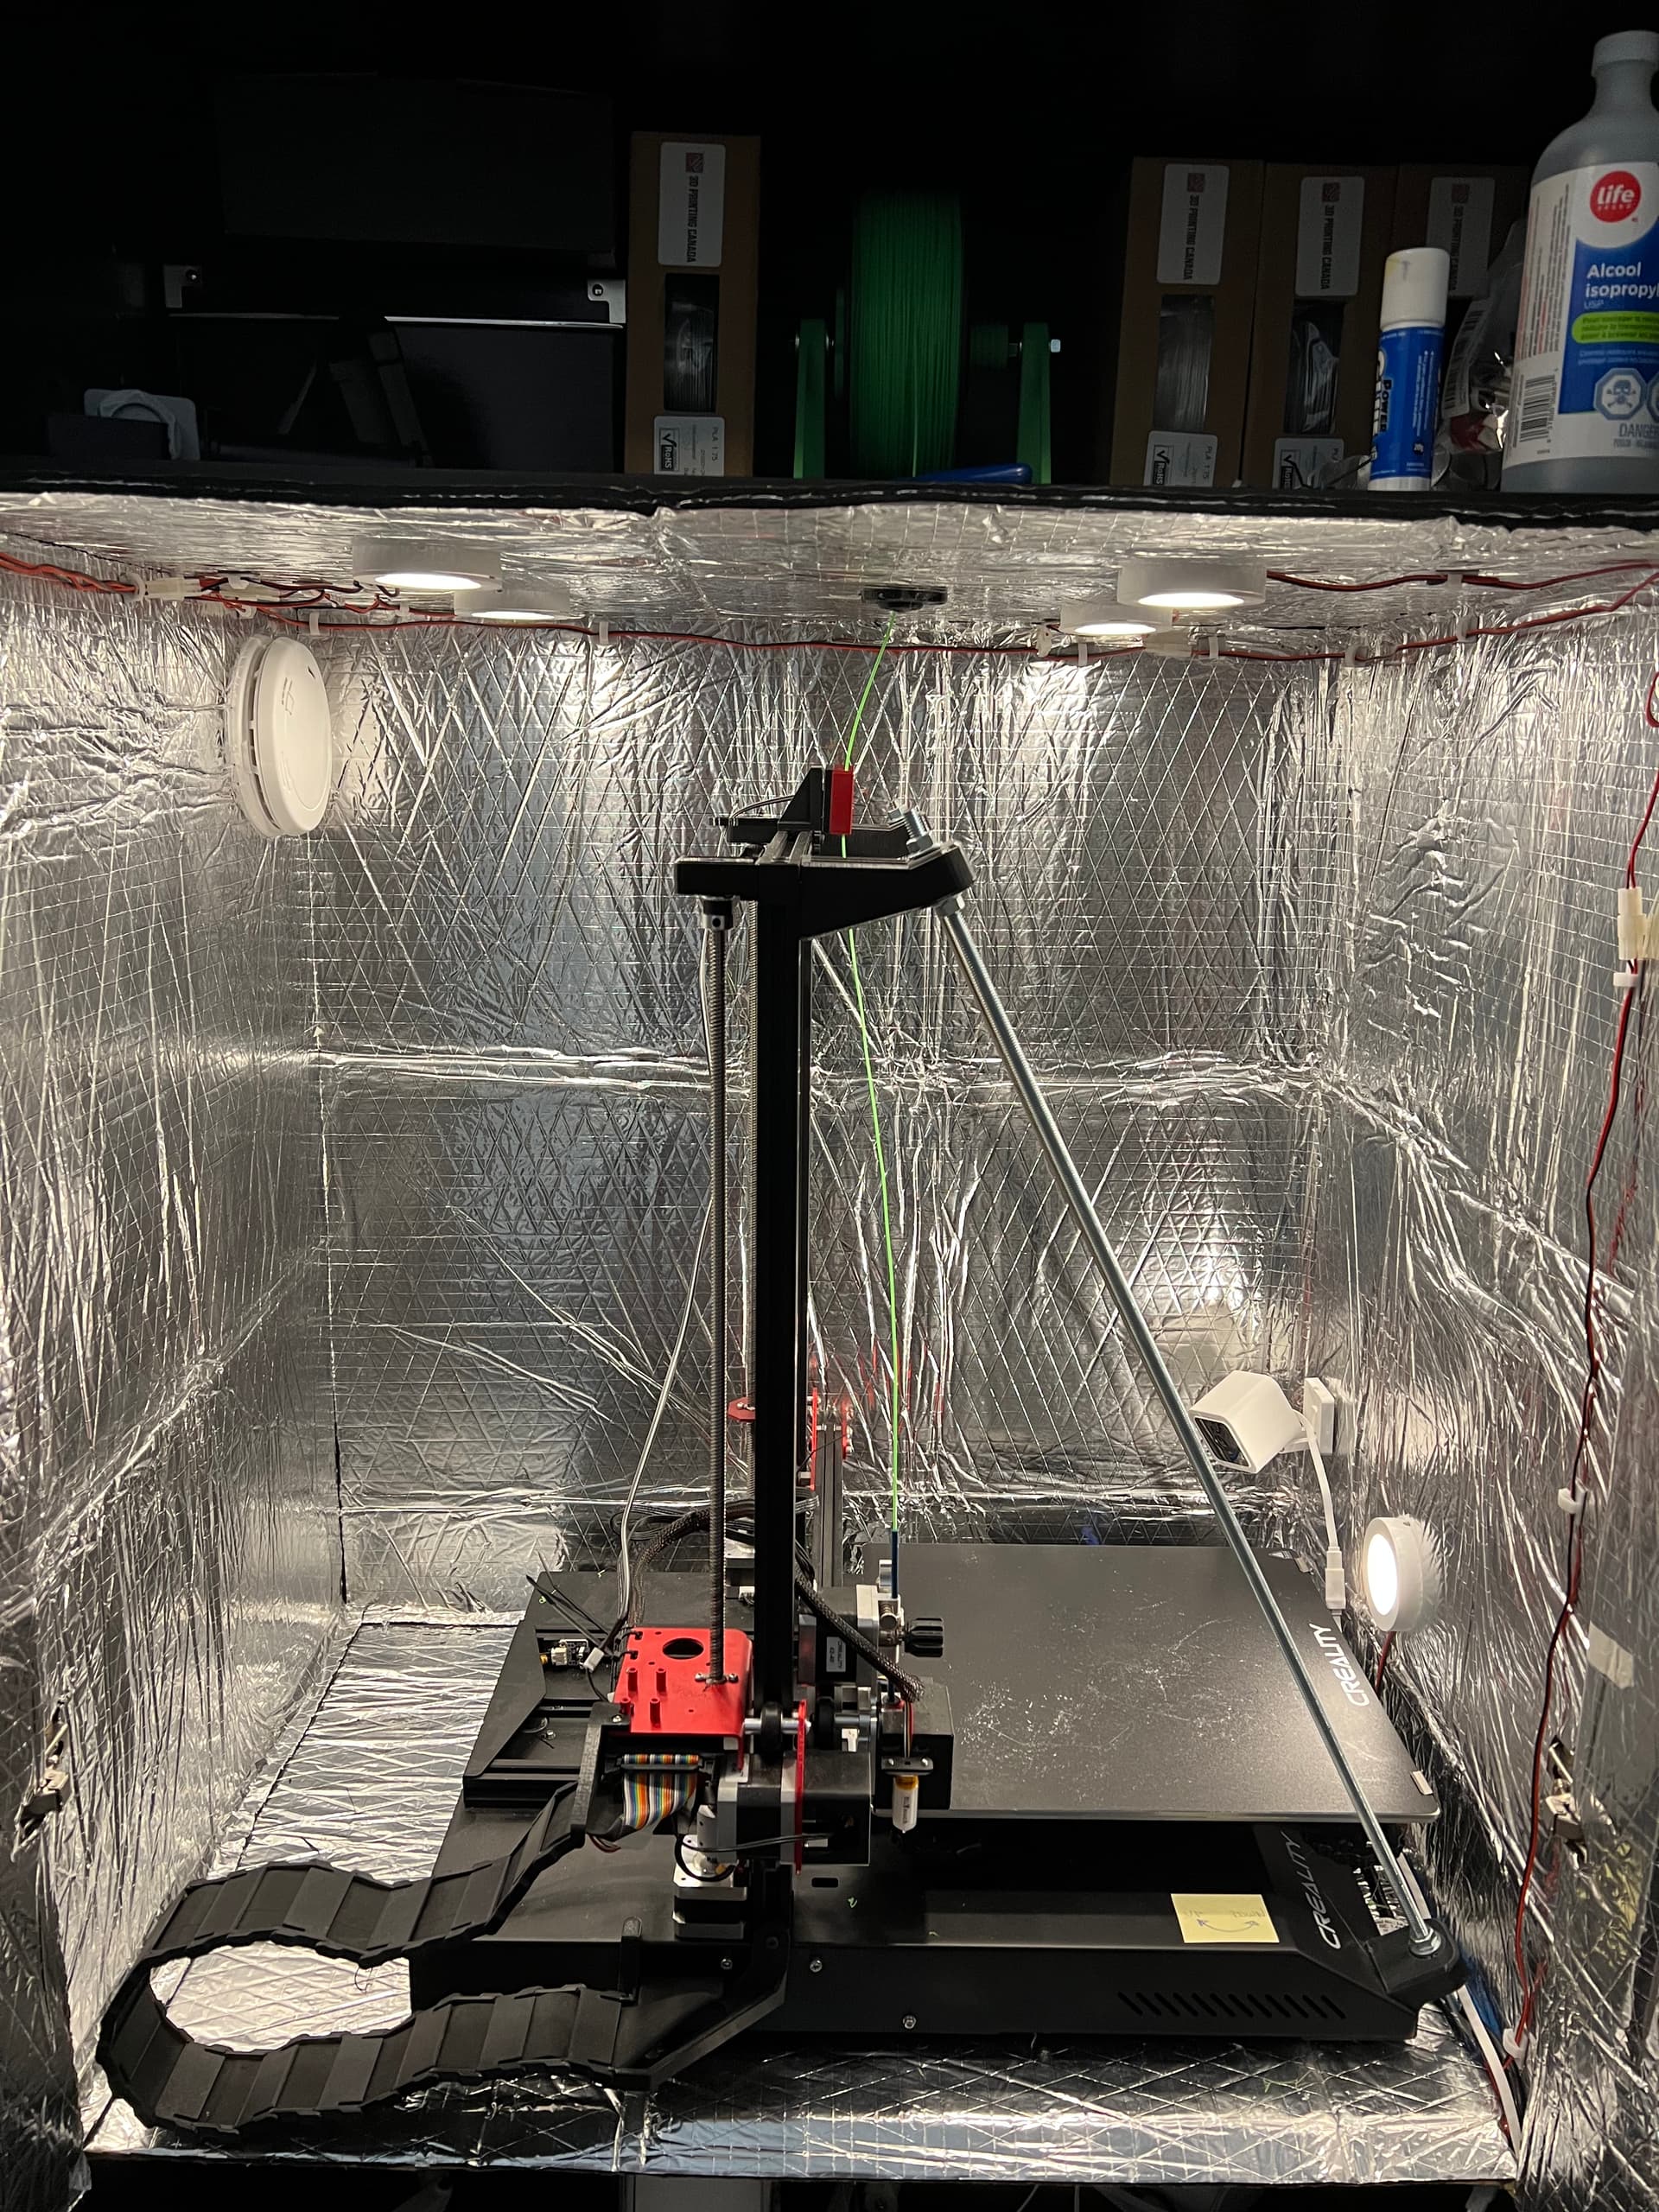
This is what it’s looking like now. I gave up on the LED strips in favor of some LED puck lights that I have got plugged into my smart power bar. I can turn the lights on and off via OctoPrint.
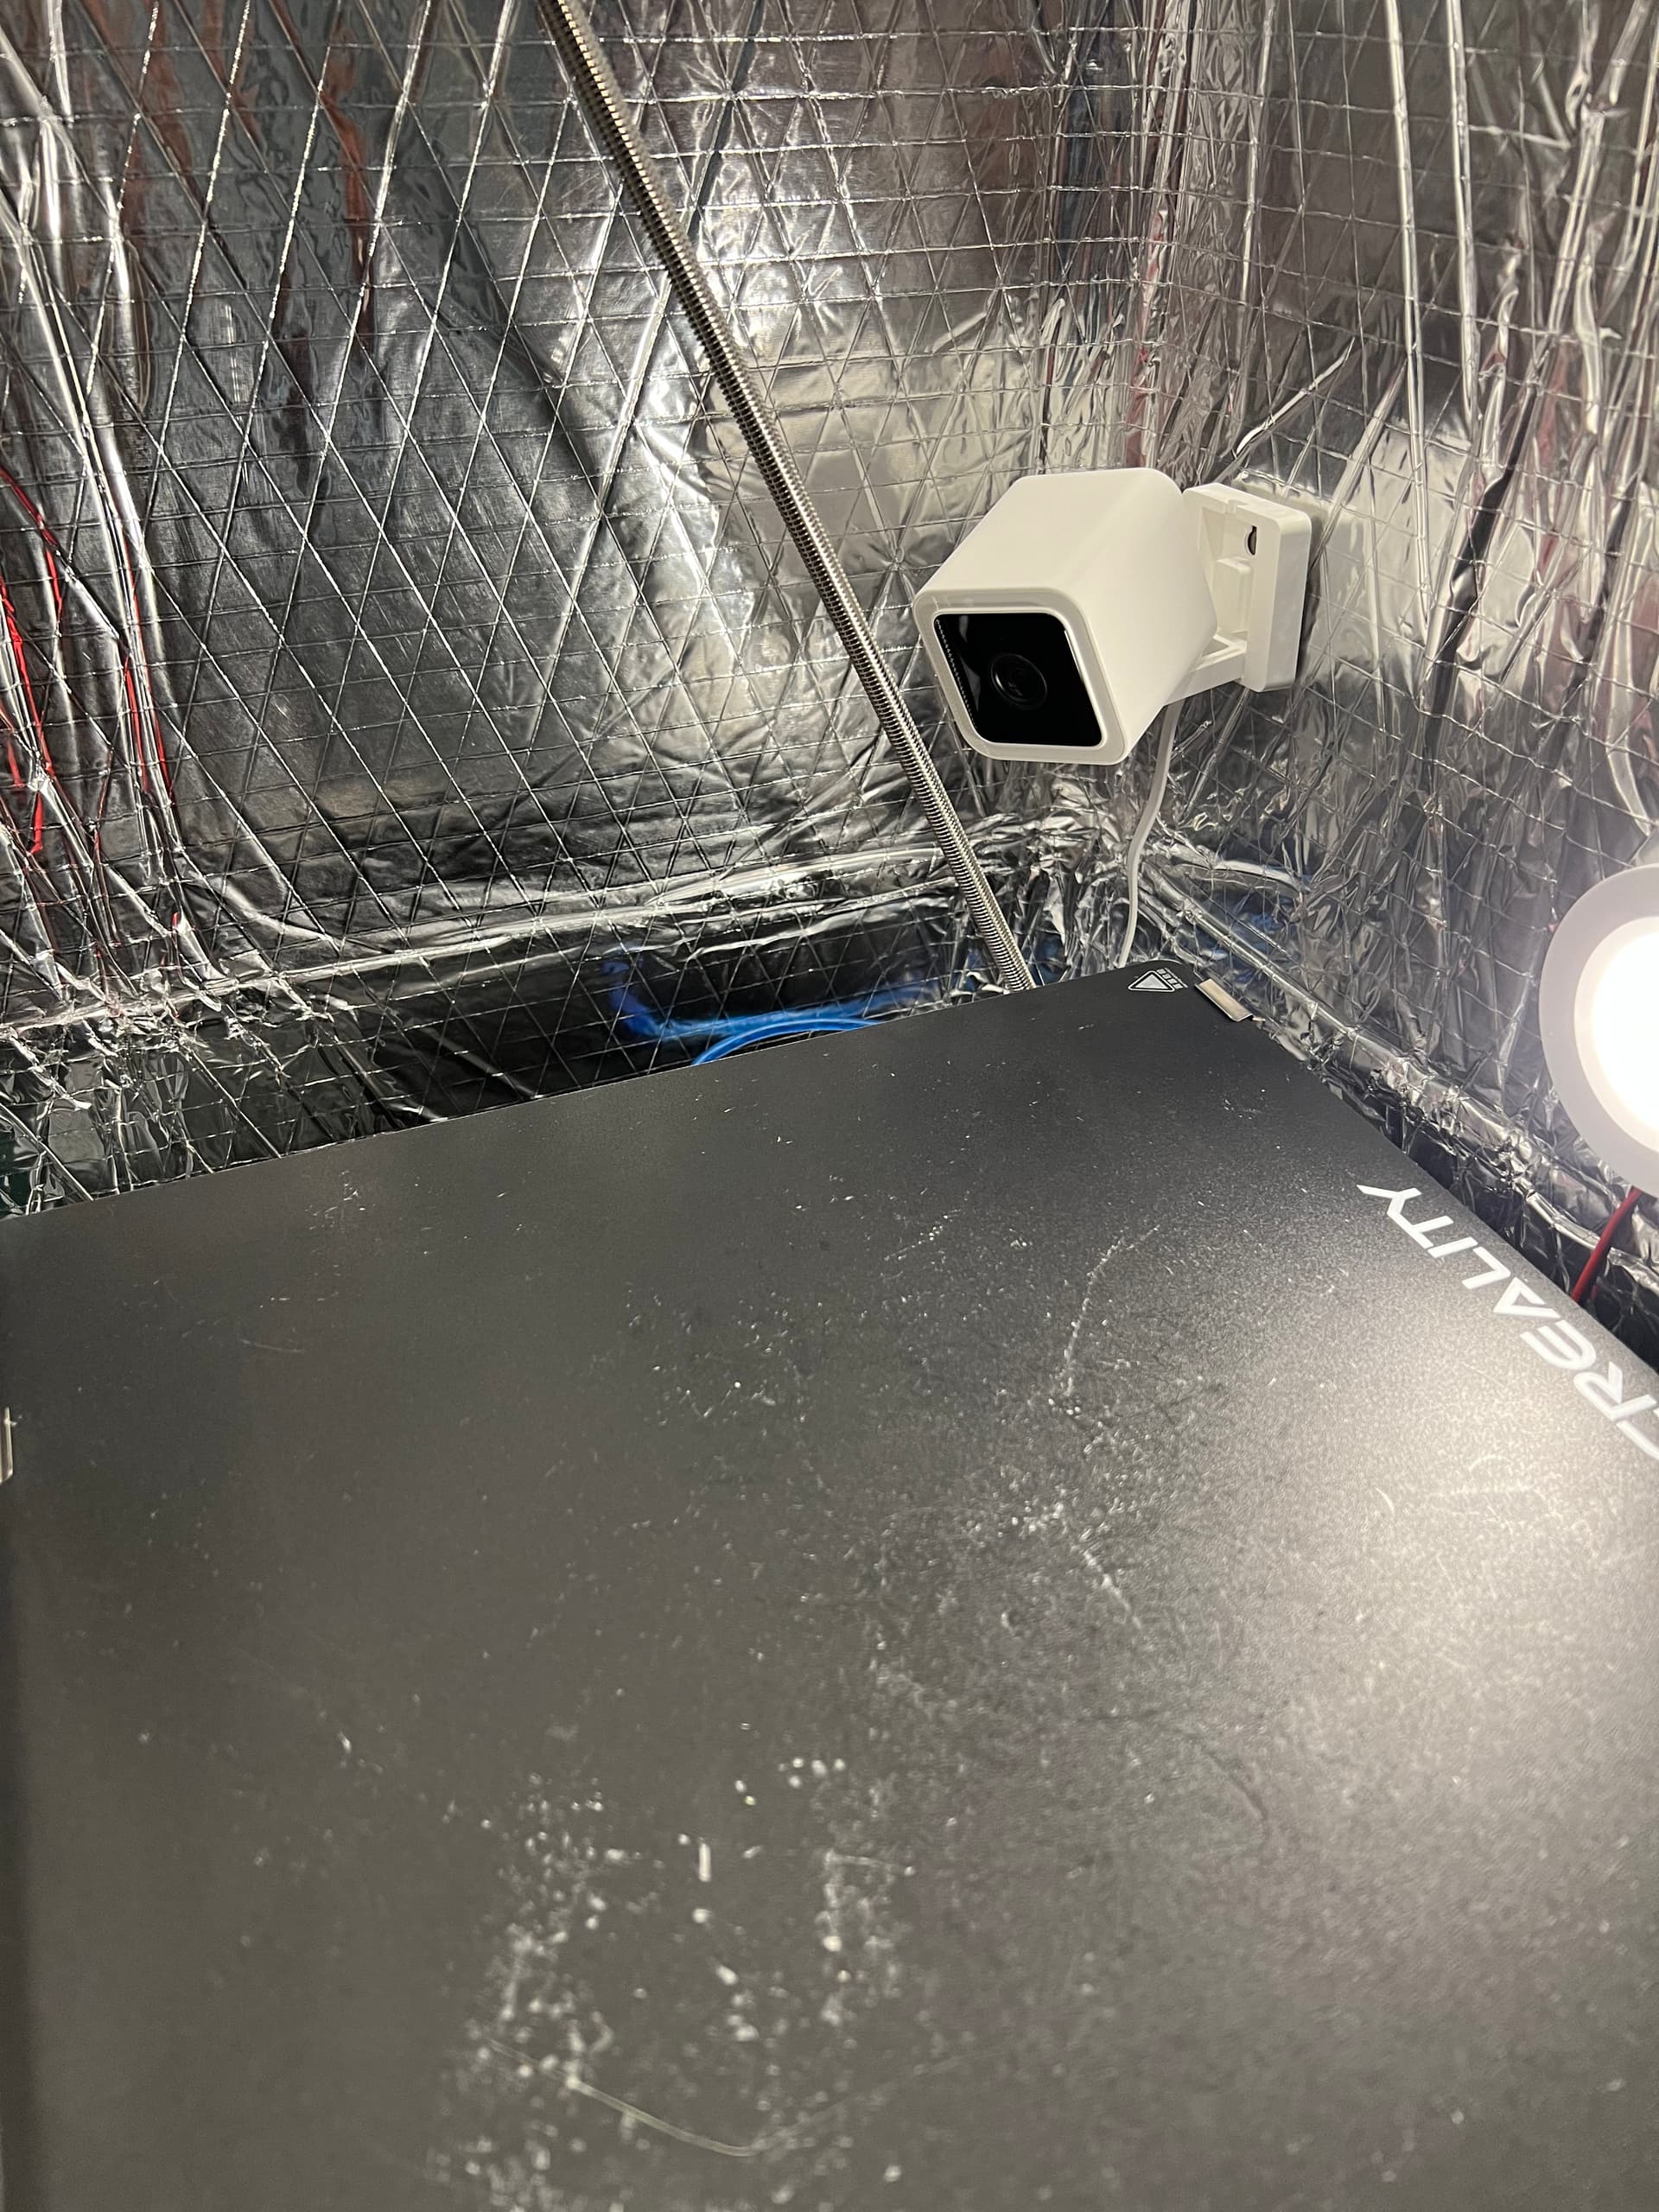
I’ve added a Wyze V3 camera which not only lets me monitor my prints from anywhere but it also integrates with IFTTT. I’ve also added a smoke detector in the enclosure and if it goes off the camera can detect the standard beeping pattern from the detector and recognize it as a smoke alarm. I’ve got it set to kill the power to the printer if it detects an alarm (granted this is dependent on my internet access being functional to work but we have pretty stable service so I’m not terribly worried about that).
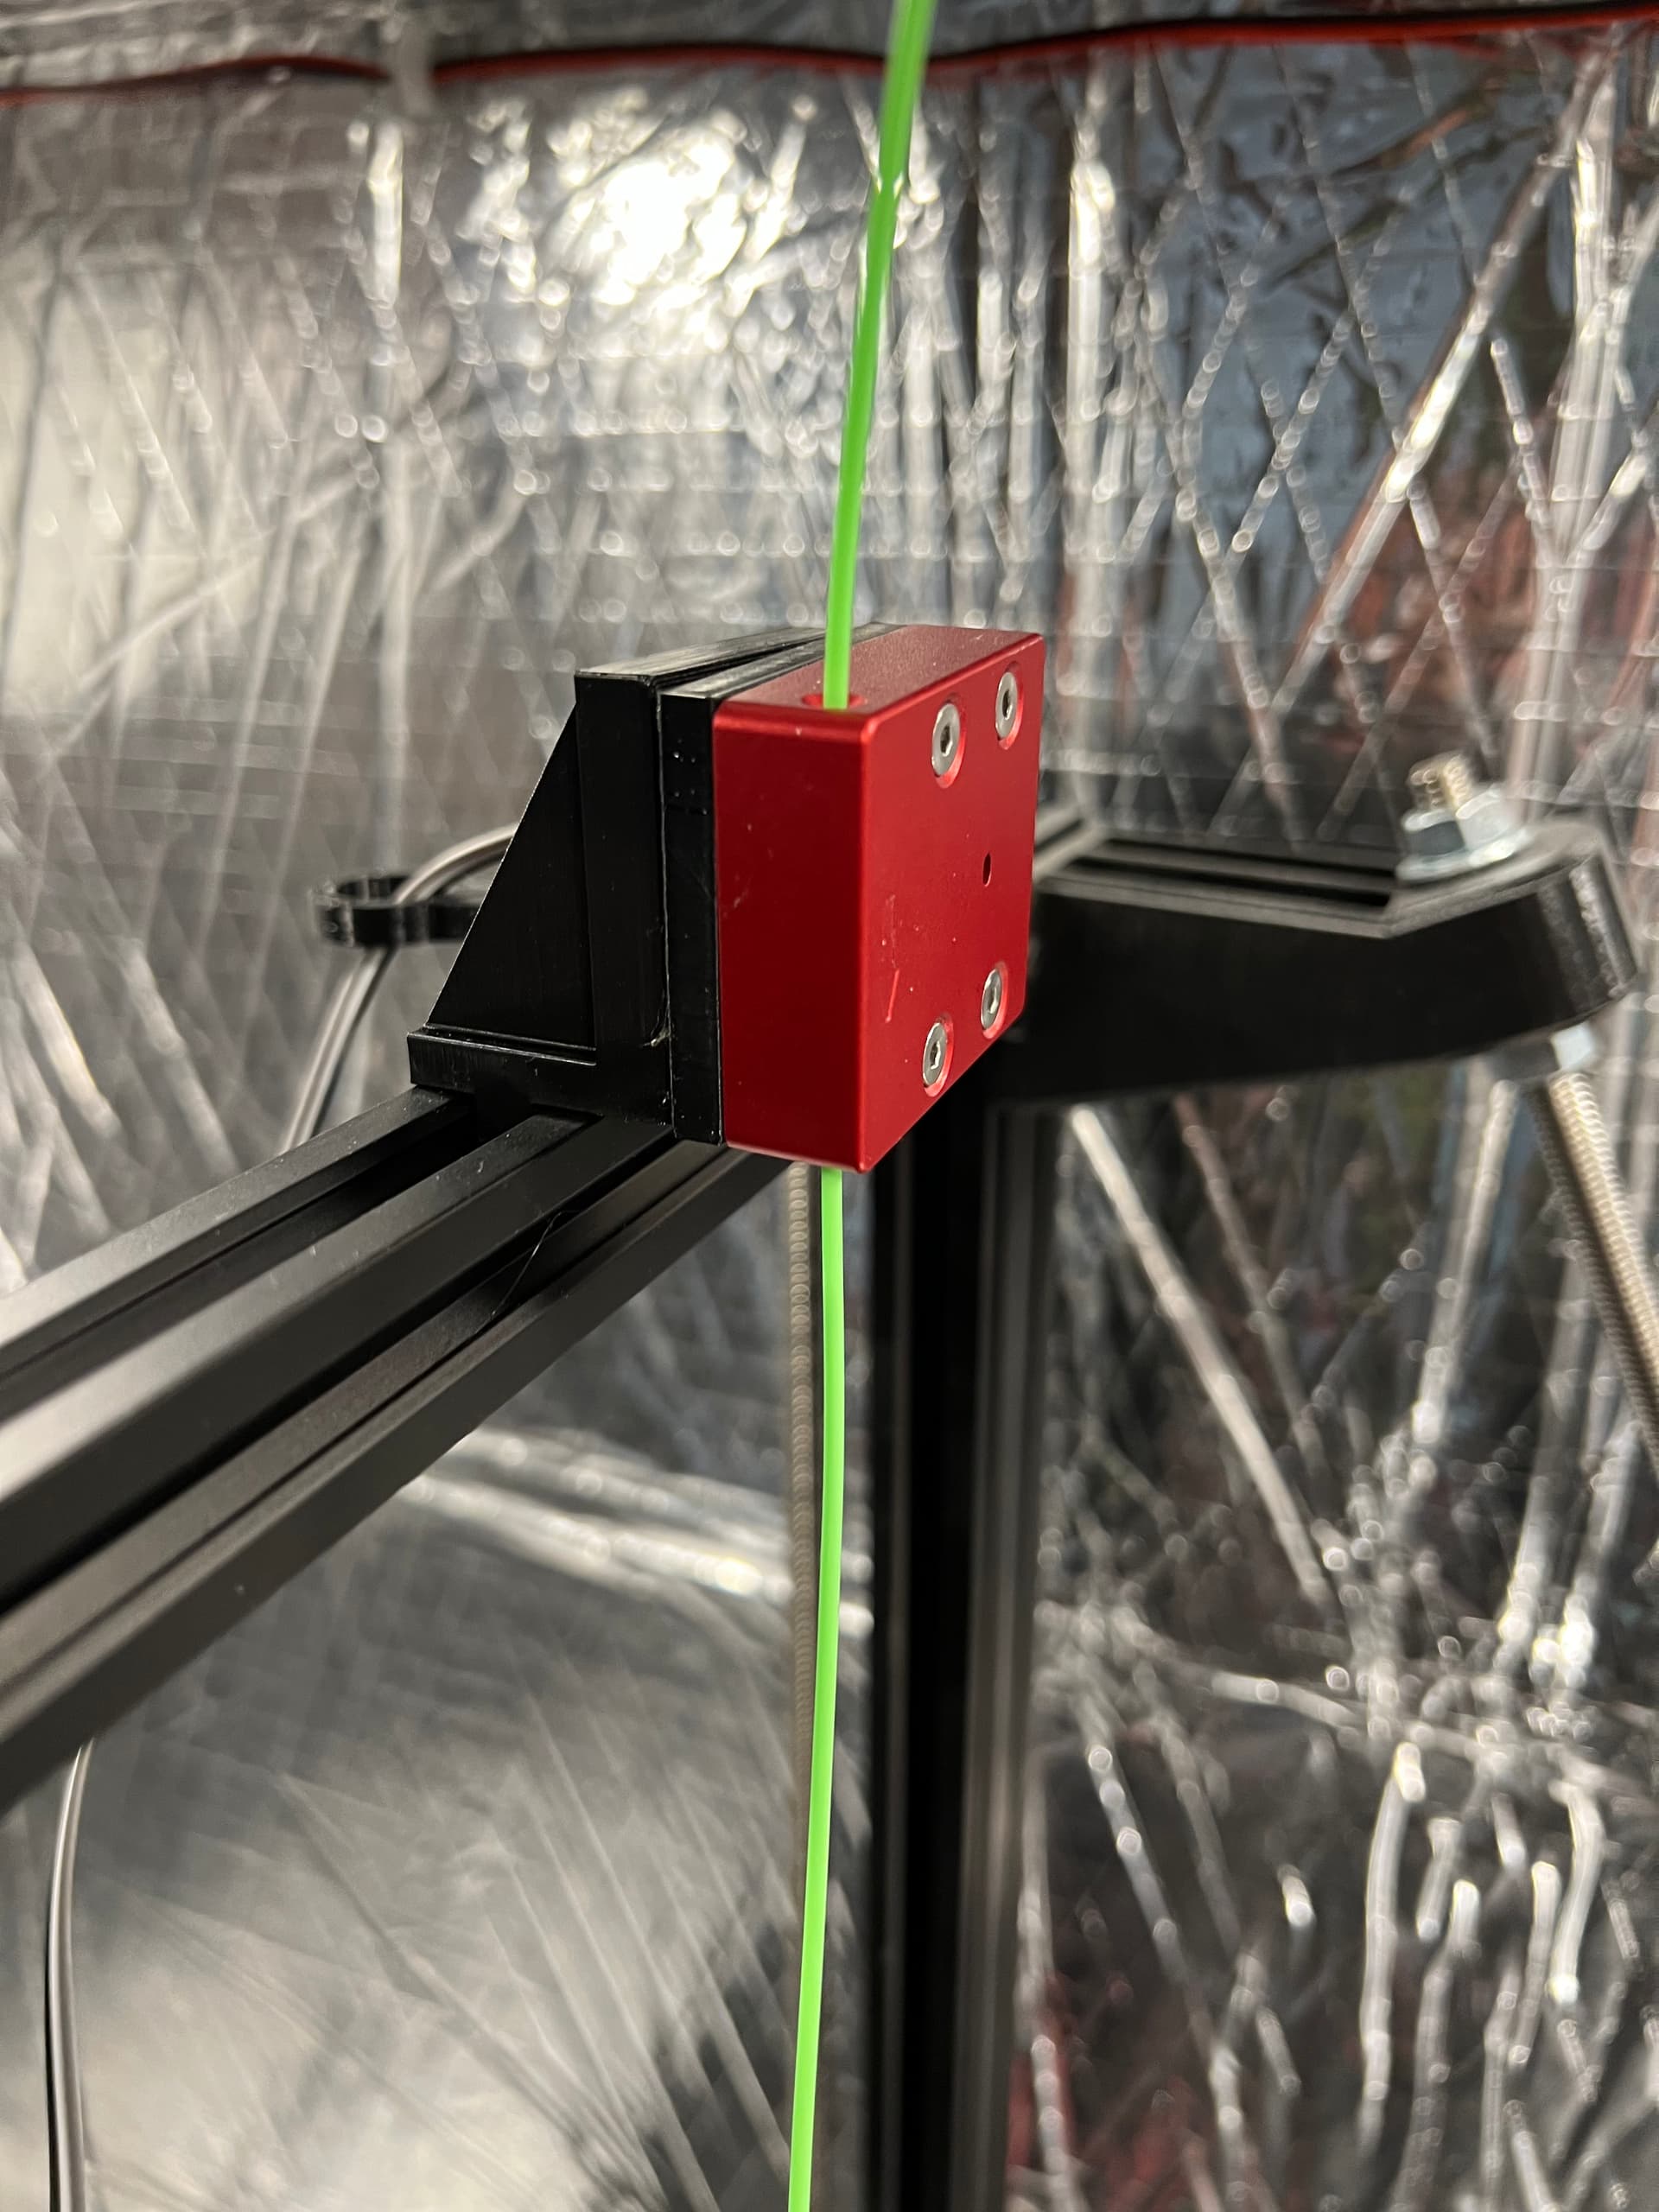
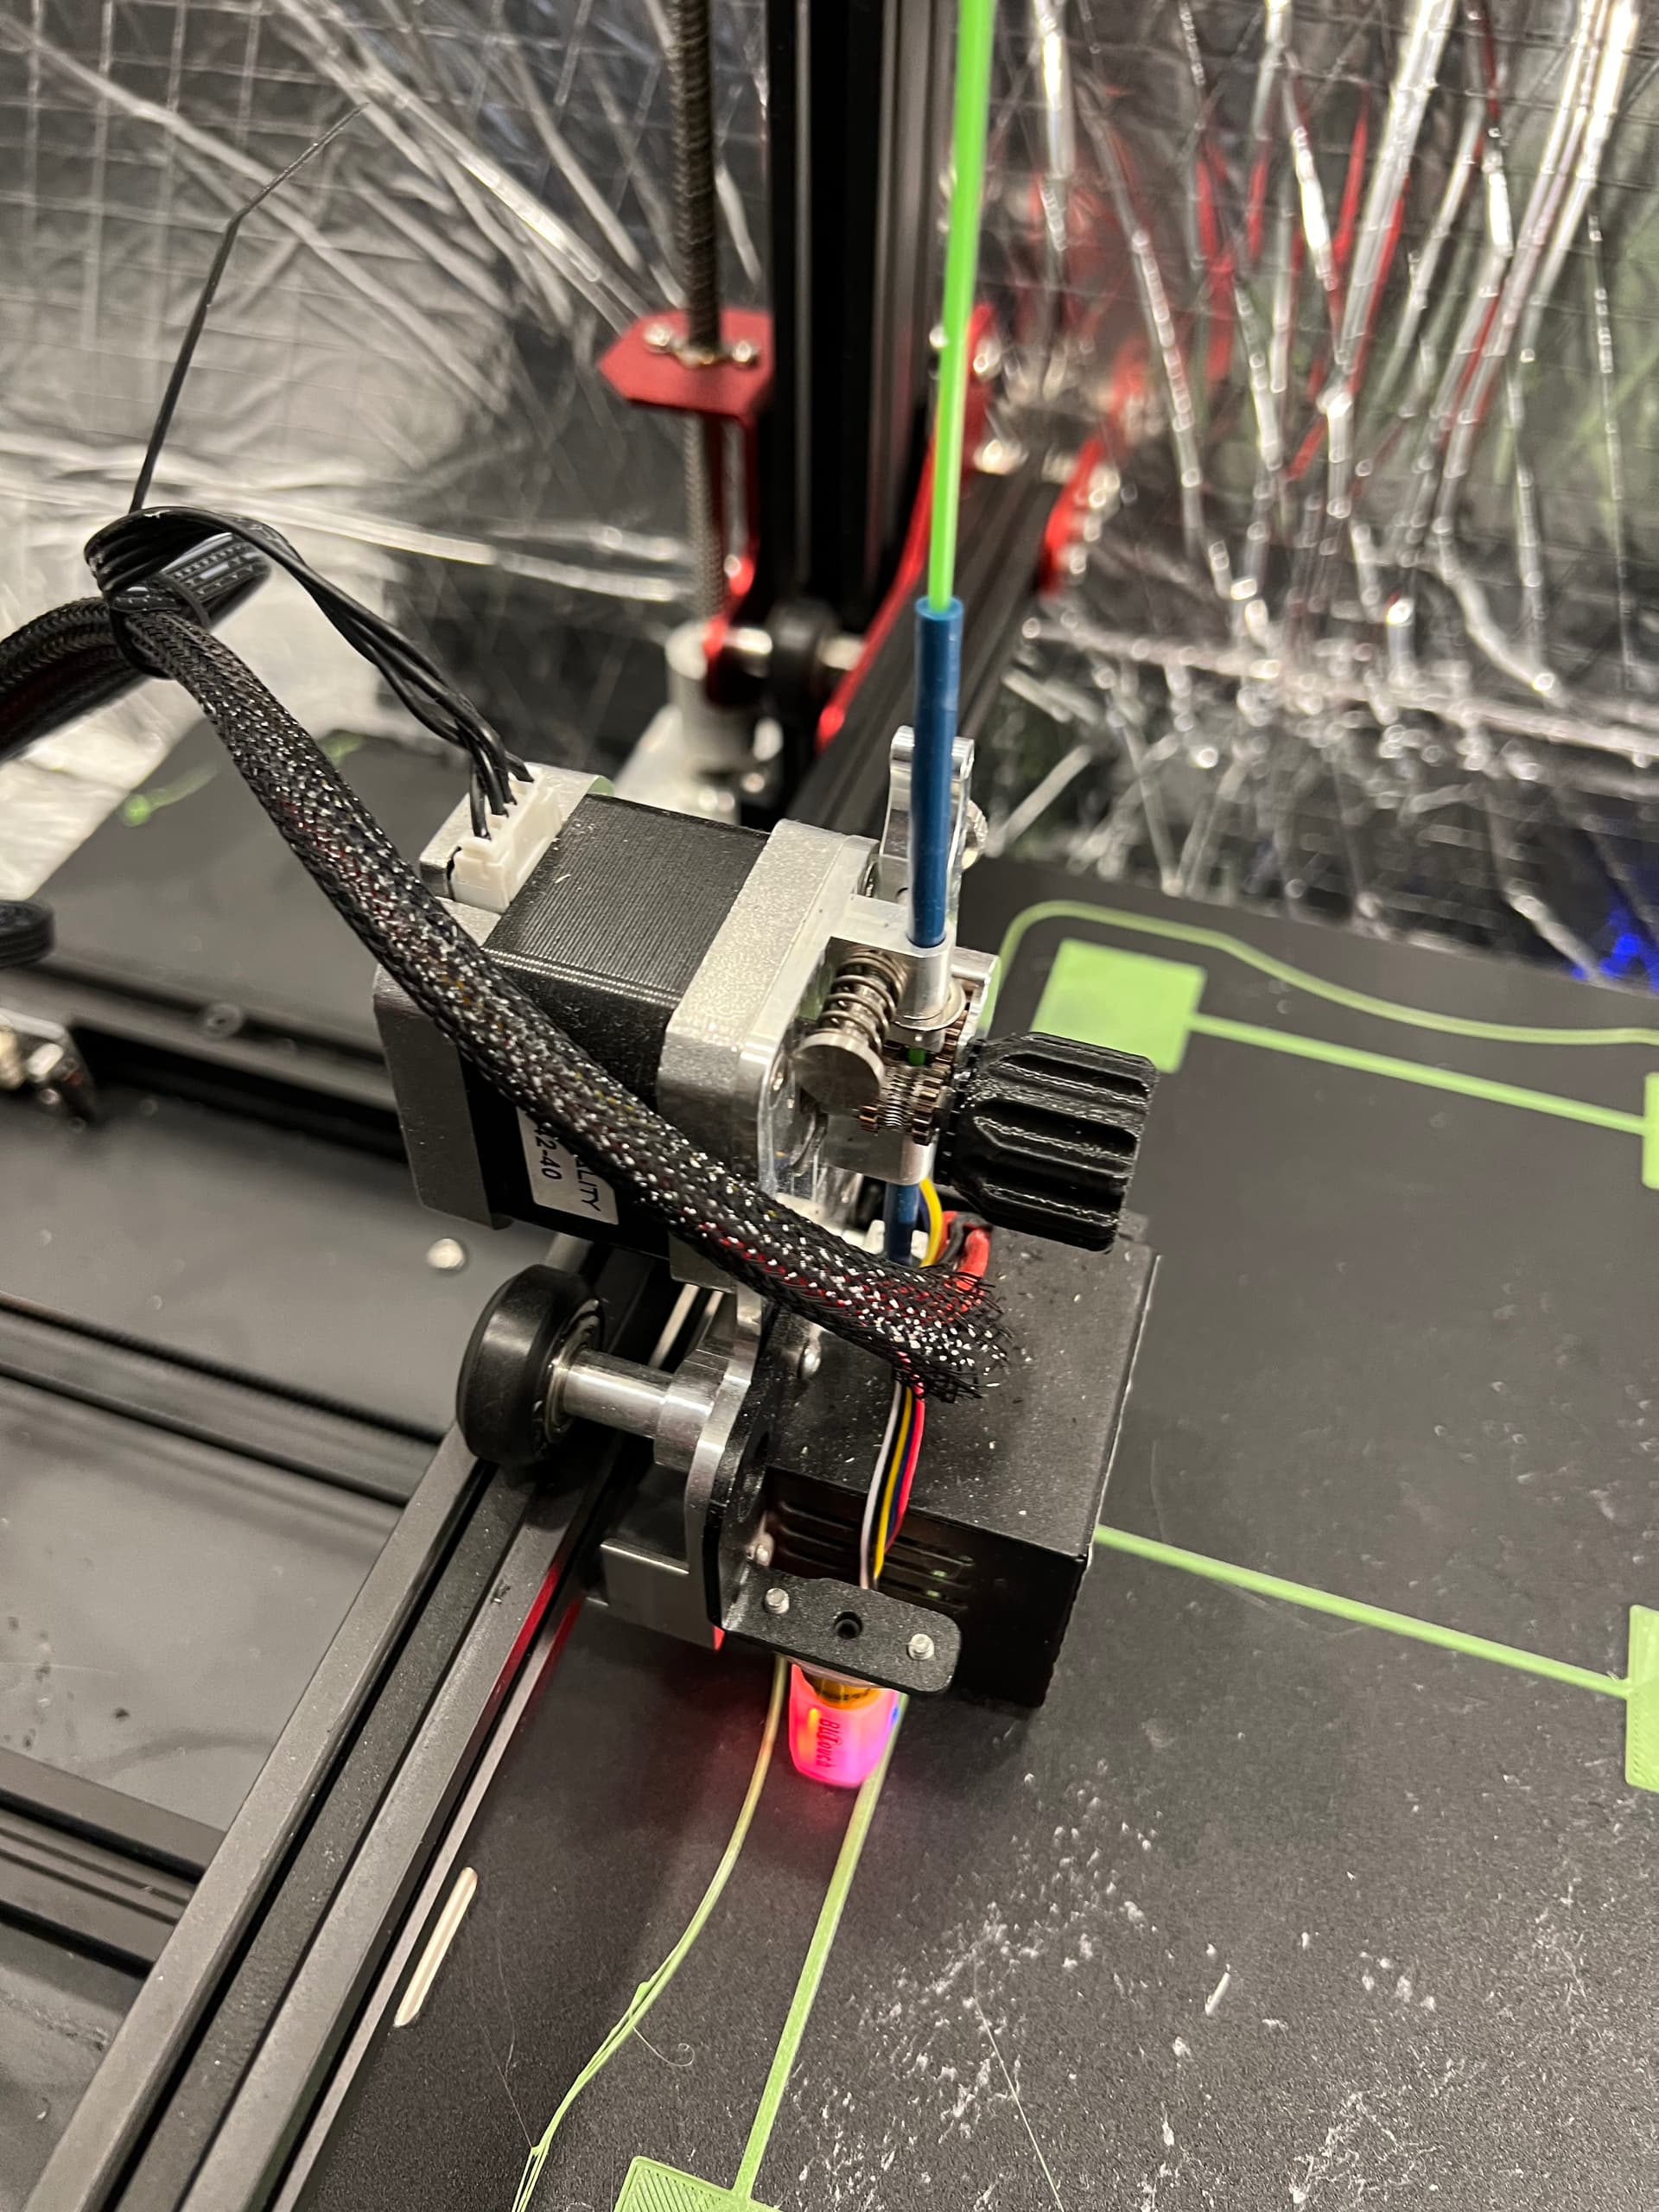
I’ve also relocated the filament runout sensor to the top frame since the filament is fed from the top down and i was having problems with tension on the filament from running it over to the side and through the Bowden tube to the direct drive extruder. Removing all that is much nicer. I found a mount on thingiverse that rotates on a bearing so as the extruder travels along the x axis the filament doesn’t catch.

Also, the filament spool holder I had previous (“TUSH” - the ultimate spool holder) didn’t work very well. It slides on the bearings but the bearings don’t really do anything. So I swapped it out for another bearing model and it works waaaaay better.
All that’s left is to figure out enclosure temperature control and fume extraction and this project will be done like dinner! Oh and I think I’m going to relocate the 12864 screen to somewhere that is easier to get at. Trying to run bed leveling wizard or babystepping my z offset is challenging in the current setup when the bed is all the way forward. Not sure what I want to do yet there though…
2 Likes
very nice, Getting it dialled in nicely.
Ive got an idea for your screen mount. Is it a standard type full graphics rep rap smart controller?
Um… maybe? LOL I’m not sure what the rep rap controller is. It’s this one:

Have a look at this.
It might stick out too much still, but it’s an idea and should fit your screen.
I’d see about it being at the base of the z frame, and since the screen is on a pivot, you could move it around.
Let me know what you think.
That’s kind of what I was thinking… I might need to make some adjustments so I can close the doors but that shouldn’t be a huge remix. Thanks for the link!!
1 Like
Anytime. I enjoy seeing how your coming along, especially as we have the same printer.
1 Like
It’ll be nice when this enclosure project is done… and I’ll have it all documented here in case anyone else wants to follow my lead.
nicely done, very neet and clean
1 Like