So I figured I’d break out from my original thread to discuss what I’m doing for my enclosure. Please everyone feel free to chime in and offer suggestions… I’m flying by the seat of my pants here so if I’m planning to do something dumb please let me know.
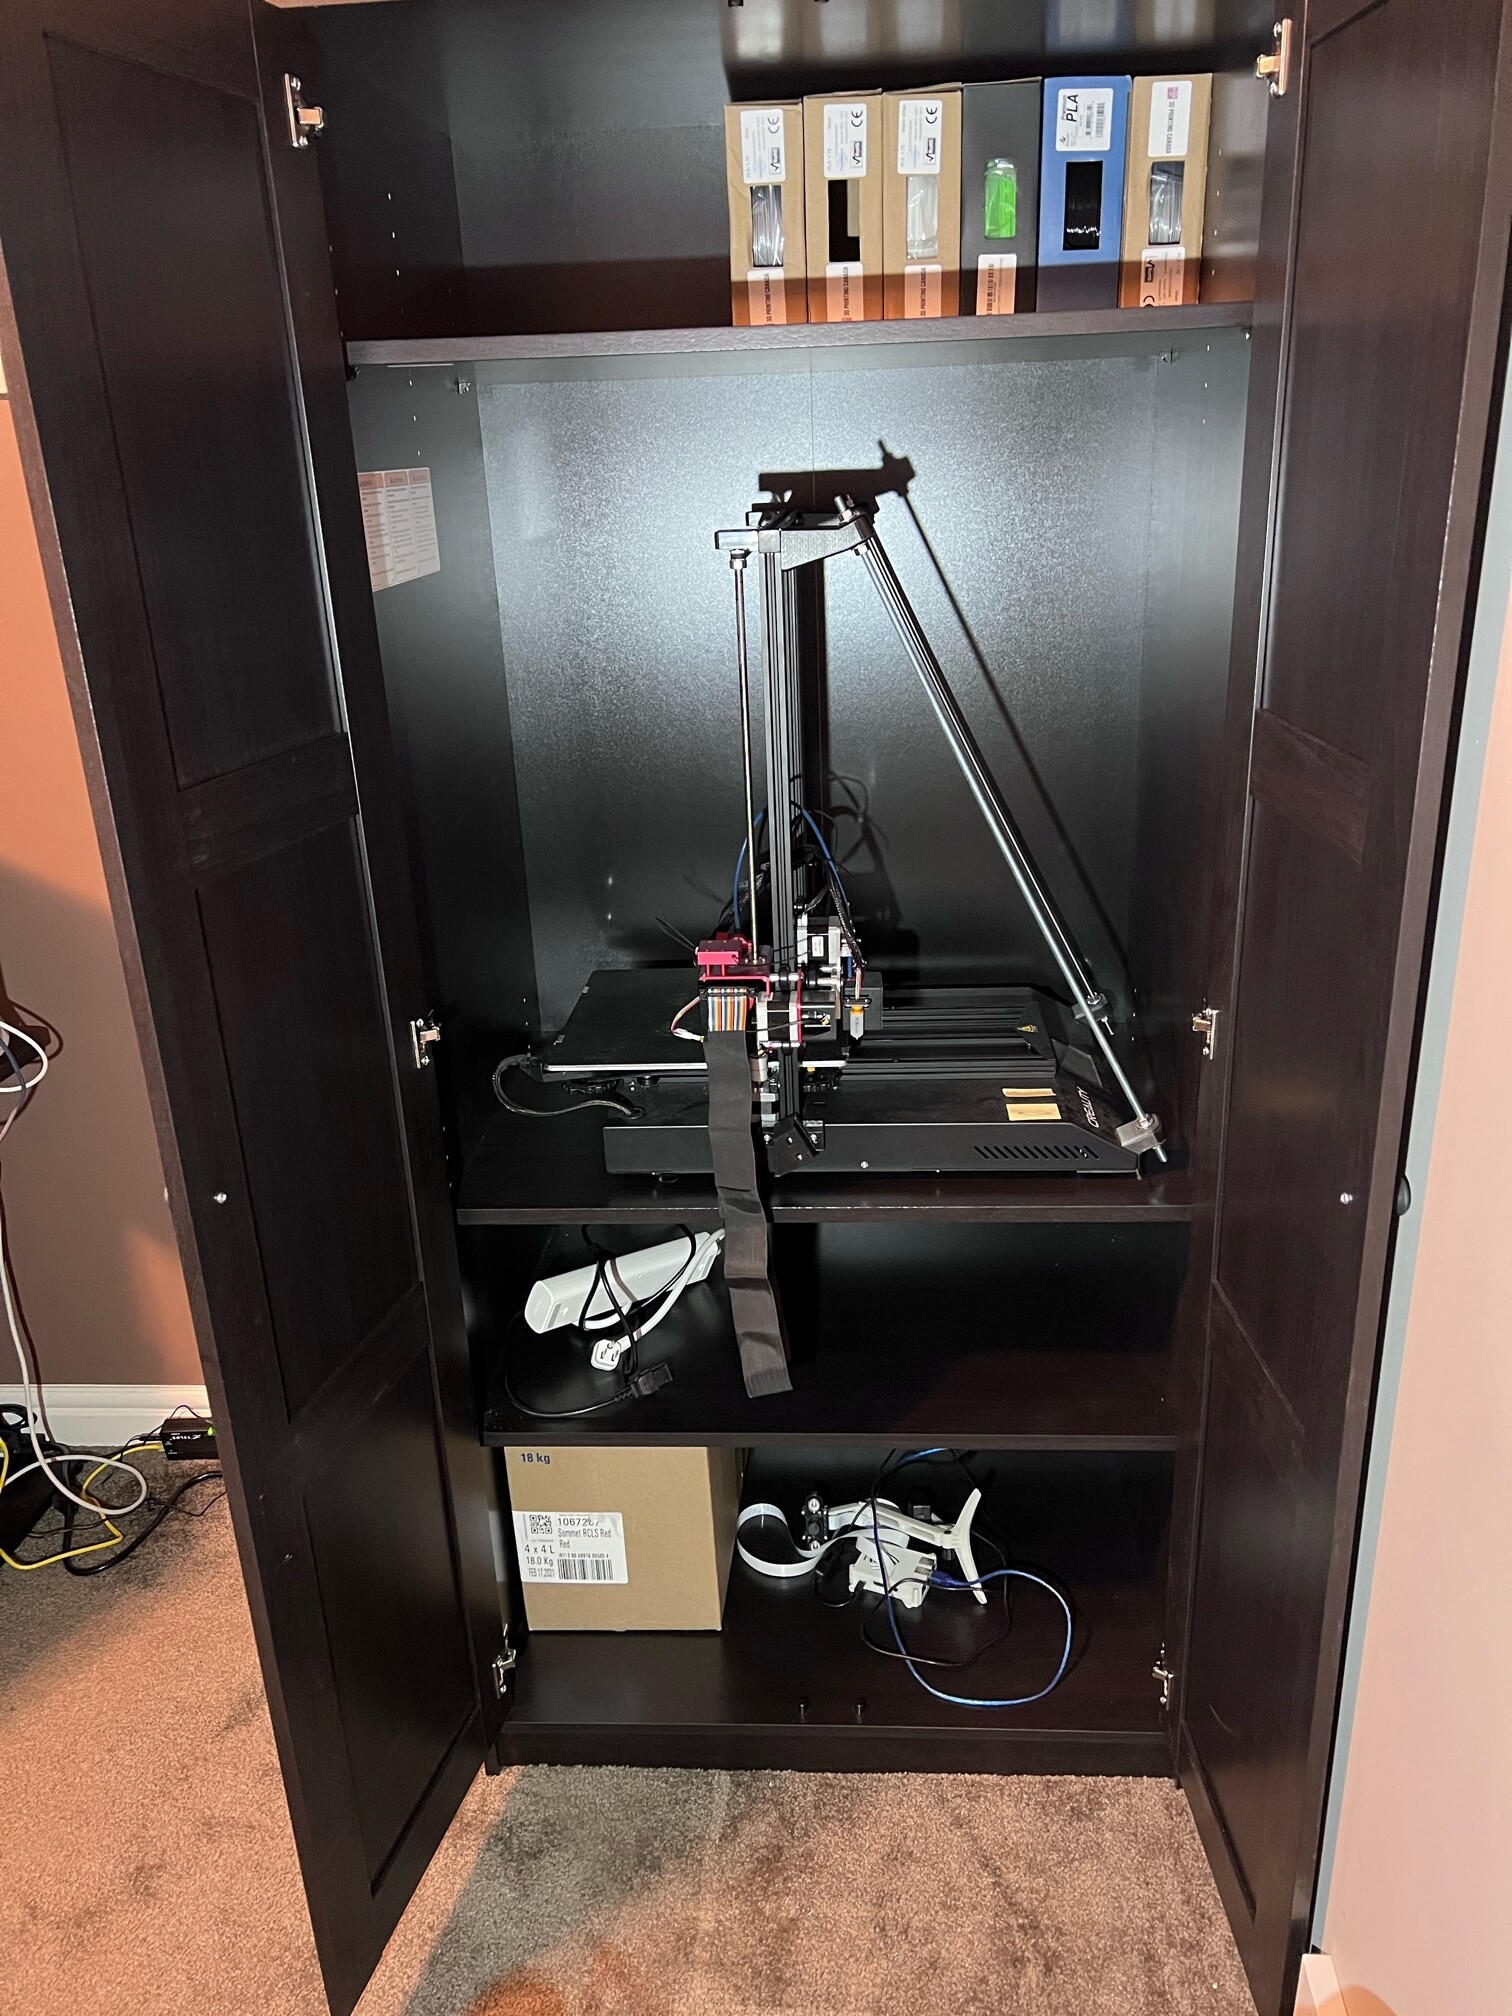
So here’s where we are so far. I bought the Rakkestad wardrobe and a couple of shelves from Ikea. After some preliminary measurements I found it was one of only a couple that would actually fit the CR10s Pro V2. Here is how I have it currently set up:
My plan is to print a desktop spool holder and feed it through a bowden tube drilled through the top shelf and fed to the printer below. I will also print a ribbon cable chain that will redirect it behind the printer. Then I intend to line the print chamber with ceramic fiber to offer some fire protection and temperature insulation. I’ll also add a smoke detector, LED light strip, and if I can find an inexpensive solution a automatic fire suppression device. Then I will cut some holes in the shelf the printer is on and put in some cooling ducts to the printer from below to keep the electronics cool. Then I want to put in a temperature control system in the main chamber to keep it as warm or cool as I need it depending on the filament being used. Eventually I also want to add a HEPA/activated charcoal filtration system to minimize any VOCs and fumes (I work in this same room all day every day so it seems prudent).
The shelf below the printer will contain the rPi and the smart power strip controlled by the Pi and Octoprint. I’ll also set up my IR camera in the chamber to monitor.
SO… anyone have any thoughts or concerns about what I’m doing? Anybody done something similar?
lights lots of lights. I print a lot of black stuff and I hate not being able to see it heh. that cabinet is going to make it seem even worse. I think the fire-rated batting is a good idea for insulation.
So I came across this automotive insulation today that might actually work well for an enclosure:
It is sound deadening, fire resistant, and the foil lining should help keep the heat inside the chamber when I want it warmer. Seems to me like it might be a good choice and it’s not very expensive. I figure I’d probably need 3 rolls to fully enclose the chamber so probably an all-in cost of $50 CAD or so.
After a little searching around I found and ordered this:
After doing a little drawing and math I found that I could make better use of a 1m x1.4m roll versus the 2m x 0.5m roll. Plus even with shipping this was way cheaper. So we’ll see what I get. I’ll be sure to update the thread once it arrives and I get everything installed.
@SpaceMoose that is really interesting. I have been busy this week, late to the party so to speak, sorry for that. I have been thinking that perhaps a enclosure could be made from XPS insulation (Pink Foam) it is quite strong, light, fire resistant, and inexpensive.
My thought is if you had a table that the printer fits upon and you build an open bottom, open front, box that just sits over the printer with printed hinges for a front door. I think that would work quite well. Especially if you need to work on the printer the whole box could be lifted away.
@kitedemon I think you’re on the right track for sure. In my case I have the cabinet so it’s kind of hard to make it removable. Plus the CR-10s Pro V2 just fits inside when the bed is fully extended so the pink foam would be too thick (though I suppose I could trim where necessary). The stuff I bought, while more expensive than the pink foam, is thinner and self-sticking so it would in theory work really well in my application to line the cabinet. It’ll be interesting to see how it plays out.
Now that I have the insulation, sound deadening, and fire resistance figured out my next step will be figuring out how best to control the temperature in the chamber (both heating and cooling) and also think about fume/VOC extraction and negation.
Just wanted to give a quick update to this thread. It took a while to arrive but the sticky-backed insulation finally arrived so I have lined my print chamber. Worked like a hot damn!! Now I should be good for fire resistance and temperature/sound insulation.
I still need to add fans and whatnot for active cooling so I can print PLA with the doors closed and eventually I may also need to add in a small heat source if the bed doesn’t heat the chamber enough to print materials that need higher temps. I also want to add a HEPA/charcoal fume extractor as well. And I’ll want to add lights and camera from my rPi for octoprint.
However as I see it my next steps are to get a hole saw and poke a hole in the back to run power cables to the printer as well as in the print shelf to be able to run cooling ducts to the printer to keep electronics cool. I also need to print a ribbon cable chain that redirects the cable to the back rather than hanging down the side so I can still close the door while printing.
Still lots to do but I’m almost back at the point where I can start printing again. Woot!
Nice! That’s coming together well.
A bonus feature is that with that much foil lining you could hide in there to prevent the government and/or aliens from reading your thoughts.
When you do an installed heater are you planning on connecting that to the main board and using the new-ish Marlin options for heated enclosures to control it?
I don’t know much about the settings/options, I just know it’s in there now from the last few rounds of compiling firmware that I have done.
I’m not sure. The heater is pretty far off as I do mostly PLA right now so I want to get it all set up for that first. I’d like to eventually connect everything to my rPi and use the Enclosure plugin so I can remote control everything but I have a lot of learning to do first. I’d like to avoid depending on the printer’s main board in case I want to change out the printer at some point so that’s why I am leaning towards the Octoprint option.
I would suggest trying it before you put a heater in. I print a lot of Petg and some ASA and found on my enclosure that is fairly well sealed I actually needed to add ventilation it was getting too hot inside.
Agree 100%. I know I’m going to need ventilation for PLA to be able to print with the door closed so I’m going to get that figured out first and then I’ll worry about heating the chamber somewhere down the road if by some chance I need it (which I doubt but you never know)
Well since @Dr.Marvin called me out on the other thread on my lack of updates I figured I’d better come back with SOMETHING… I’ve been crazy busy with work lately so I haven’t had a lot of time to do much on the enclosure. However, I HAVE been playing around with LED lighting that I want to control via Octoprint (why? why not?).
So the first thing I need to do is connect the LED strip to the rPi. However the LED strip is 5V and the rPi GPIOs expect 3.3. So I needed to introduce a level converter to the mix. Since I haven’t played with any circuits since university I am kind of muddling my way through. Here’s the setup so far:
But then i thought to myself “Self! You don’t want to just have a breadboard that can be easily damaged in there do you?”. I did not. So my next step was to buy a soldering iron and learning how to make this into a more permanent solution. So I’ve assembled a number of pieces and it looks like this so far:
You can tell by my ubertechnical schematic there that I know EXACTLY what I’m doing (not!). But if by some freak chance this works then I’ll model and print up a case for it and will have my very first from-scratch thingy that I’ll have made. Yay!
Anyway… once I get the LED strip working then I’ll mount it in the enclosure. In the meantime I’ve still got to pop a hole in the back for the power bar to poke through and then I will start printing some accessories (most importantly the ribbon cable redirection chain that will send it to the back of the machine rather than dangling on the side where it can get caught on the door. I’ll also need to print a new spool holder that I will have in the top compartment - right now my spool holder will still be side-mounted as before so I can’t close the doors while printing yet.
Sooooo that’s about it for now. Hopefully I’ll have more to show soon.
So a little update on this. The LED driver board didn’t work (though I suspect my crappy soldering skills had something to do with that). I might try again with a breadboard setup to do a POC but I think it’s more likely that I’ll just get a strip of lights that I can plug into my smart power bar and control it that way.
In any event, one of the things that was bugging me was that when I closed the doors the ribbon cable was pressing against it. I didn’t like that. A short time later I had a cable chain that redirects to the back of the machine:
“What’s next”, you ask? Well I’m going to swap out the stock touchscreen and replace it with a 12864 screen so that it plays nice with stock marlin (and Nic’s updated version):
“That can’t be it”, you might say. You’d be right! Cookie for you! I am going to feed the filament from the top shelf rather than from a spool attached to the machine in the print chamber:
“Good GOD man, that must be it”, you might say. Nope! By directing the filament down from the shelf above the centre of the printer I’d have to string the filament all the way over to the left to use the filament detector:
That would likely result in the filament rubbing against the door and I just didn’t like that idea. SO I will be disassembling the filament detector and repositioning it on top of the servo so that the filament will feed straight down into the direct drive extruder:
I’ll have to build an extension cable to go from the detector over to where it originally plugged in but that shouldn’t be a big deal. After that I’ll work on electronics cooling and then an exhaust system if I start printing with stinkier filaments. Don’t think I’ll need to worry about heating the chamber any time soon as the build plate gets it plenty toasty in there even with the doors open. In fact I’ll likely have to set up a thermometer and some fans to get some active cooling happening when printing with PLA.