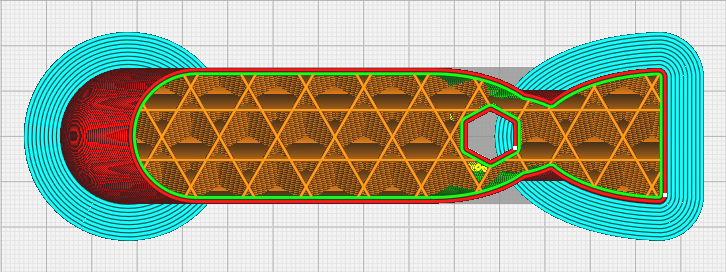
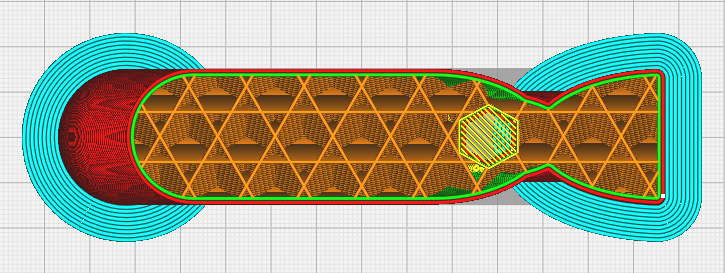
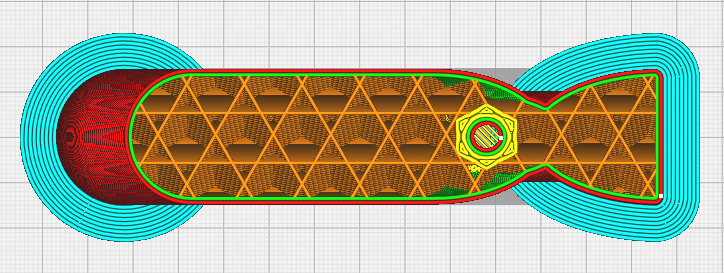
Here is a little trick I came up with for causing a bridge above a shouldered hole, where the diameter steps down and the OD of the new wall is smaller than the ID of the larger hole, so there would be no support for the wall of the smaller hole above the larger one… I can’t print it the other way up, so I made the “hole” for the shouldered (lower) part and the “hole” for the smaller (upper) part separate (instead of joining them into one object), and separated them vertically by 0.1mm… I then joined them into one “object” that you can move to where you need it… This means you can’t “see through” the hole, and Cura prints a single layer bridge between the upper and lower holes, which you can easily drill through… Here are the screenshots of the layers, in the order printed (bottom to top)… Layer “X” is the shouldered (lower) portion, in this case a hex recess for a nut, Layer “X+1” shows the bridge, and Layer “X+2” shows the first layer above the bridge…
Layer X
Layer X+1
Layer X+2
It worked a treat!..
Bob