It has been a while since I have posted anything on here, not for lack of printing things, but thought I should share this project since it was more involved than my other recent creations.
I had an idea quite some time ago that I should try making a small decorative Japanese style garden lantern. The plan started out to make something small and 3d printed, but as plans do it grew in size an complexity to become a functional table lamp with 3d printing mostly playing an assistive role. The top changed from printed plastic to cherry and birch wood and the base to cast concrete.
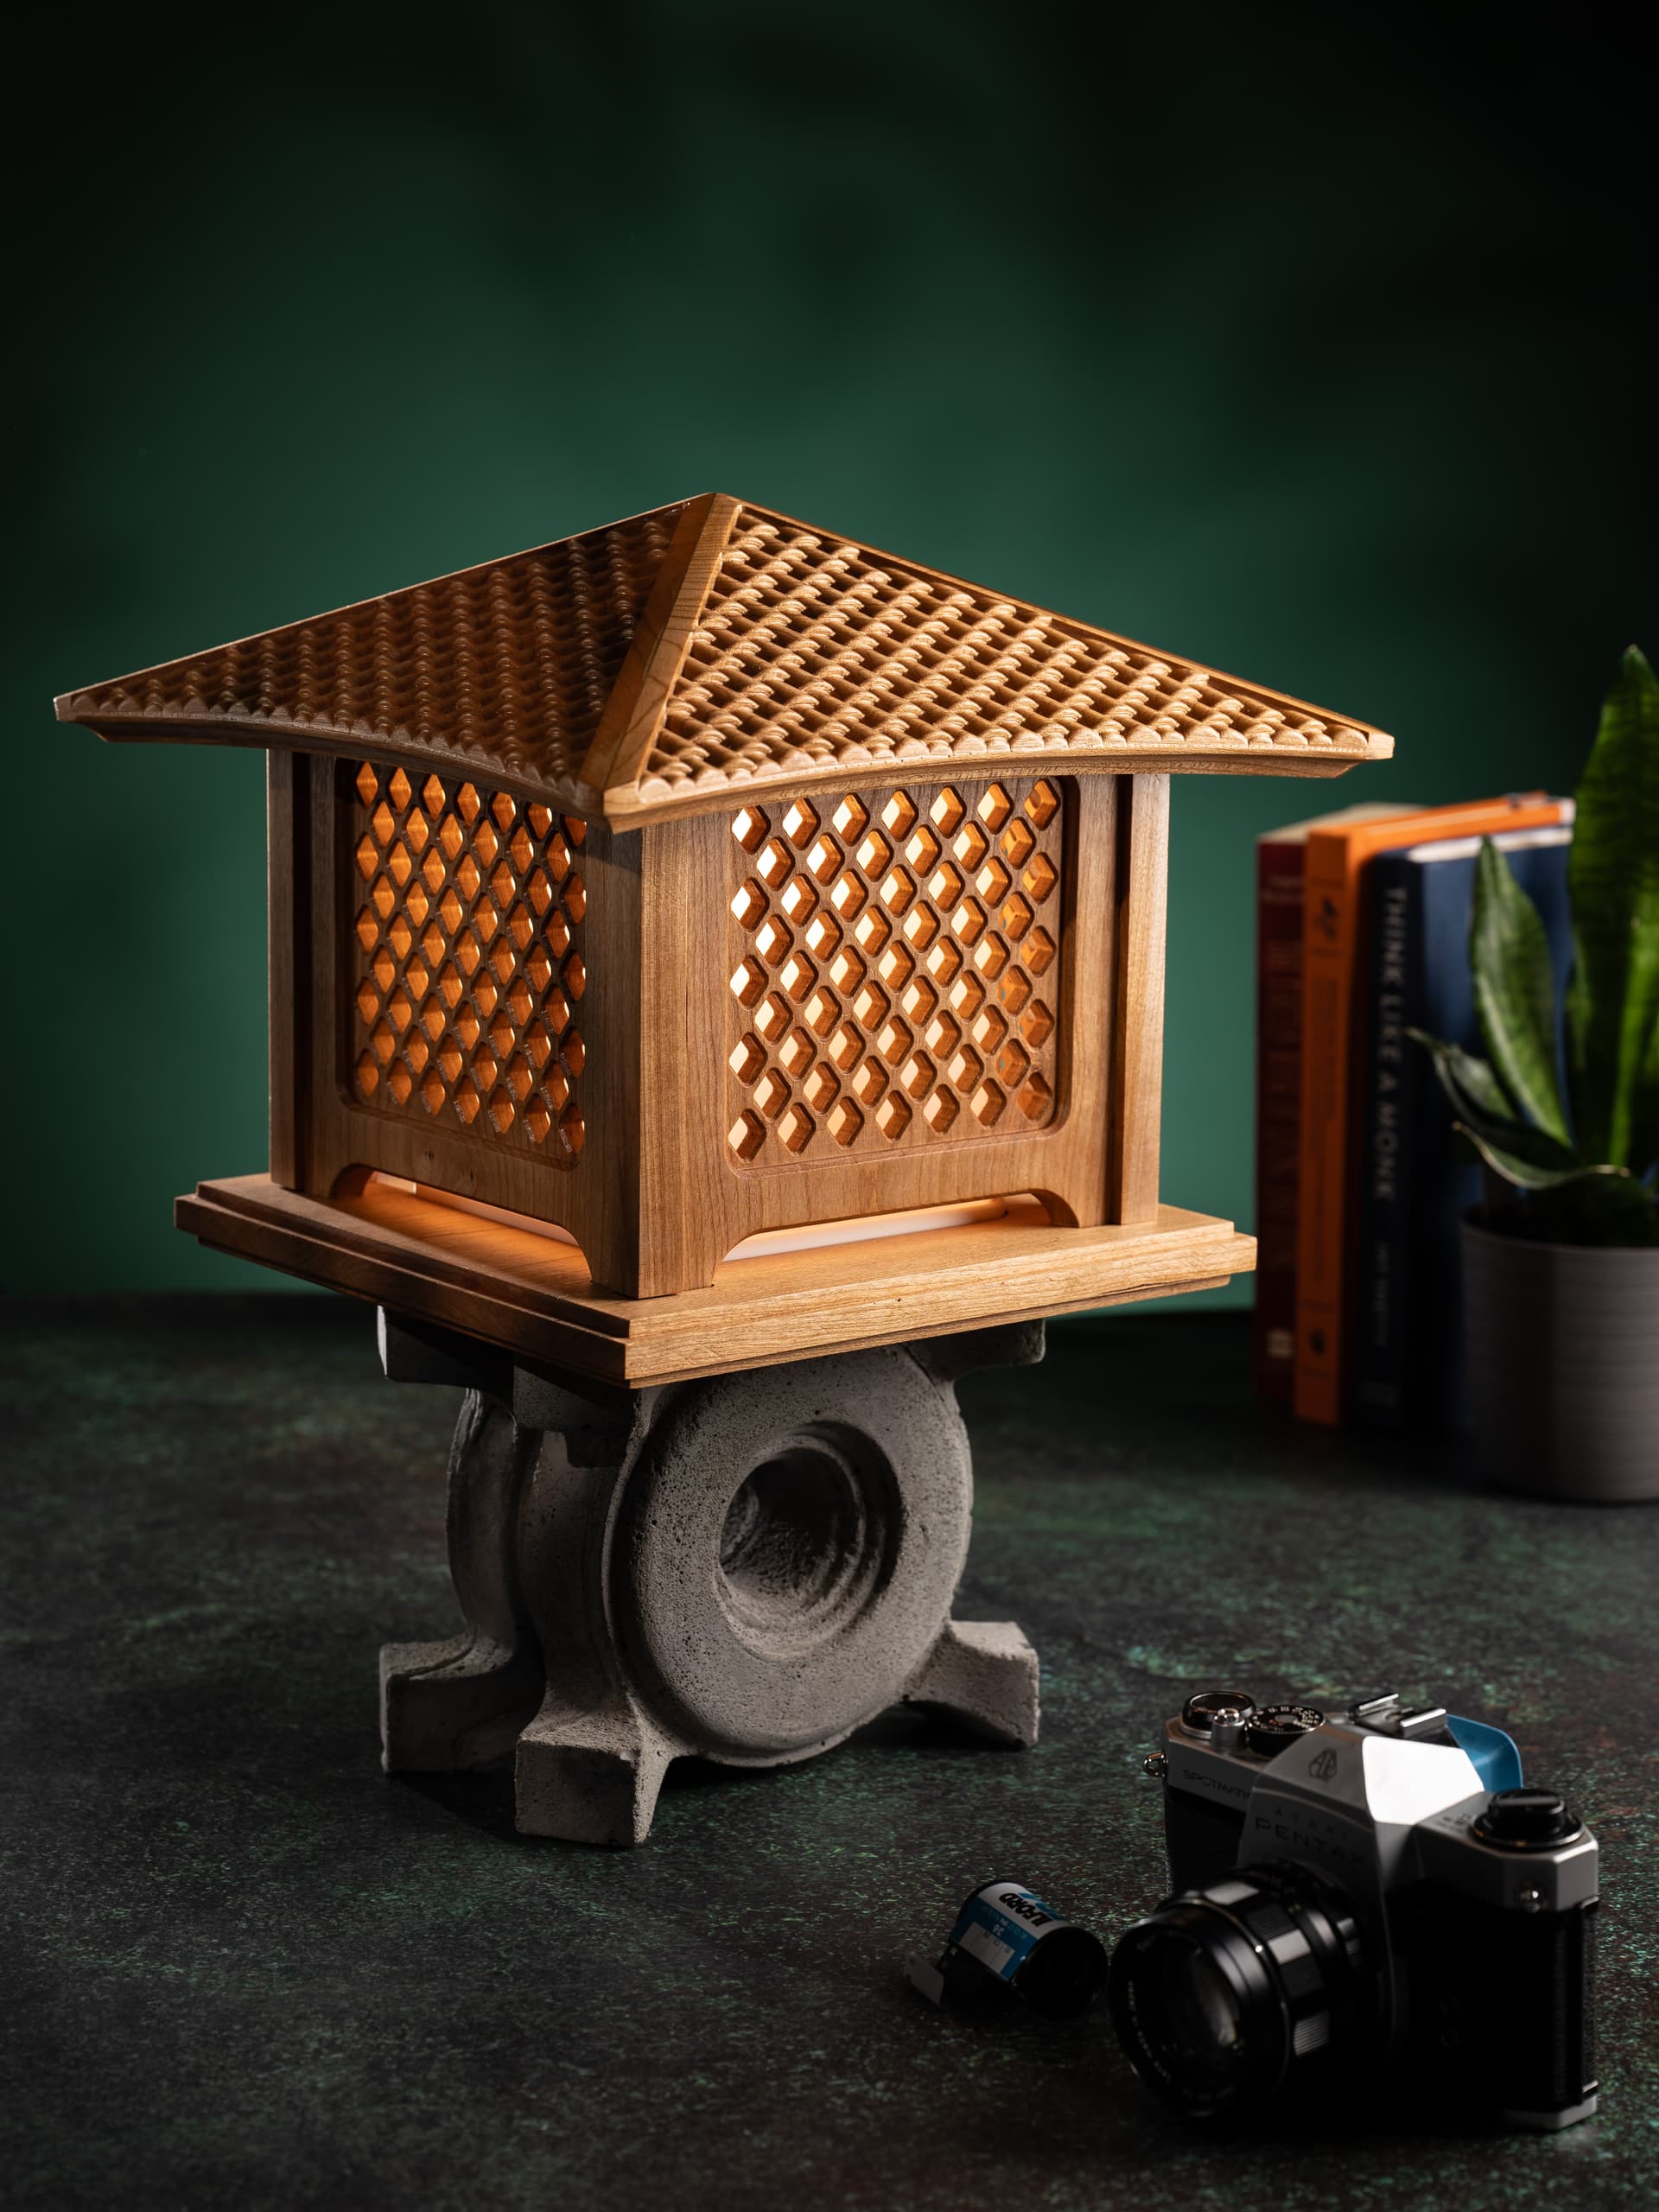


Modelling was done in Fusion after some sketchbook scribbles with the biggest challenge being designing the base in a shape that was both interesting looking and able to be molded.

Making a mold was new territory for me and the shape of the base requires a mold with a minimum of six piece. Two additional pieces were required for a cast in place wire chase and a revision added another two pieces for plugs for pouring the mortar mix in bringing the total part count to ten for the mold.


After the base had cured and I knew that it hadn’t been a complete failure I started prepping the rough wood for machining. I planed the boards to close to finish thickness and trued up the edges with the intention to get them to a more accurate finish thickness by surfacing them on the machine.

I could have saved some material by nesting multiple components into each blank but since this was the first time I had needed to do a fairly accurate fixturing for a double sided carve I thought I’d play it safe and machine one part at a time. The cut time was also fairly long for each piece with multiple tool changes required so it seemed best to break up the cutting into single parts.


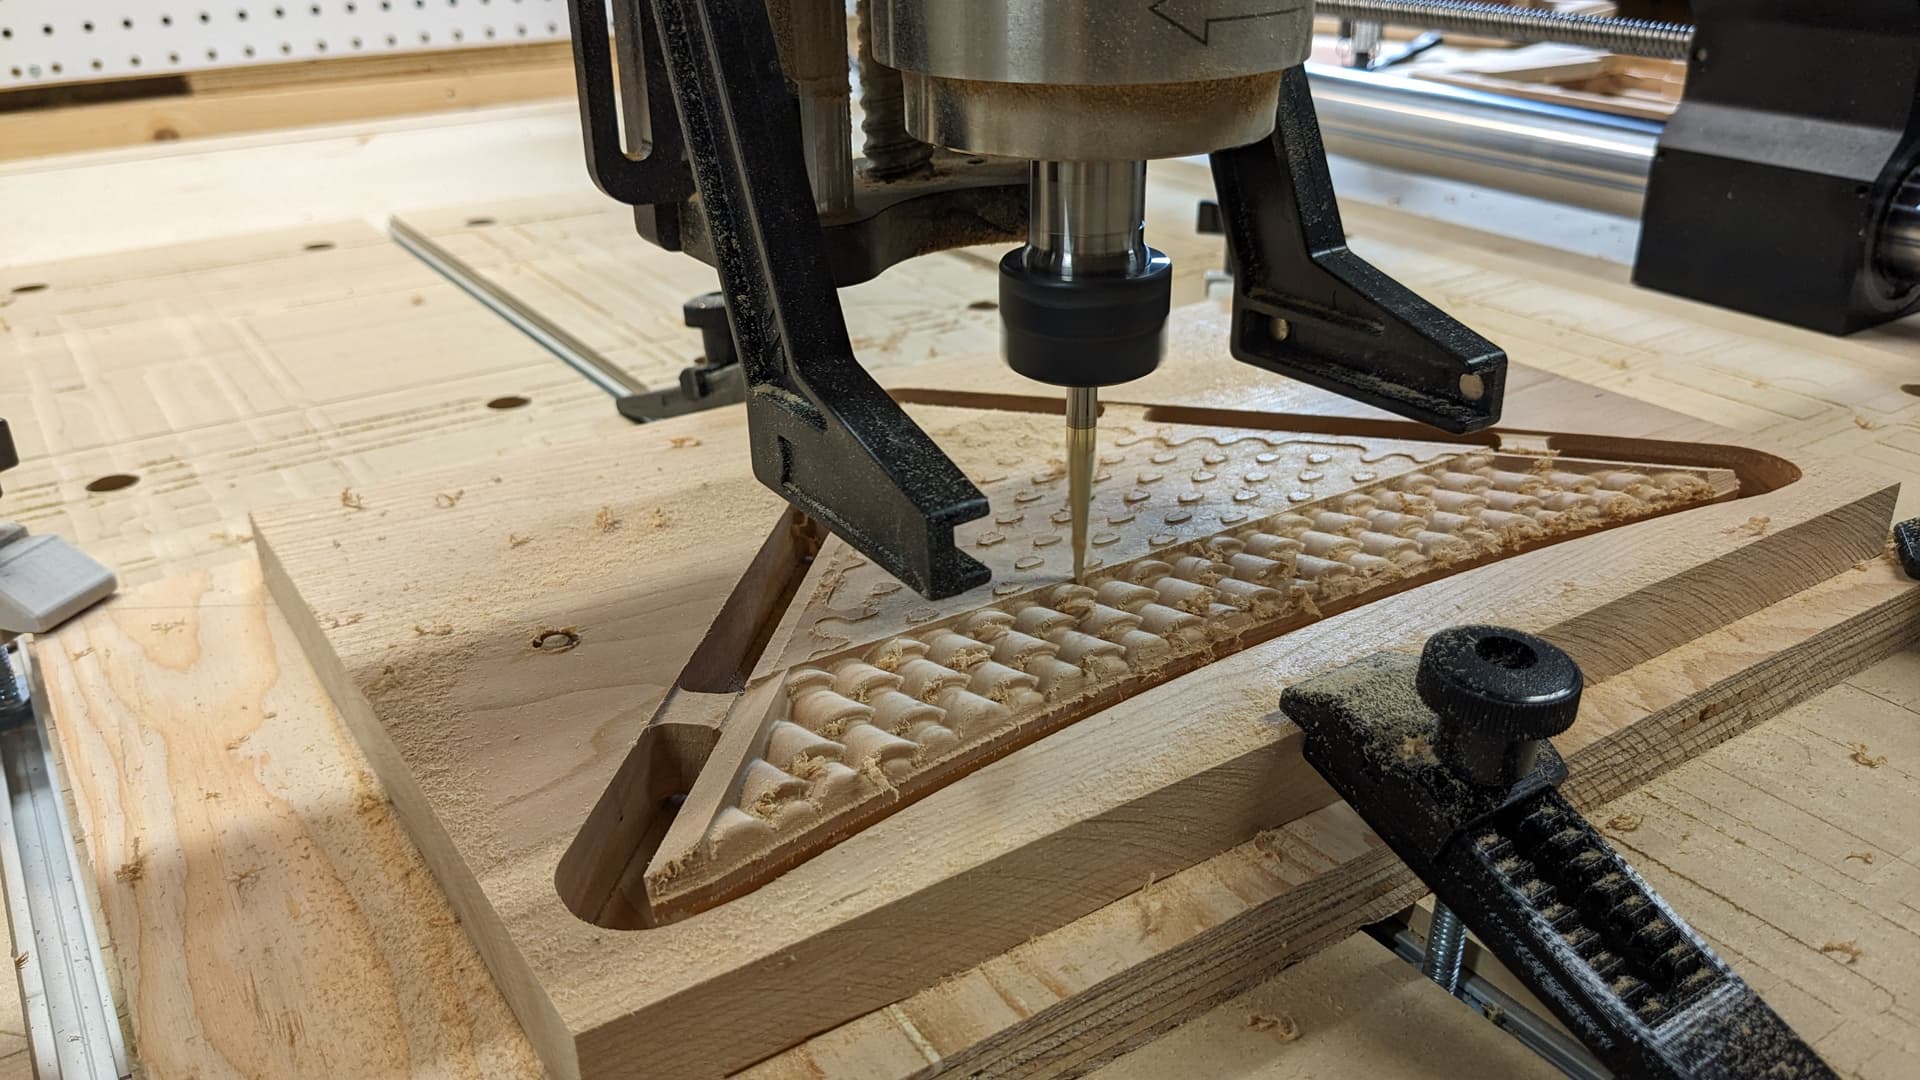
While the machine cut each part I was able to prep some birch to be used for the corner trim pieces and do some sanding and test fitting on the parts that had come off of the machine already.


With all of the parts done the final step was to glue up the assemblies and finish them with a few coats of Osmo Polyx hard wax oil. To make this very slightly more 3d print related you can see in this image some of the printed hold downs that I designed for my machine. There is also a bunch of printed parts that I designed on both the CNC itself and the table that I built that aren’t particularly visible in this shot.
There is also a printed part inside the lamp to hold the light socket and one for holding the diffusion material.

Since these will end up living on a pair of bedside tables that I now need to design and build I have already started making the second lamp. The nice thing is that I was able to make improvements for the fit of the parts and tool paths as well as the mold for the second round so it should go a bit faster and easier.
I tried casting a second base in the original mold but wasn’t happy with the quality of it. The mold also disintegrated when I was removing it so I’m currently reprinting the whole thing with some slight revisions. Casting still seems to be the biggest wildcard in this project and I certainly have a lot to learn before I could do it confidently with consistency.