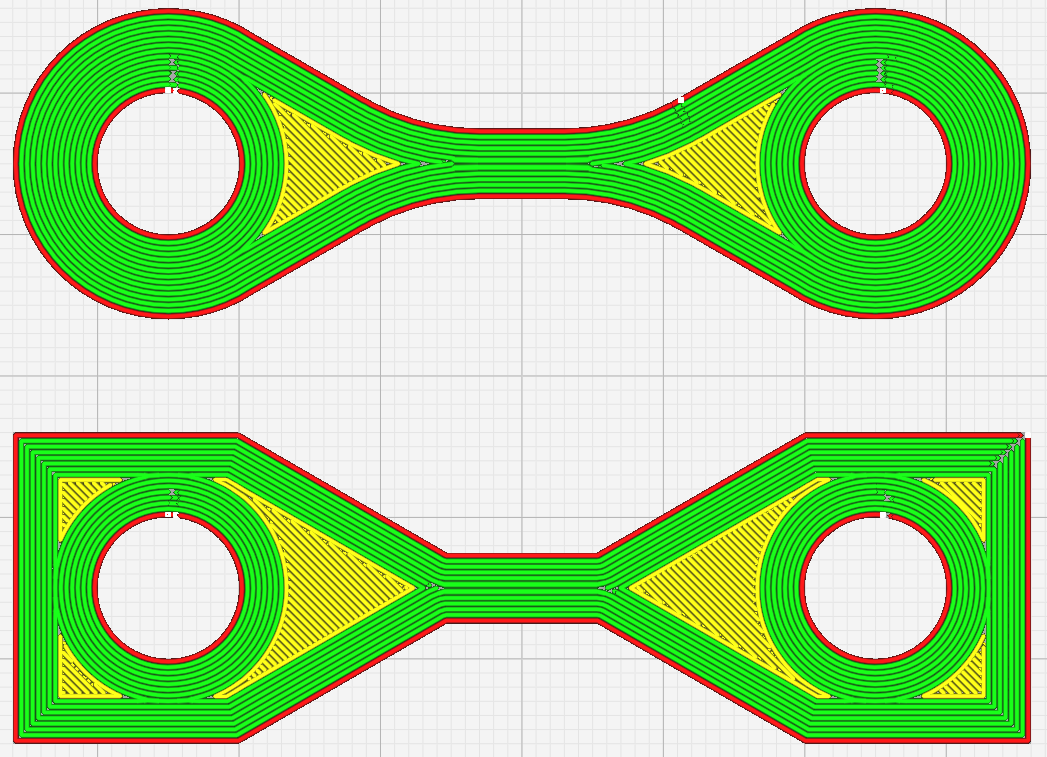
In Cura, you can increase the flow without changing the layer height or the wall thickness… I don’t know how much material the “100%” setting extrudes, but the minimum would be the volume of an ellipse the layer height by the wall thickness… A rectangle of the same dimensions would be 1.00 / (PI/4) = 127%, so I used 100% and 127% in Cura and got these Preview results… First, the standard 100%… 11 grams of filament used…
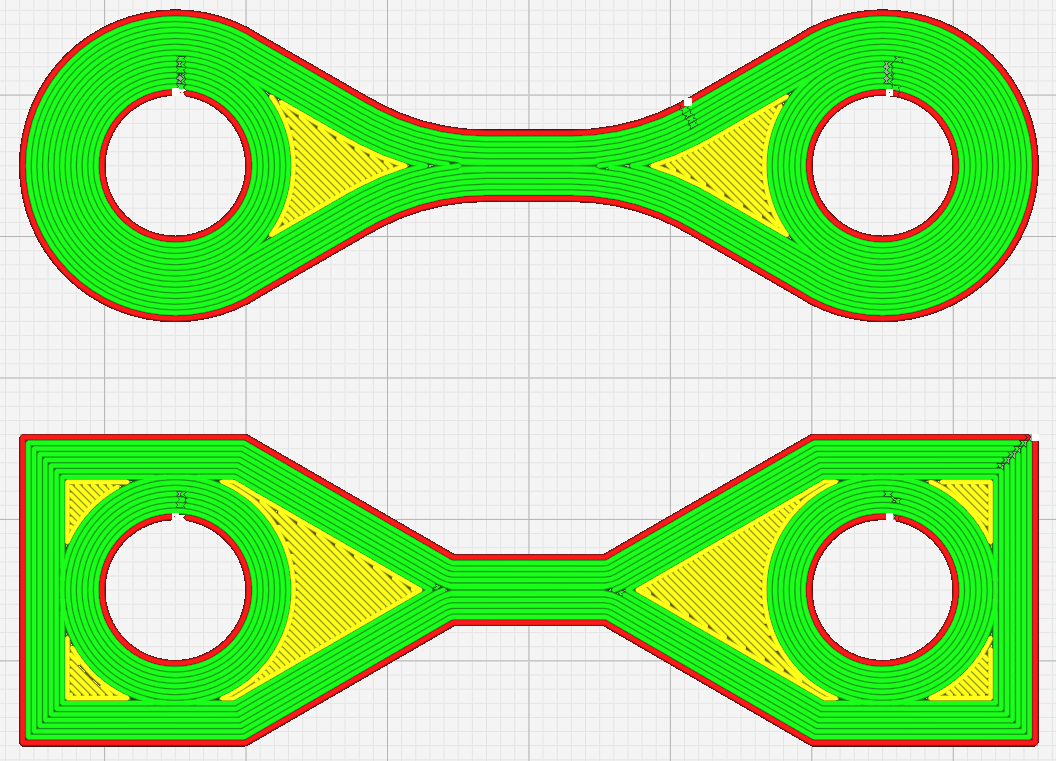
And next with the flow set to 127%… 14 grams of filament used… You can click on the images to enlarge them…
Note the slight gaps between the threads of filament at 100%, and how those gaps virtually disappear at 127%… Now assuming that “100%” is actually a bit more than the actual volume of said ellipse (to get bonding between layers), is there not some setting, maybe between 110-120% that will increase the layer strength, because the extra filament has to go somewhere, so it should spread out to fill the gaps between the theoretical ellipse and the same size rectangle?.. Might this also increase the layer to layer bonding, and possibly improve the surface finish as well?..
Flow is for tuning the volume of material coming out of the nozzle and I use it to make sure that when I for example have a 0.4mm line width set in Cura the actual measured line that gets printed is still also 0.4mm. I use the calibration tests from Teaching Tech to tune it.
Some materials expand differently when they are heated so flow can be used to compensate. Most of the time I have found that materials end up somewhere in the 90-100% range. There are some specialty foaming filaments that have different amounts of expansion depending on their print temperature so flow would need to be dialed way back to keep a part dimensionally accurate.
Of course if you dial a filament too far back you will end up with what I think your post was eluding to where the line of filament being extruded is too elliptical and doesn’t have as much adhesion to its neighbours.
If your goal is to increase adhesion by jacking up the flow rate I would look at changing a few extra settings. You can adjust flow for different line types and layers in Cura. I haven’t actually tested this but if I were to experiment I would also do the following:
Print outer walls first on each layer at your calibrated flow rate from the Teaching Tech test. This should act as a barrier to keep the next lines from squishing out and ruining your dimensional accuracy.
Print inner walls and infill at higher flow rates. Too high on the inner walls and the material will start to volcano up into the layer space above so there will be an optimal amount to keep things clean. Infill could likely be set higher since it has room to squish out on each side of the line.
You could try to increase the flow on top/bottom layers but I would be cautious of this for the same volcano-ing reason. Too much flow here will give you a terrible surface finish with lots of ridges and marks from the nozzle dragging around through the raised areas.
In general the risk to increasing flow too much is that you have an excess of material that squishes back up around the nozzle. You’ll end up with a big snot ball building up on the nozzle and that could turn into a wrecking ball that damages your part or clubs it off of the bed.
If you some experiments let us know what you learn.
Thanks, Blair, that is a great expanation… I did some testing, at 110% and 120% flow, and at the latter, the top surface is so rough from extra material I thought it was going to damage the nozzle as it plowed its way through the bumps… At 110%, the coupon was a bit stronger, but the top was still pretty rough… so I changed to only increase the flow on the inner walls, with all other settings remaining at 100%… Your tip to print the outer walls first was very valuable… That improved the surface finish (but the top was still pretty ugly), and gave me the highest tensile strength I have measured so far… However, I am going to go back to 100% flow and explore other options for now…
Can’t comment on the flow bit… not at that particular stage with my printing to be honest…but, try ironing for the top layer… might help give you a better final result, unless it’s curved… in which case, ignore me…
You can increase the first pass (only) flow to 125% and it will help push the filament onto the bed giving better adhesion but to much can cause elephants foot.