I discovered Lithophane to print and has been ask to me in high demand to print.
Im including some links to help with the process.
Free Photo Editer to remove back grounds for example and retouch pics
For those that have done this here before, will a standard Ender 3 do it with a .4mm tip? I had tried a couple of times only to have it fail. But I was printing it standing upright. Can one make one of these laying down flat on the bed and have it turn out even just ok? Thank you.
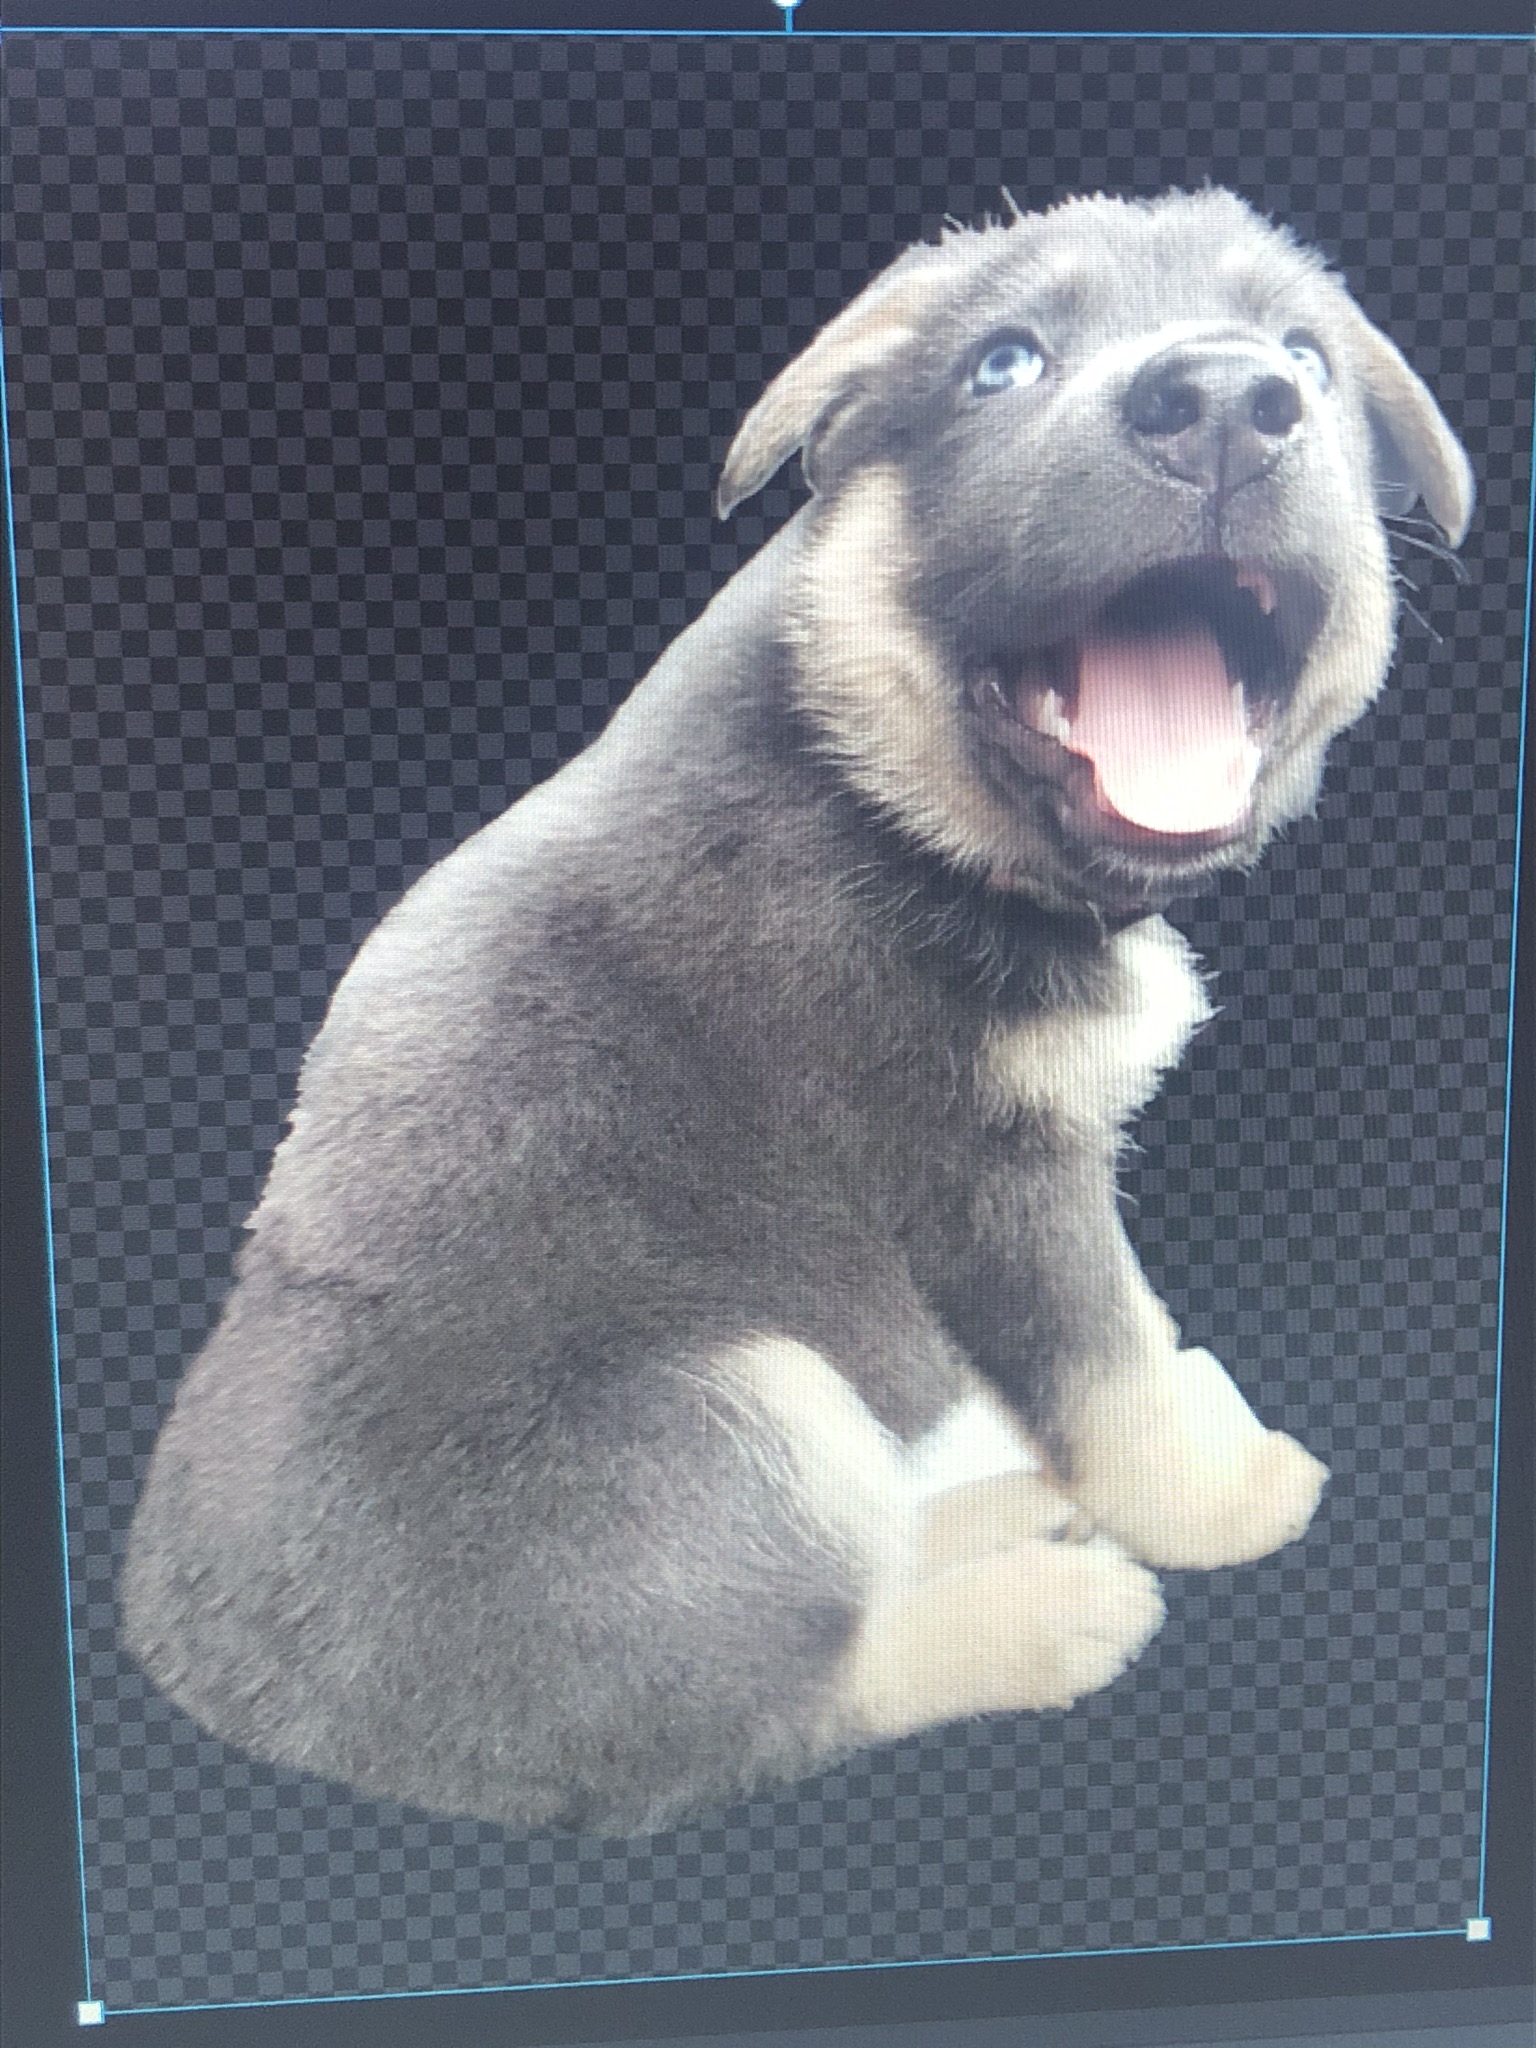
Its better standing up, for thin piece use bed adhesion brim, for pictures I found it’s best to remove background.
Adjusting brightness and the contrast make features stand out.
In Cura .16 or even .12 Infill at 0 change Shell Wall line count to 5
This has given me great results.
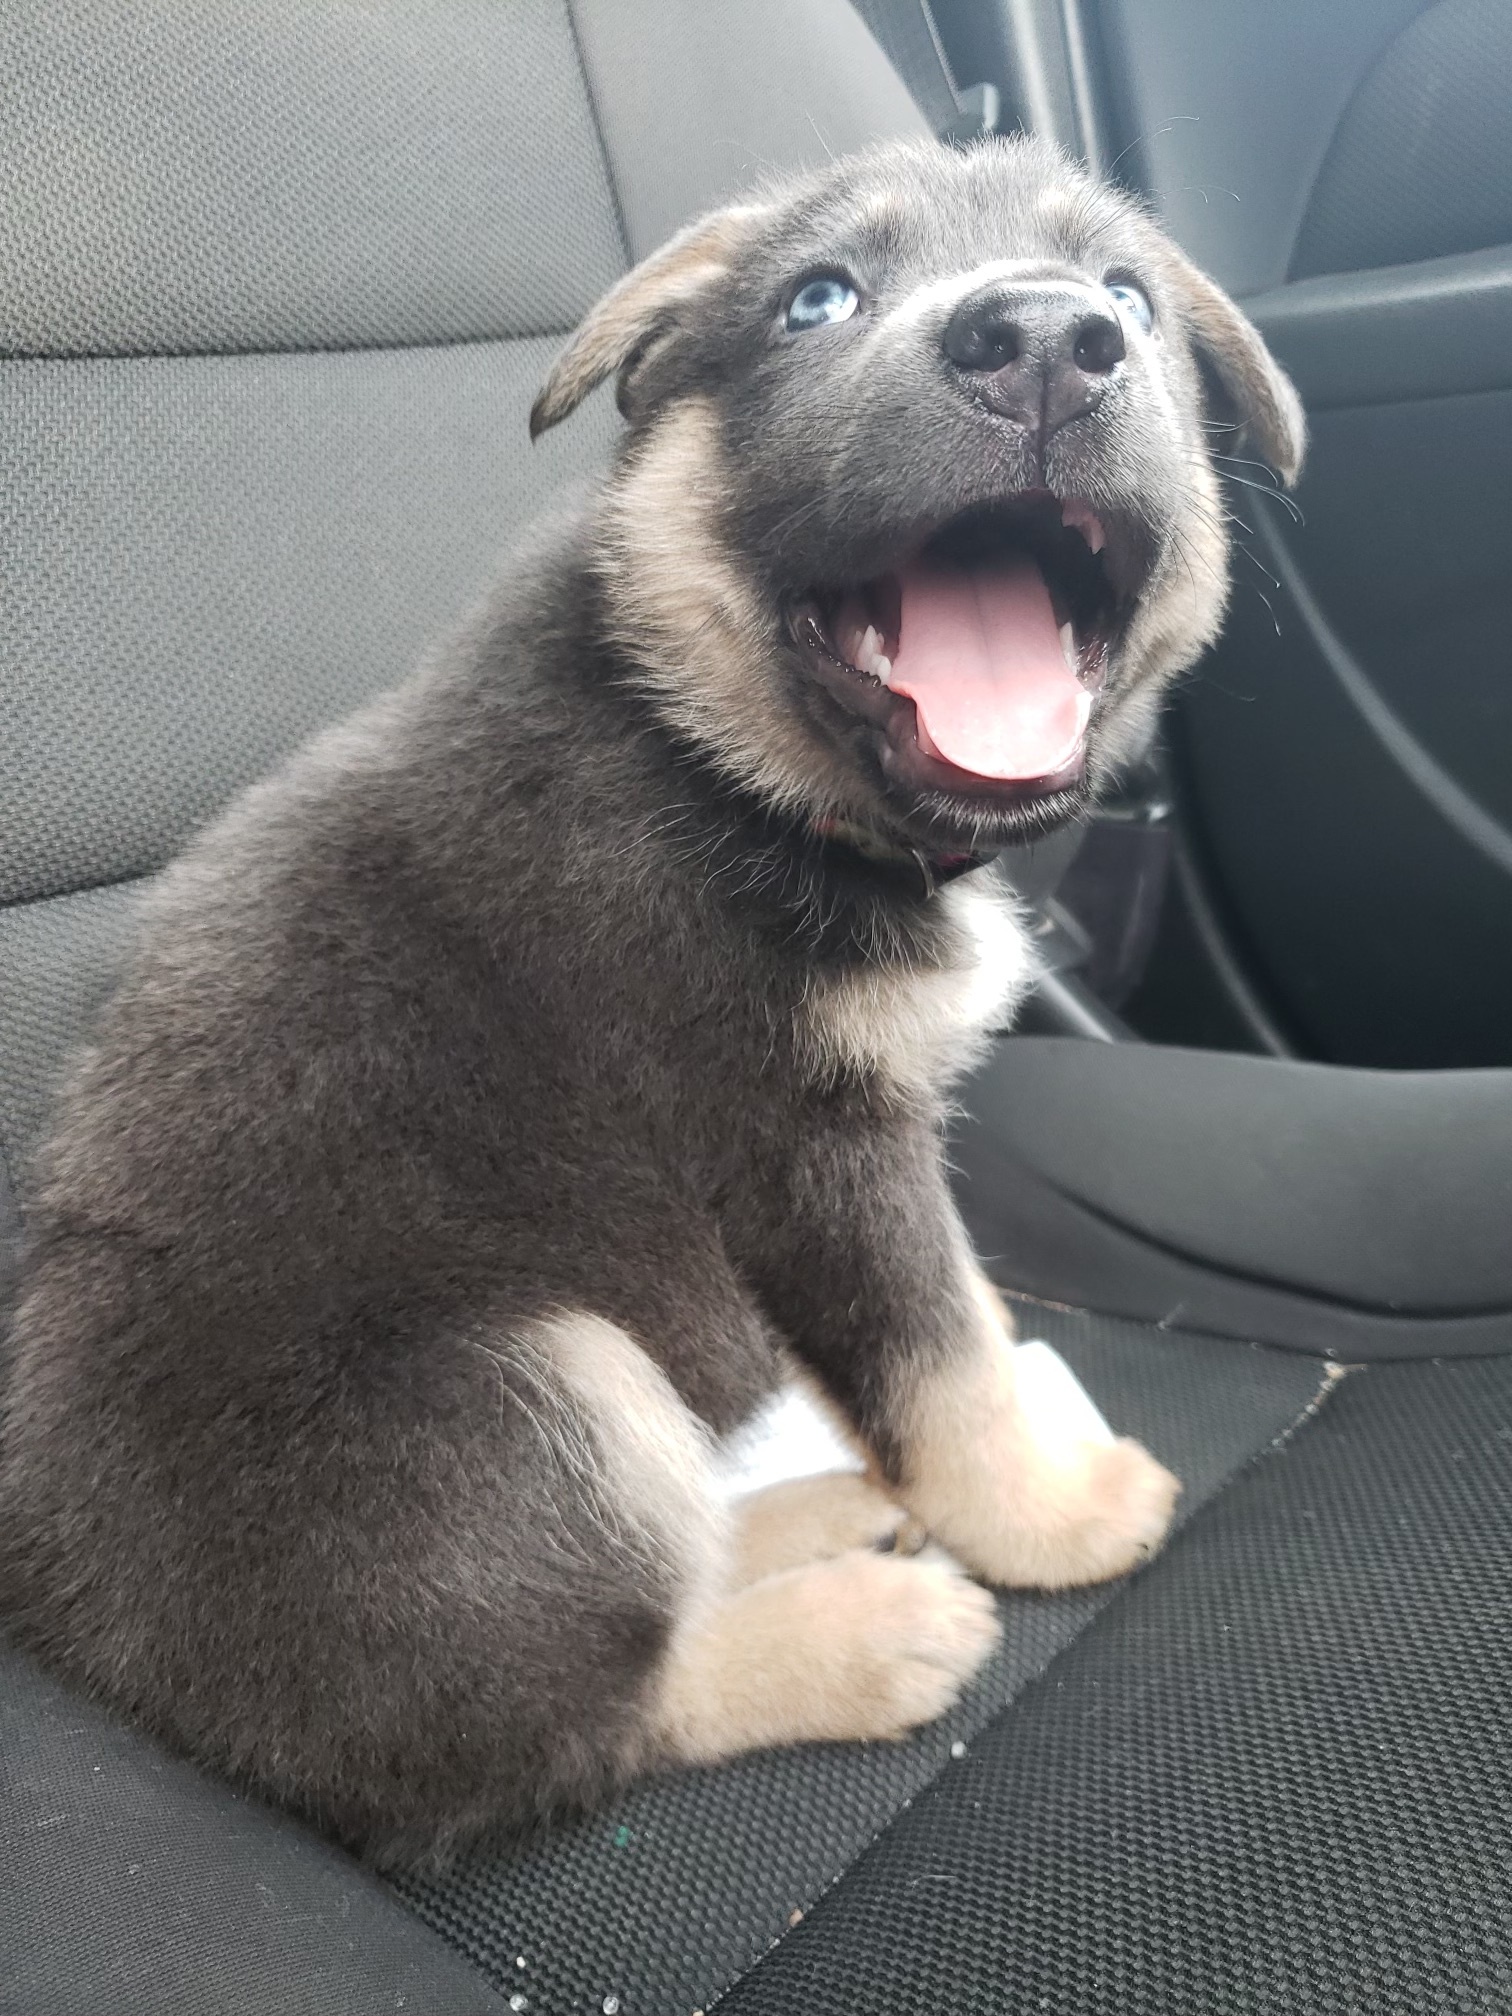
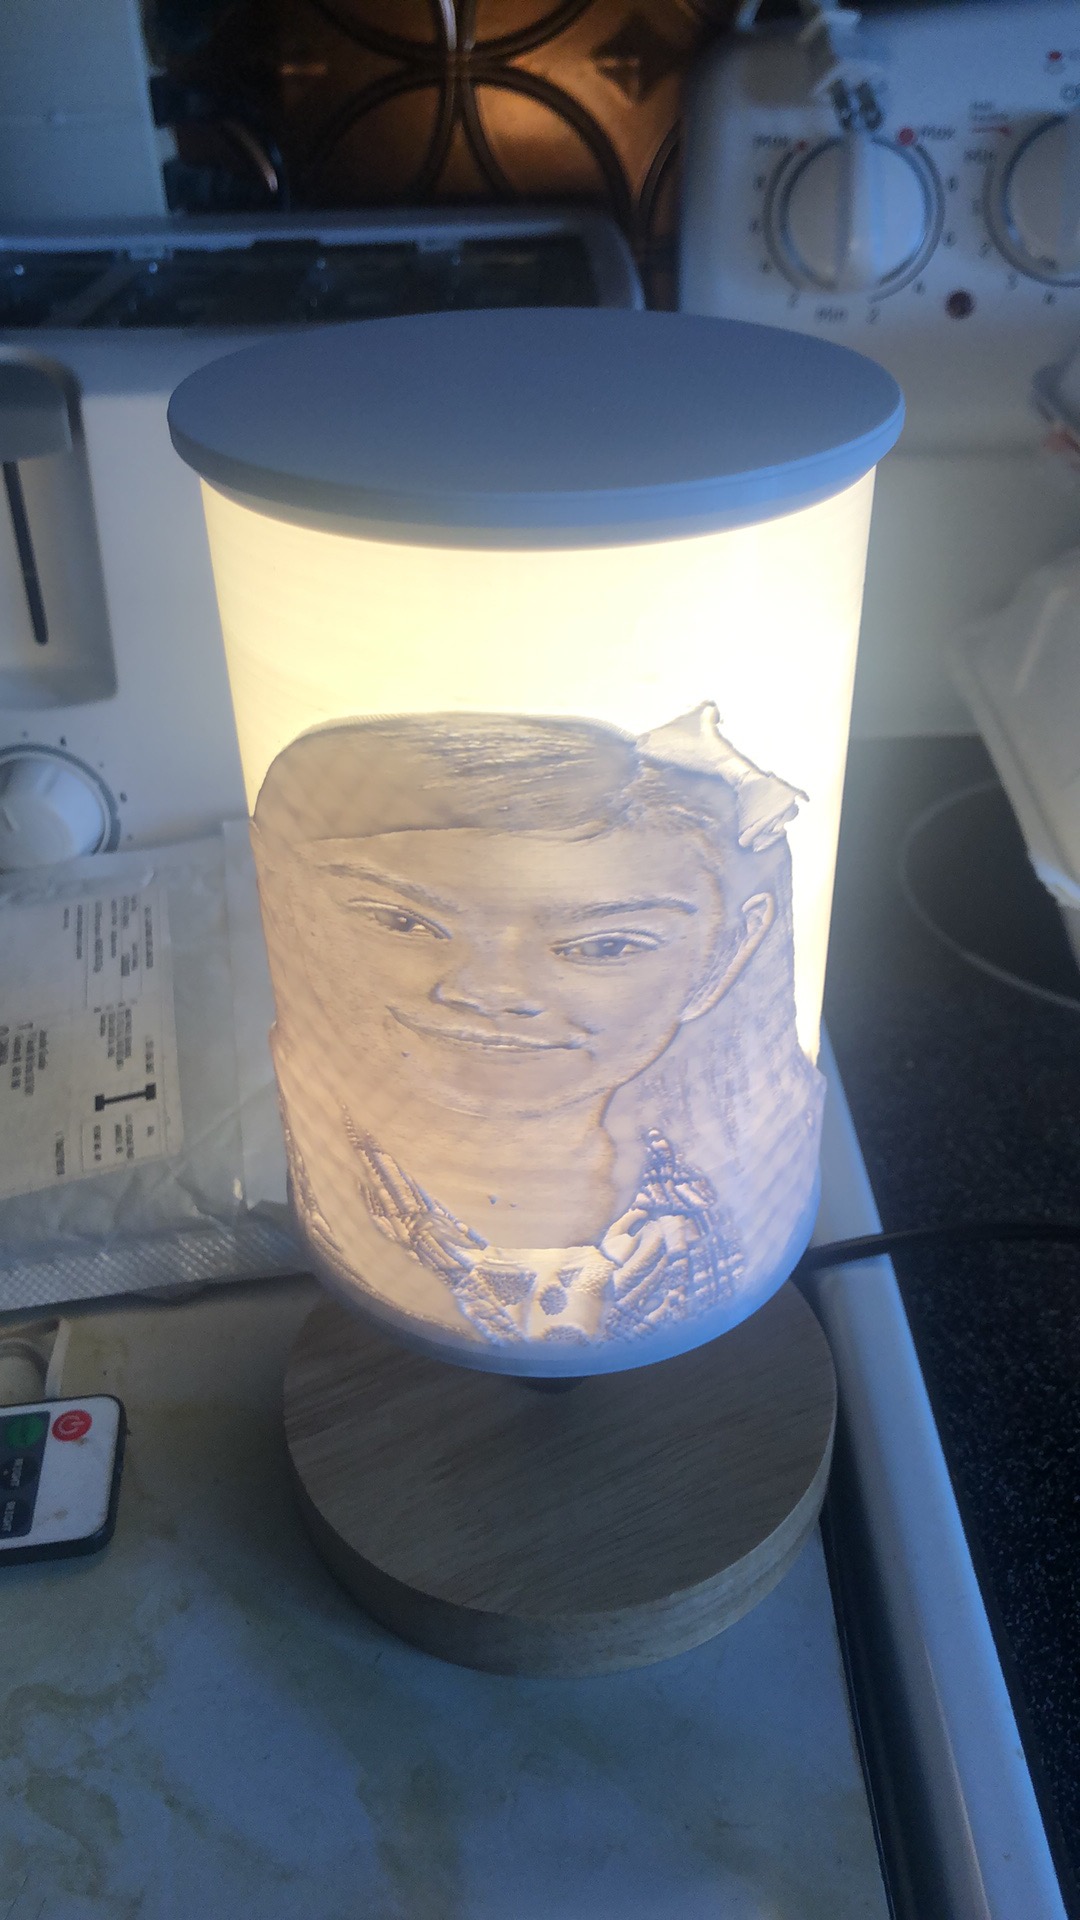
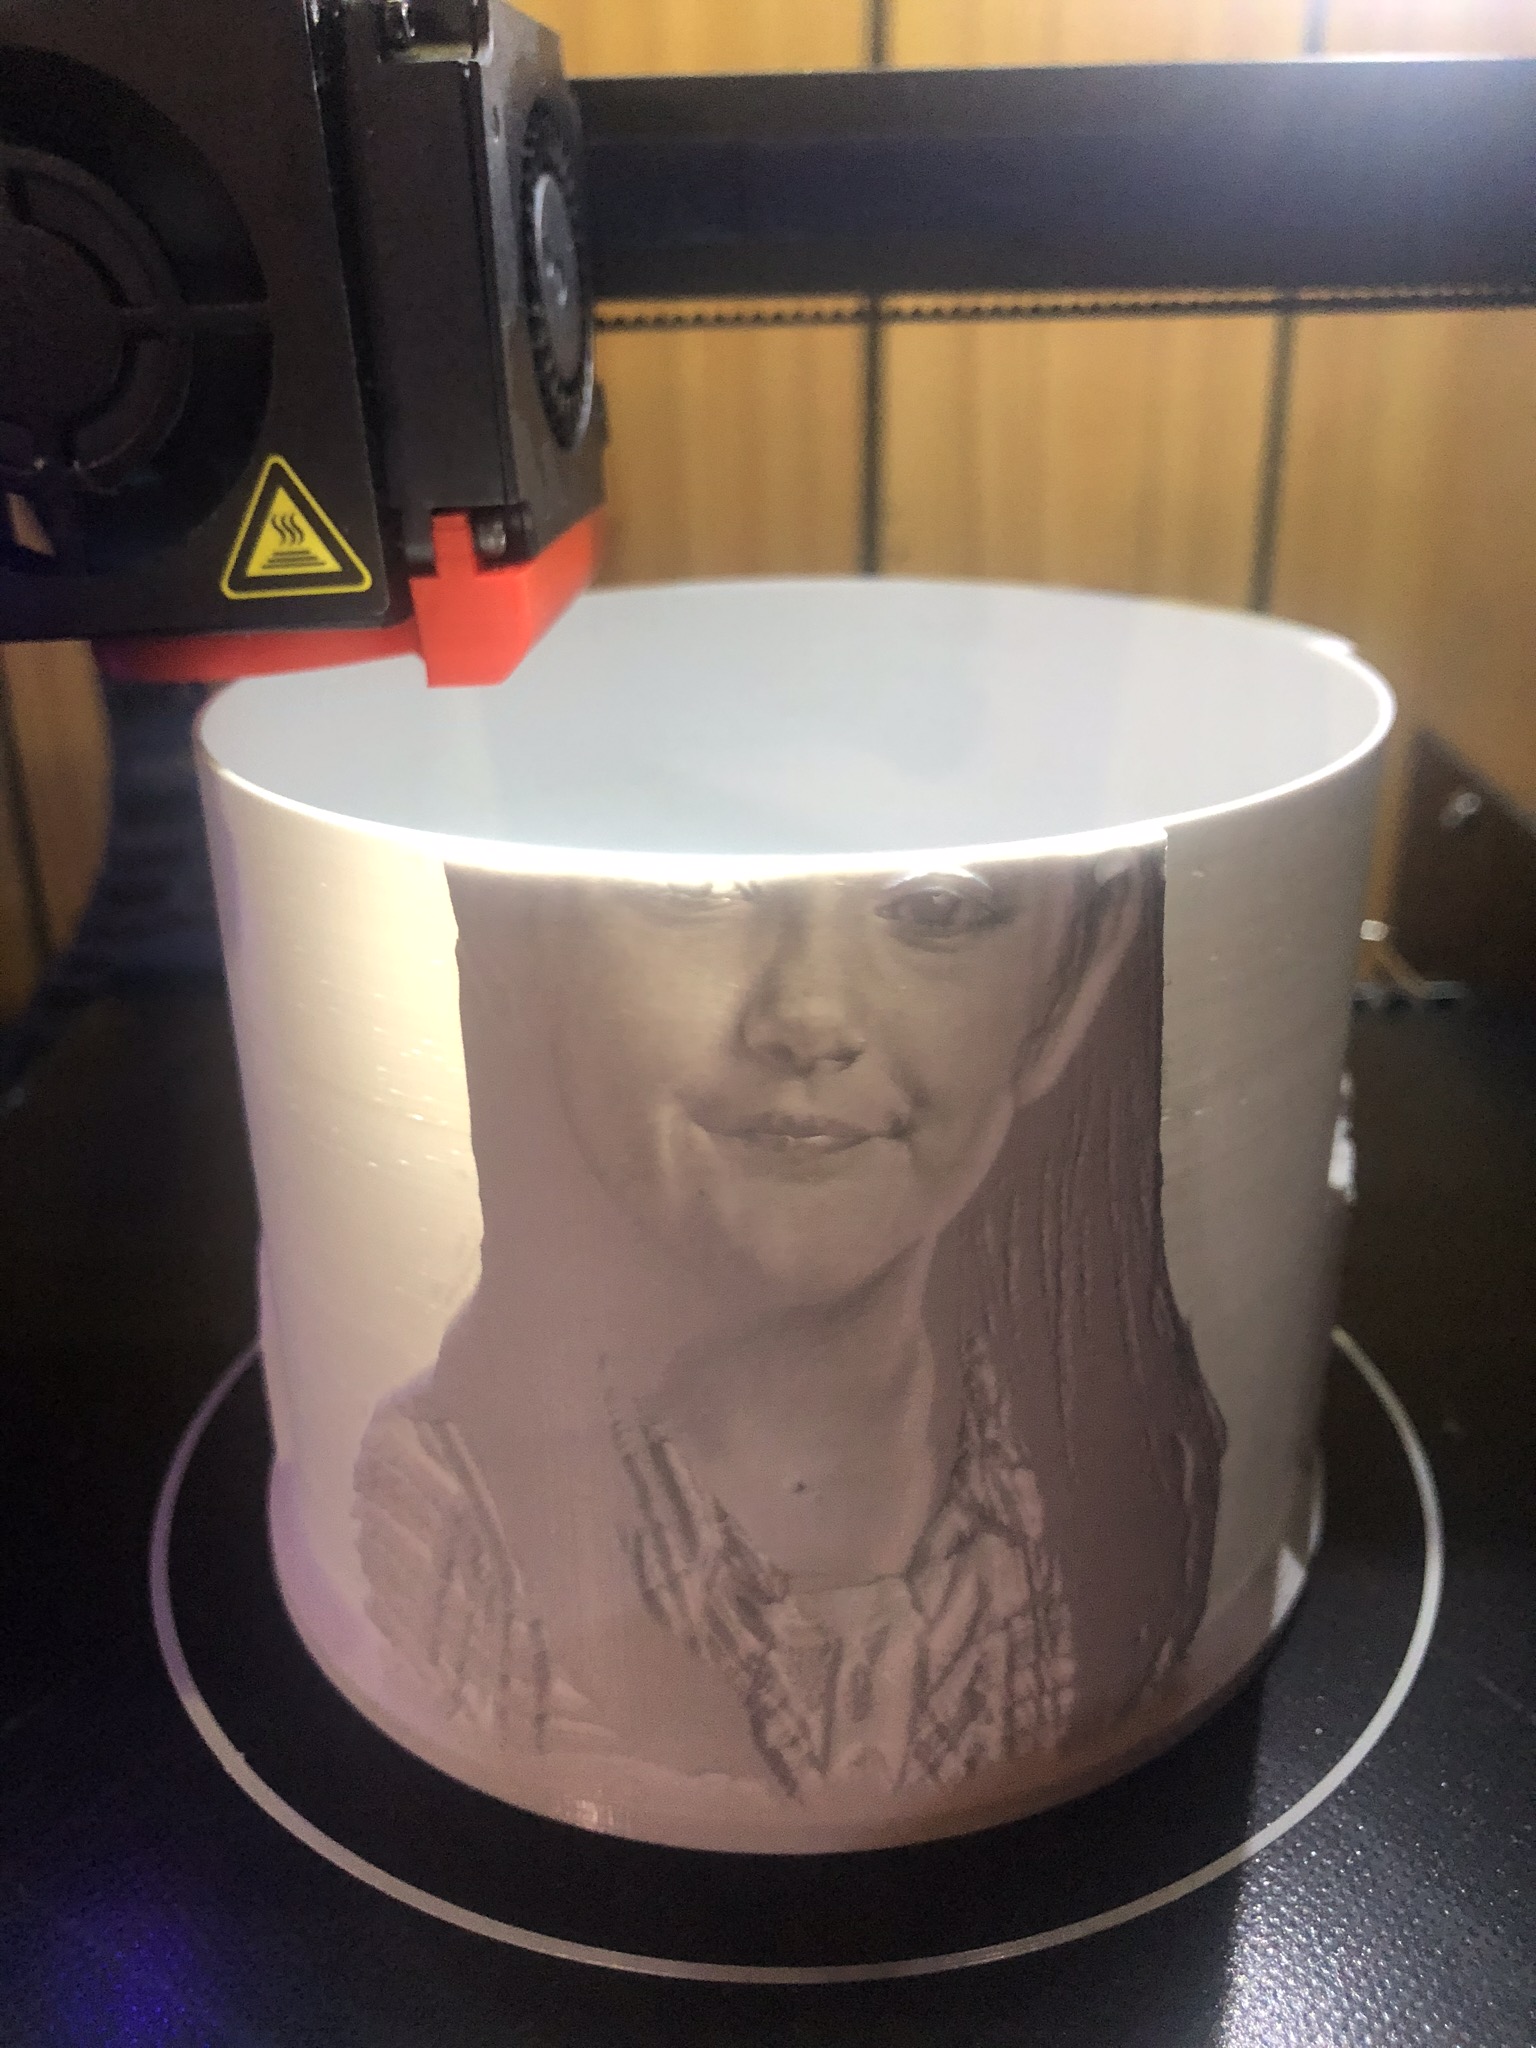
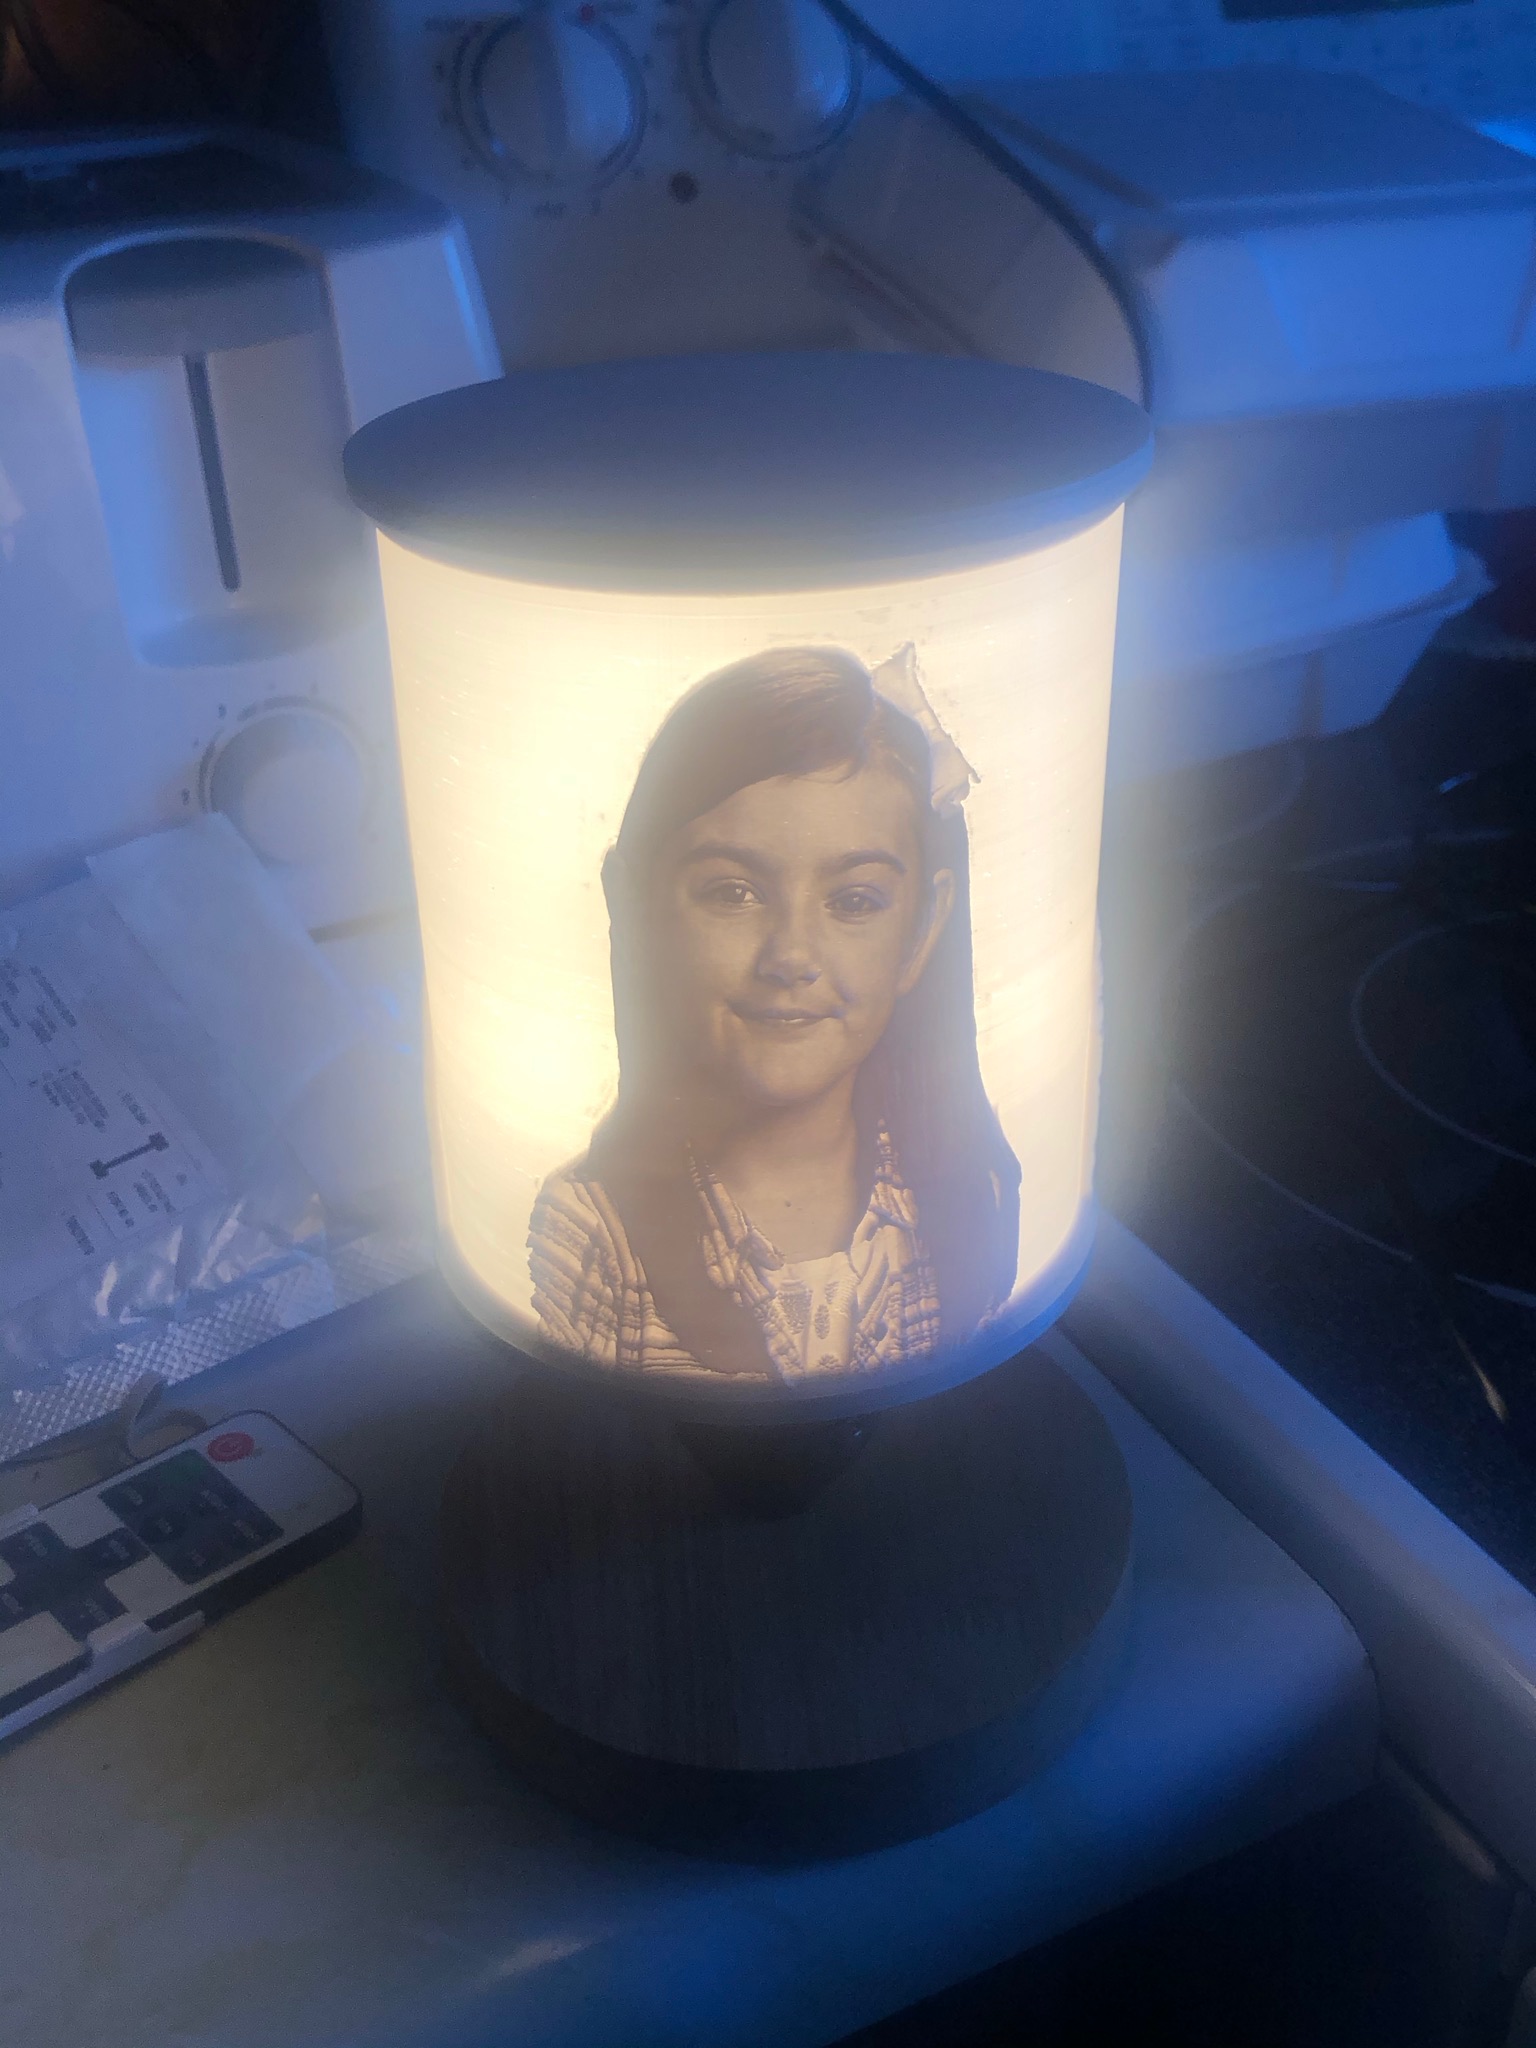
Example: Making a lamp for someone for a dog that has passed away, Original pic, modified pic, Shade for the lamp
Sorry my question may not have been worded properly, or I just plain old don’t understand this yet. I do see what you did, and an amazing job at that. What I was referring to was a flat lithoplate such as one someone could stand in a window or possibly smaller like a keychain. That is what I had tried. If memory serves me well, I believe it was going to be 3mm thick overall. If I was to try something like yours I think I would have succeeded. I did have ‘adhesion’ checked off, but was a flat plate being built up standing on end.
If I may ask, how do you get the background removed from a photo? Is there a program to do this, or is there a lot more learning how to use another program? Or, would it possibly be better to try and print it curved, rather than flat? Is there an online lithopane program you use to do this? I am now even more destined to try again! Thanks.
The lithophane program I used are in the link above. For pictures there is all kind of software out to help remove the background as it make it stand out better. Sometimes it is a bit tedious to try to do that because you have use a cut out tool and get close to the edge of the image. This step is mor like picture editing before it is use in the lithophane.
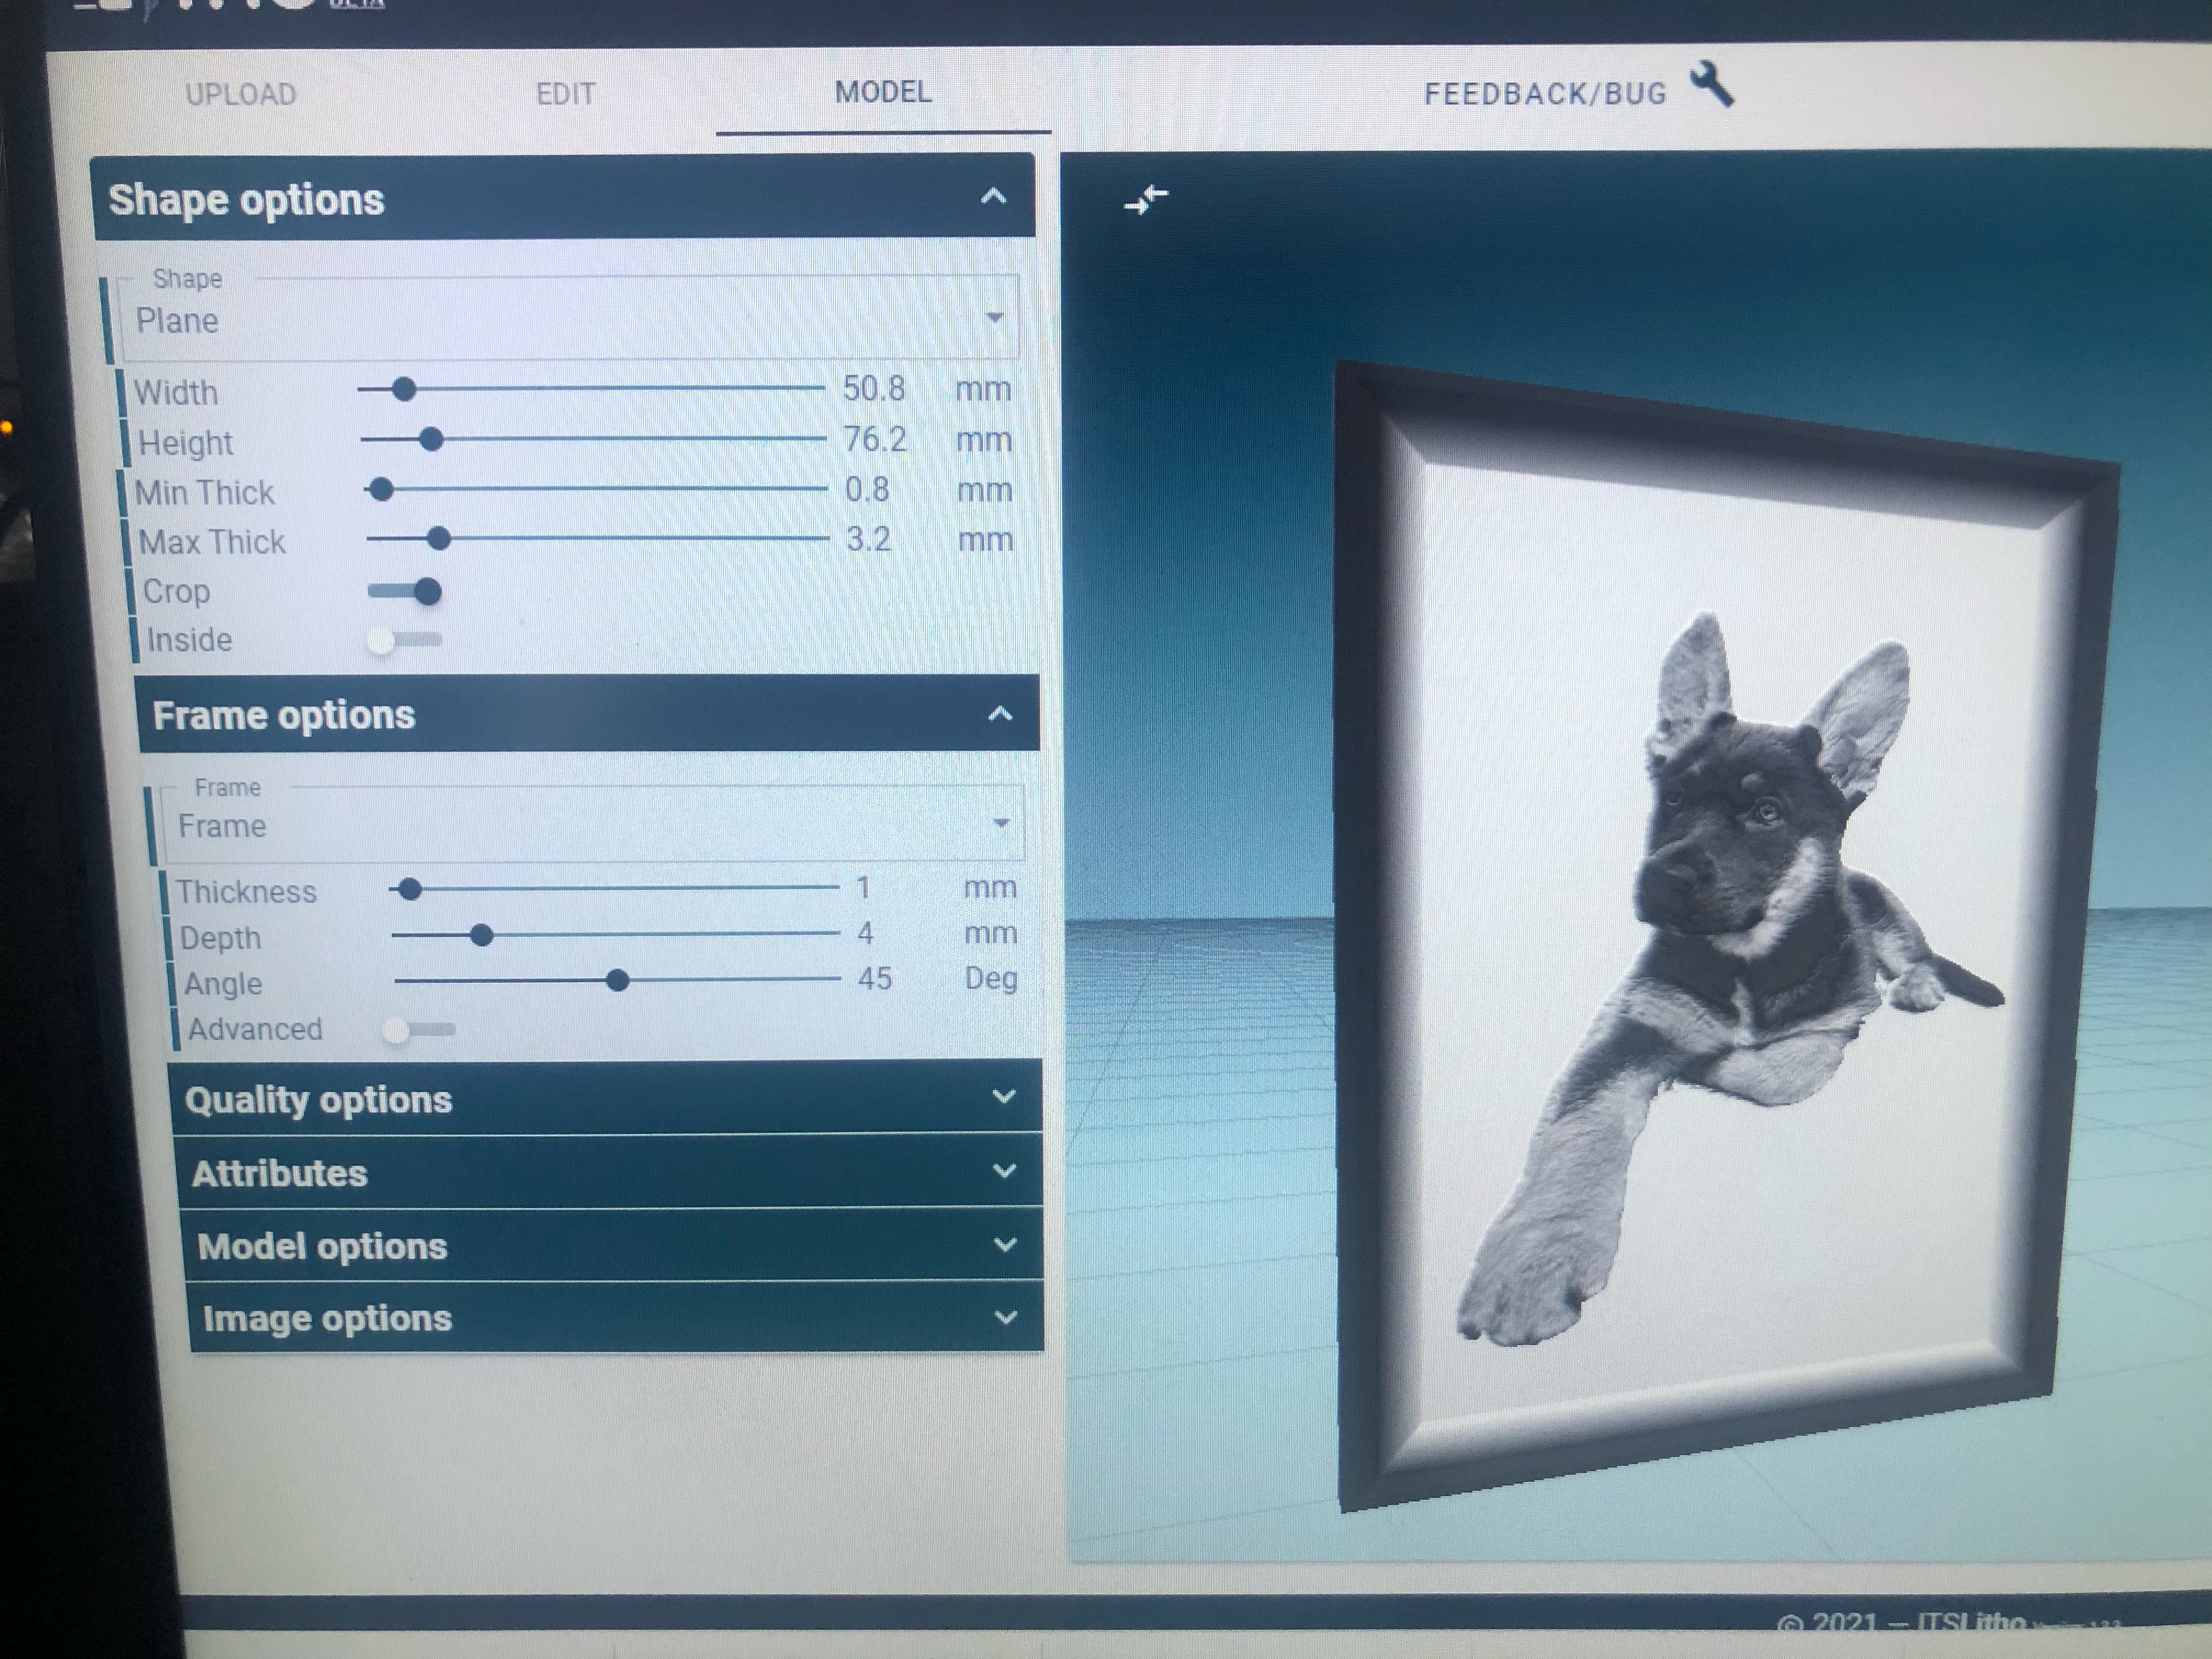
The video above helps to understand the lithophane. Most of the small one I created was 4mm thick but the image in the program are set min 0.8mm and max 3.2mm that is for the difference between light and dark of the image.
In the program you upload that image you removed the background then Edit, Image Editor change the Brightness and Contrast as needed,
You can also Image Transformations crop the image to help centering it.
Under Model
Shape options, Shape you pick what you want to creat, I would recommend trying flat first as for the curve one there is a bit to adjusting the image so it dont look squishy.
You can change the size there too but for now keep the default value I stated above for the image.
Like for the Heart shape for example there is also Attributes where you can select Enable Hook and size it, keep in mind about how its printed, I printed those Upside down still vertical.
Down the bottom left Image Options help with the position and size of the pic in the frame.
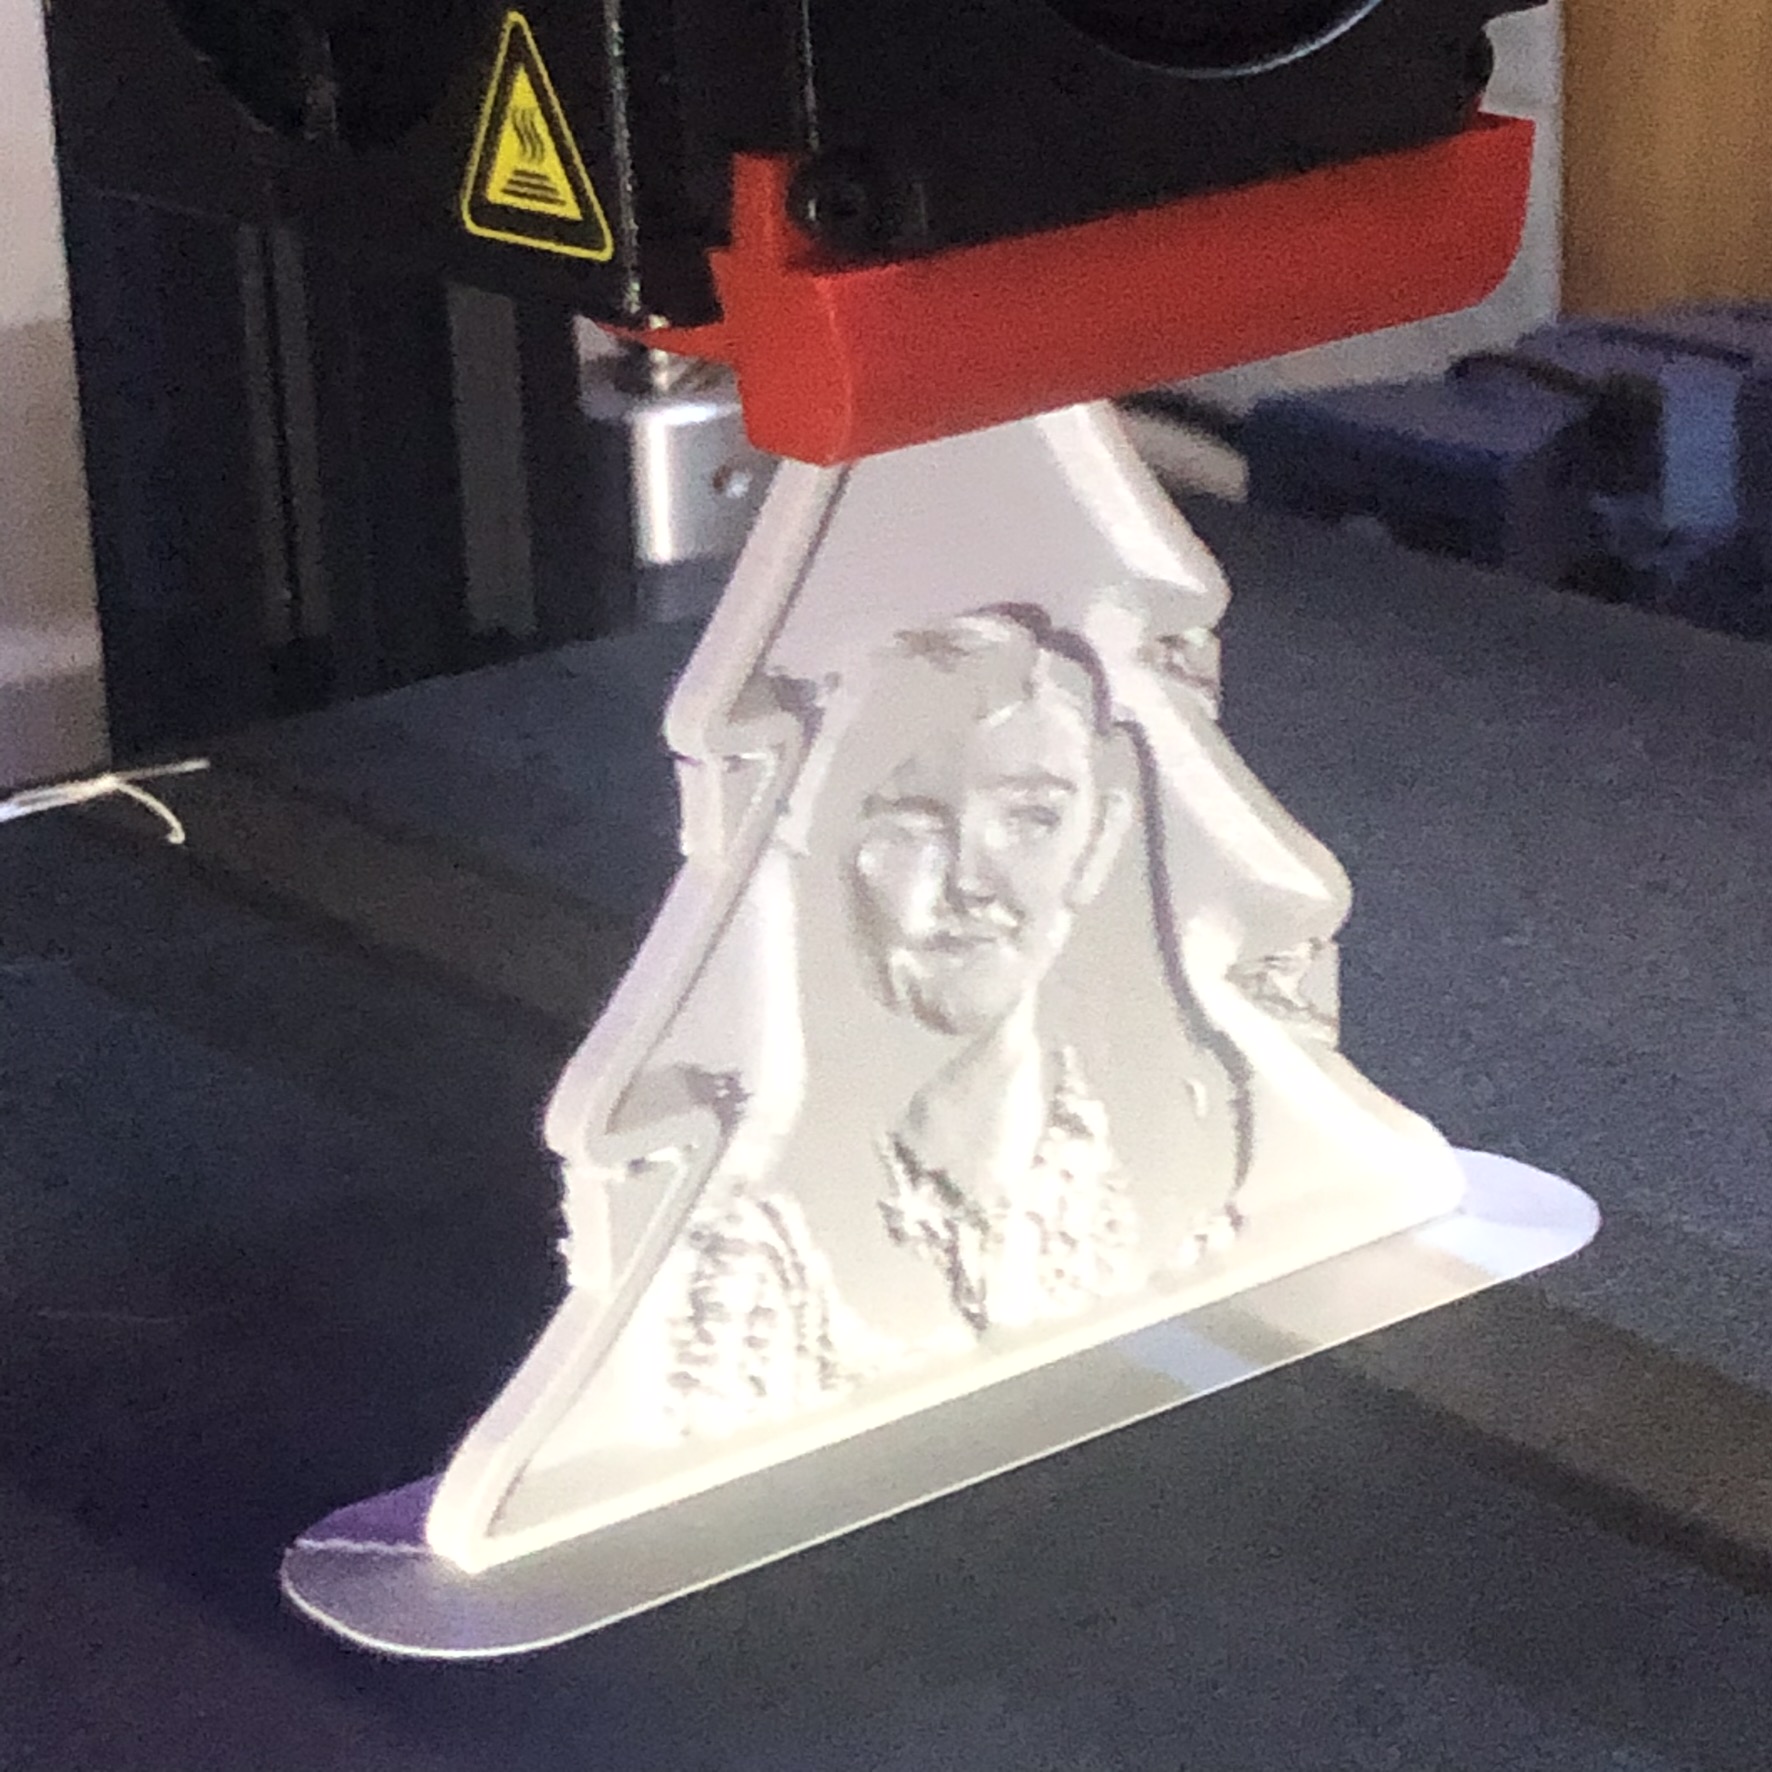
Printing is better with low layer lines and in line with the Y direction so that the X move is minimal because of the thickness.
I made a few mistake myself when I forget about NO INfill so you cam say 100% or 0% with a line count on shell at 5. I also made mistake in playing with the Depth Min and Max when I didnt understand what it was for. I include a round shade that the infill was on and image was squish because it tried to wrap it around and a night light cover that didnt turn out well because of what I did to the min and max depth.
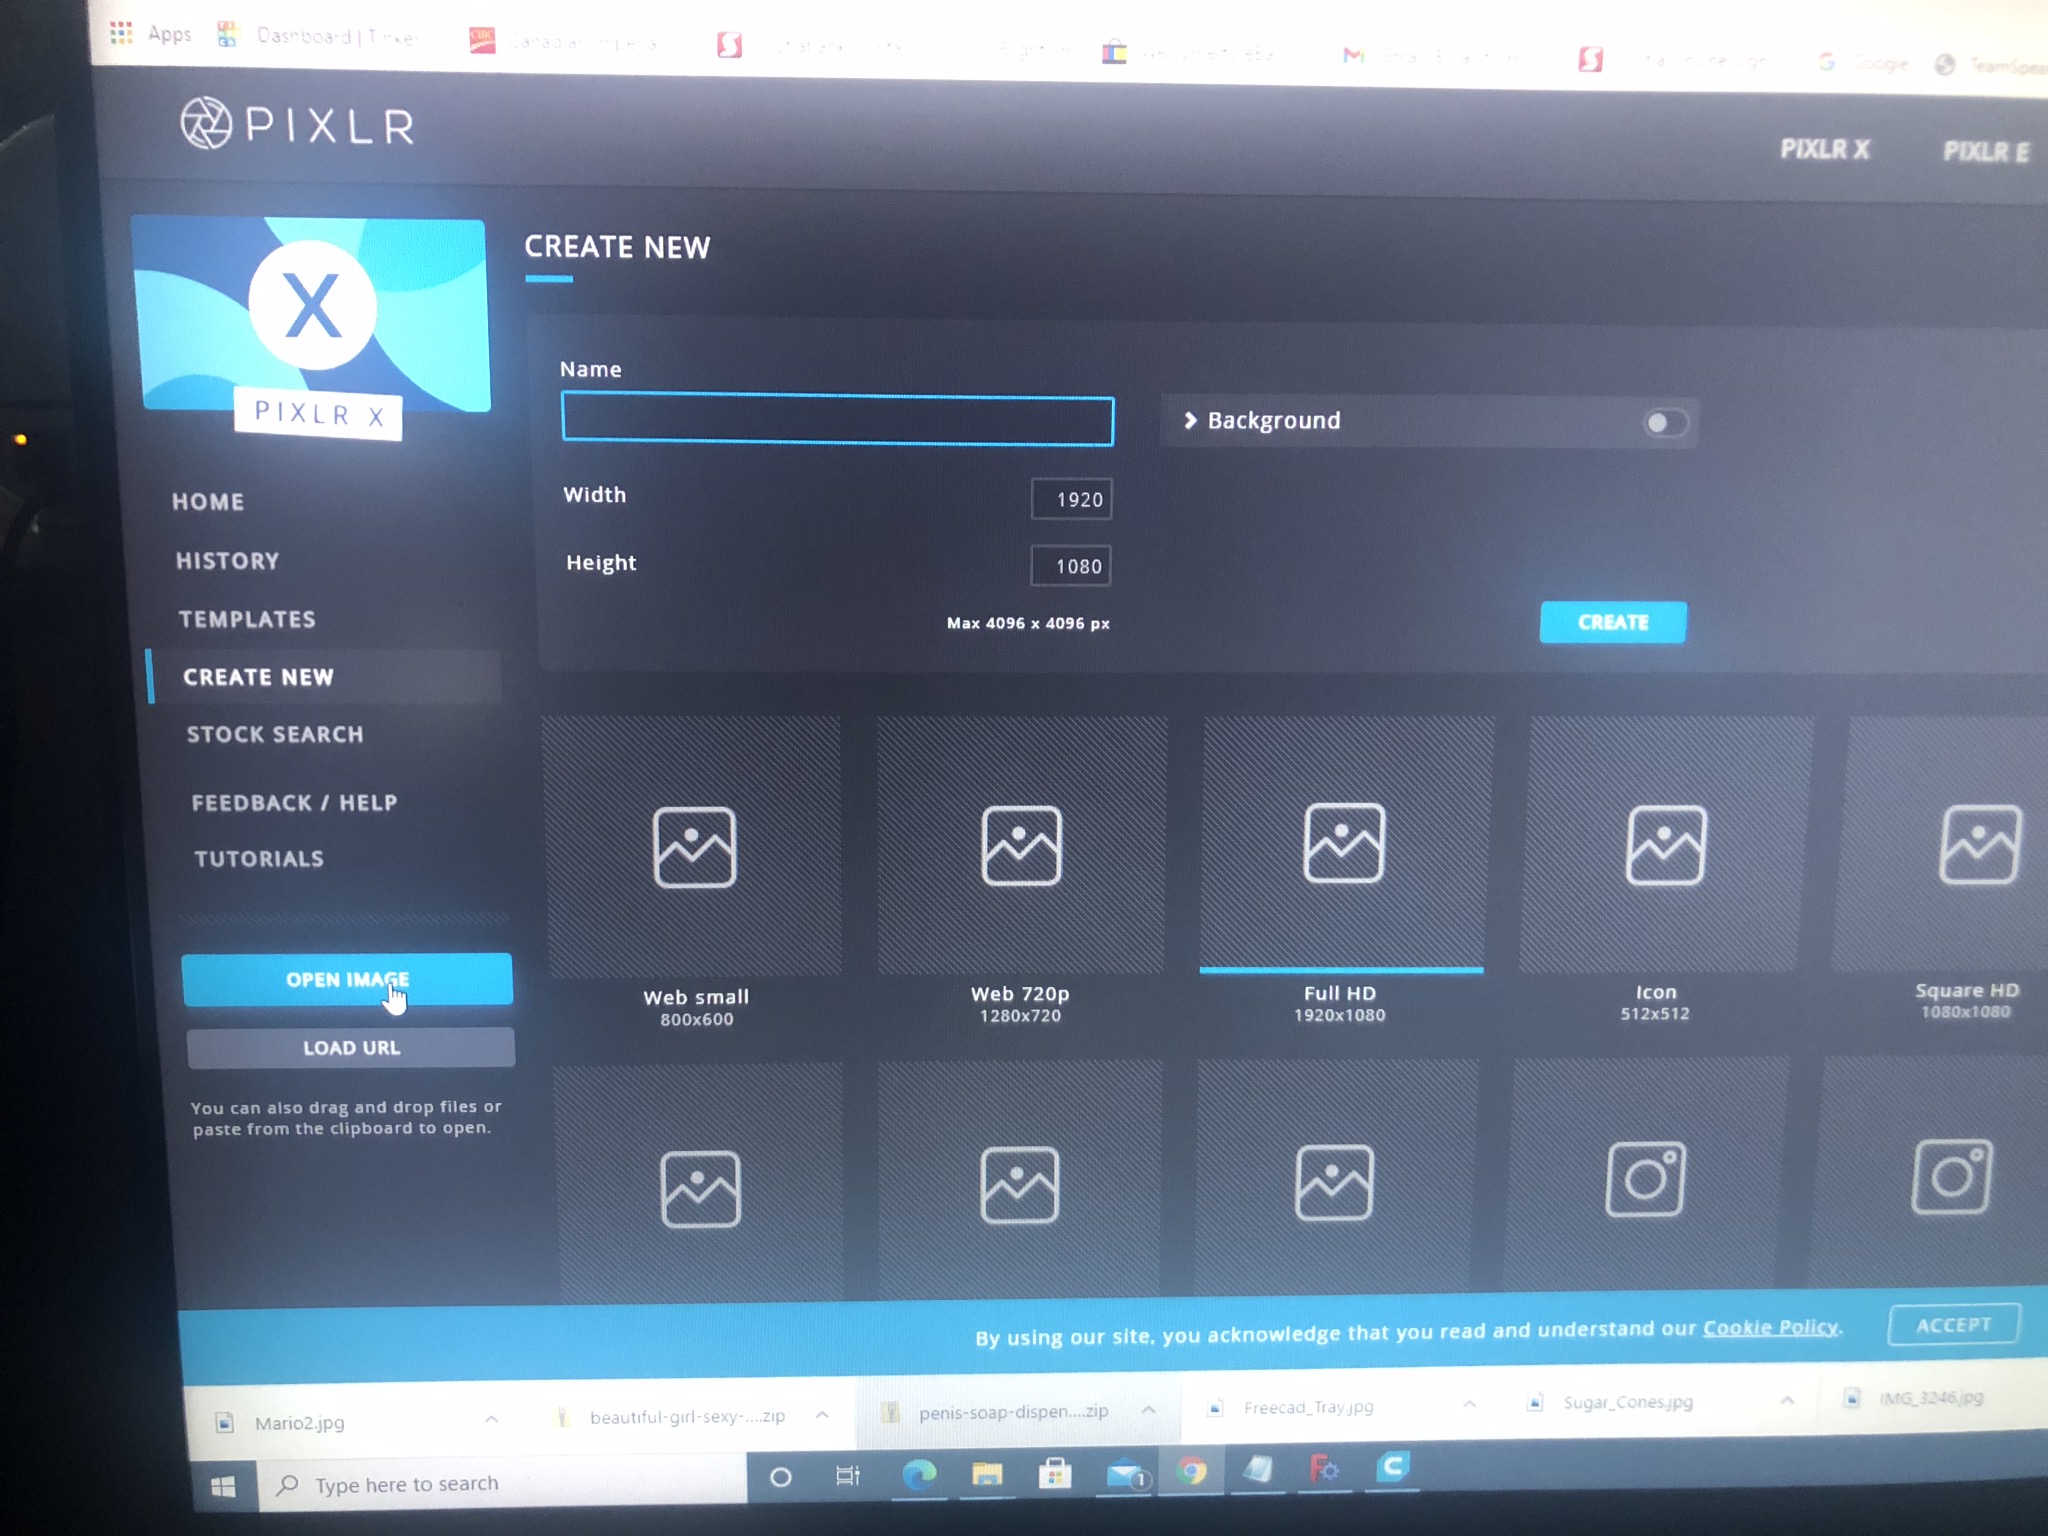
For the pic editing I included a free online program.
Just Create New
Open image to up load your pic and Create
On the left there is a pair of scissors for Cutout
Select Remove and pick a tool, you can also change the size of the tool below and the Softness I use 0% for the big part around then I use 50% for close to the image as to blend in a bit. I f you forget even a small bit of background it will show up in Cura as a bump or smudge on the item so you can go back and touch the image again in the area and save it again.
Yes there is a bit of work to it but the result is well worth it.
One more trick!
In Cura I tested 100% vs 0% Infill on a 130mm square lithophane
If you select 0% and in Shell change line count to 5 the same print will be 2.5hrs shorter to print then selecting 100% infill.
I went to the website mentioned above and there was a link there that did the whoever background removal for you, and quick! Now to play around with the lithophane site and try and find a curved lithophane base or whatever one calls it, rather than a straight one. I think curved may be easier to print as I think it may not be as wobbly? I may be wrong though as I am new to all this. Also to try and figure out what size is should make it? Not sure if 3 inches is big enough to see it or not?
Try something small first, like a 3” (76.2mm) rectangle or square, in cura orientation of the print thin part facing you and check Bed Adhesion to have a brim around.
Most of the bed movement will be on the Y axis just going back and forth.
The Christmas tree I did was 78mm plus I had to have support on because of the branch overhang, no trouble to see the pic on it.
I always try small first because some lithophane bigger size will take a lot more time.
There is curved one in the selection, the amount of curve is also adjustable plus there is a couple of option to add a light holder in the back so it can be use for night light cover Very Neat!! But you need to know the size of the light to work properly it is also adjustable.
Nice to see your are trying it!!!
Here is an example to try its 3” high by 2” wide (76.2 x 50.8)
In order to change them separate you check the Crop slide
I also changed the Frame Thickness to 1mm the default was 3mm its up to you how you wants it.
In my case I reduced my image to 85% in Image Options
In Edits after I uploaded my image the brightness was reduce to -0.1 and contrasts adjusted up to 0.1 in this image.
Thank you. I will hopefully have some time tonight to try it out. If not, it will be tomorrow. Funny as you show a dog, and I want to do one of my cat. Lol. Thanks again for the help. I will report back as soon as I try it, either good or bad.