I’m building a terminator style arm model, and will use this thread to show progress. All the model will be created on a Creality resin printer. Its my project to learn more about this technology.
Model was all created in CAD 1:1 scale in SolidWorks.

90% the parts are resin printed now, now working on a few larger parts which have been split into two half’s to fit on the bed.
is yours going to articulate? that’s a lot of little parts heh!

Well, I guess we’ll know you’re finished when your printer becomes armed and dangerous and you stop reporting in.


This is outstanding.
I’ve got a terminator arm printed and waiting assembly, but the detail on this one is above and beyond what I’ve got put together.
Great work!
Thank you, I started building the thingverse version, then decided it was worth the effort to build a unique version. I have one 3D version which is pretty close replica and this version because I wanted, to show extra details. My granddaughter likes robots and I worked on the software used for the T2 special effects many years ago, so the has become a little tribute exercise.
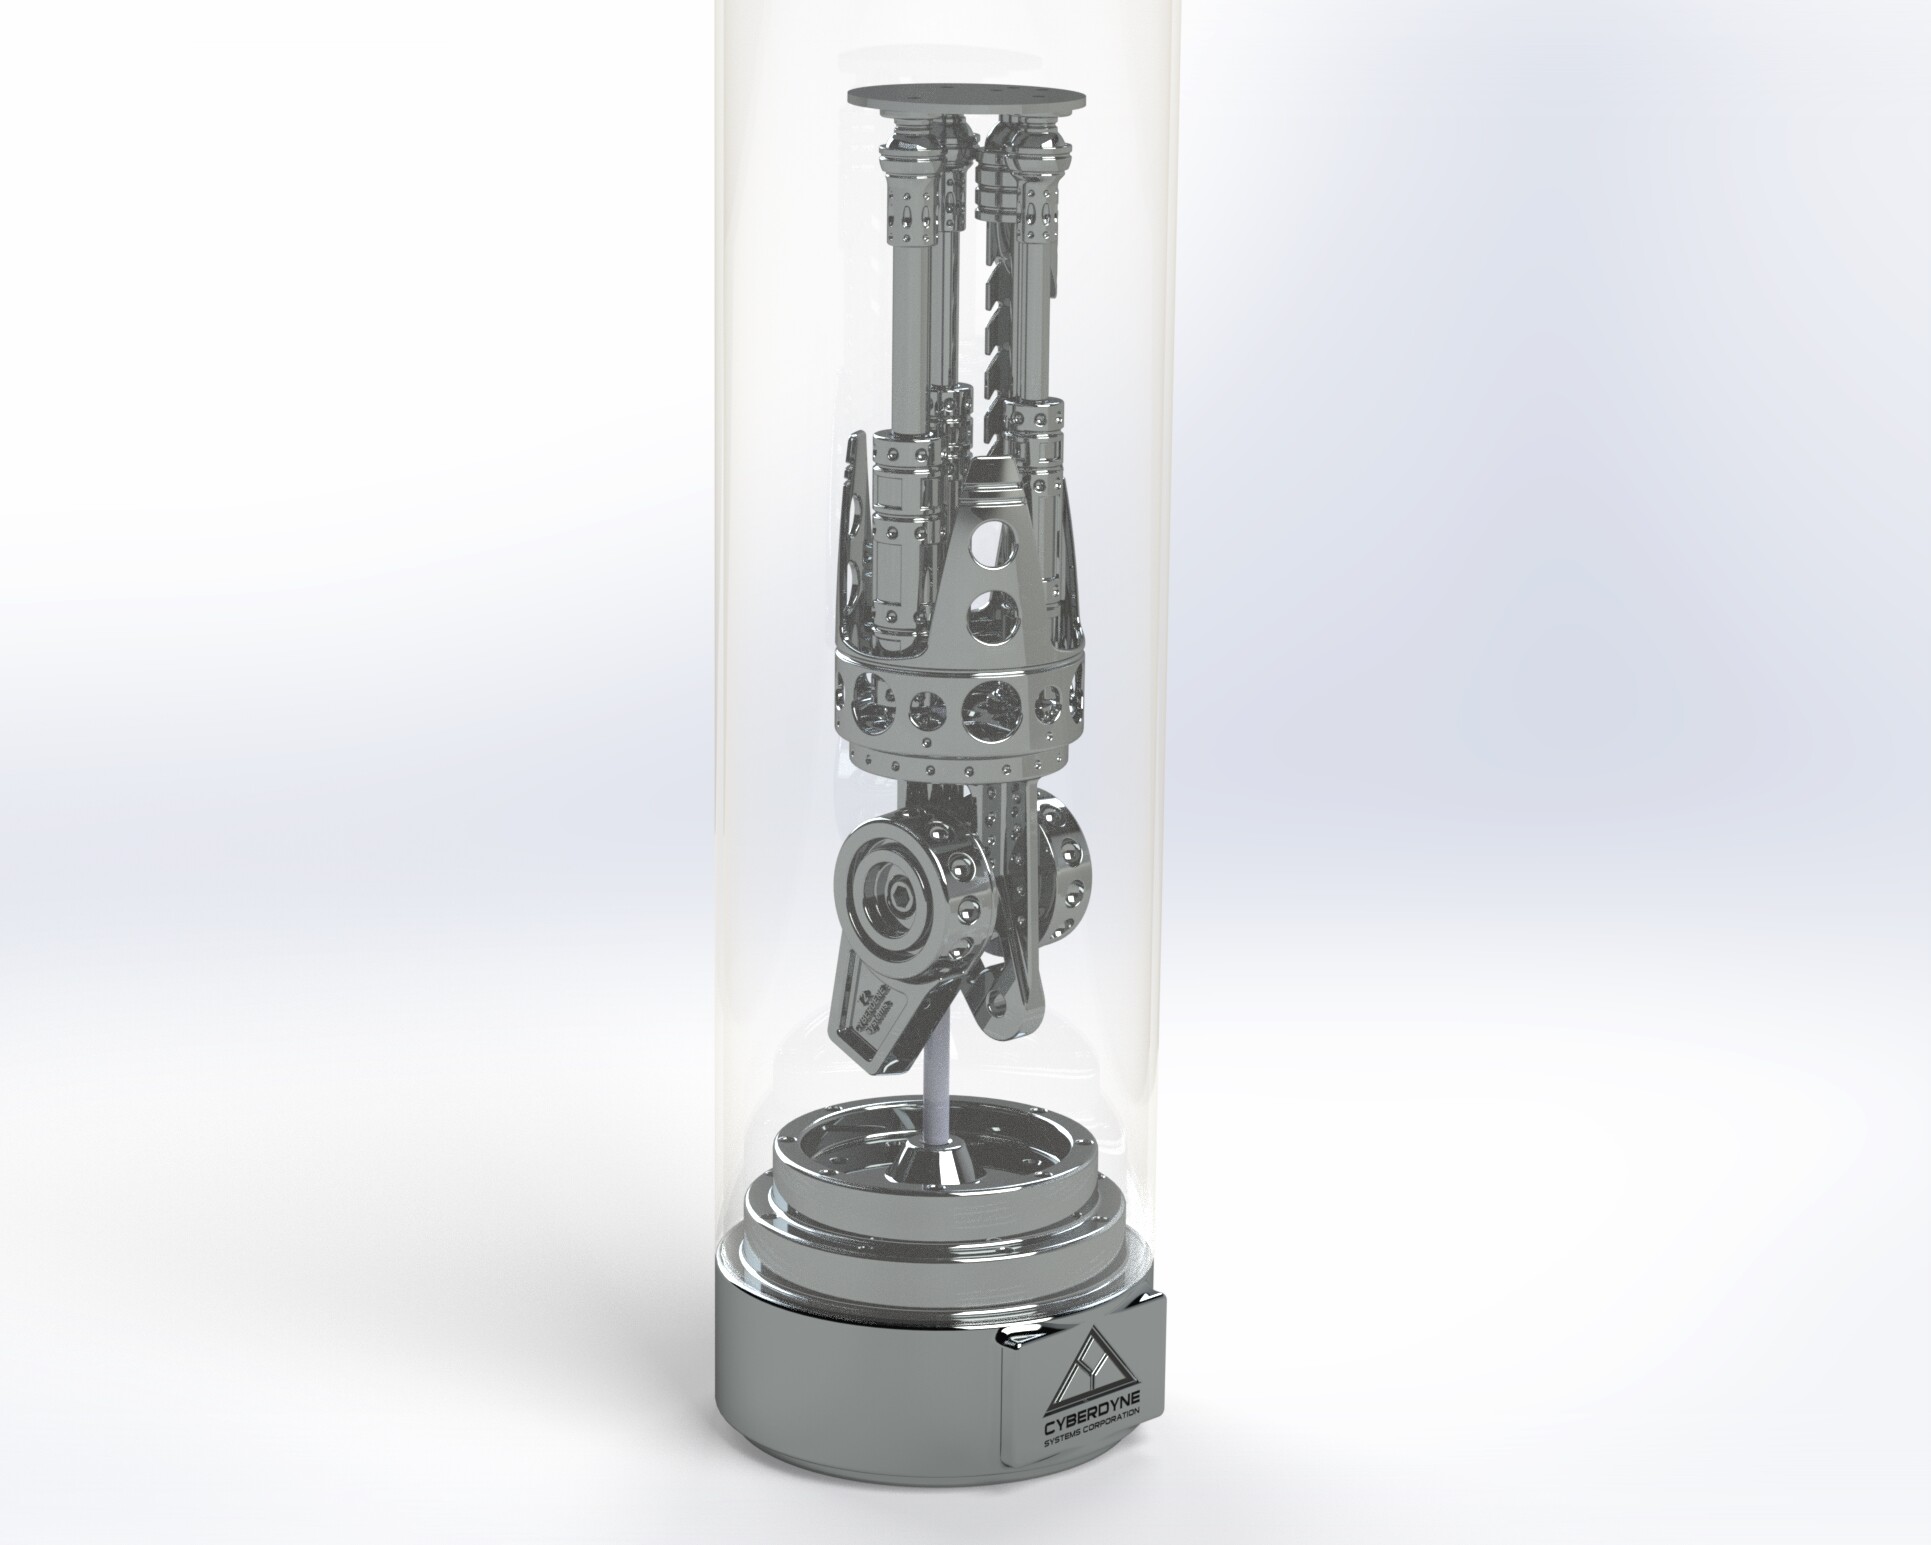
Only part left to print now is the base which will have LED lights and I will buy the glass tube from ikea. It’s been lots of fun, and a lot of work to build in a CAD system.
The software used for the running man liquid metal figure was Alias 2.4.2 developed in Toronto by Alias Research. 3 of the five animators working at ILM worked at Alias before going to ILM in California.
Looking cool.
Can’t wait to see it all put together and finished.

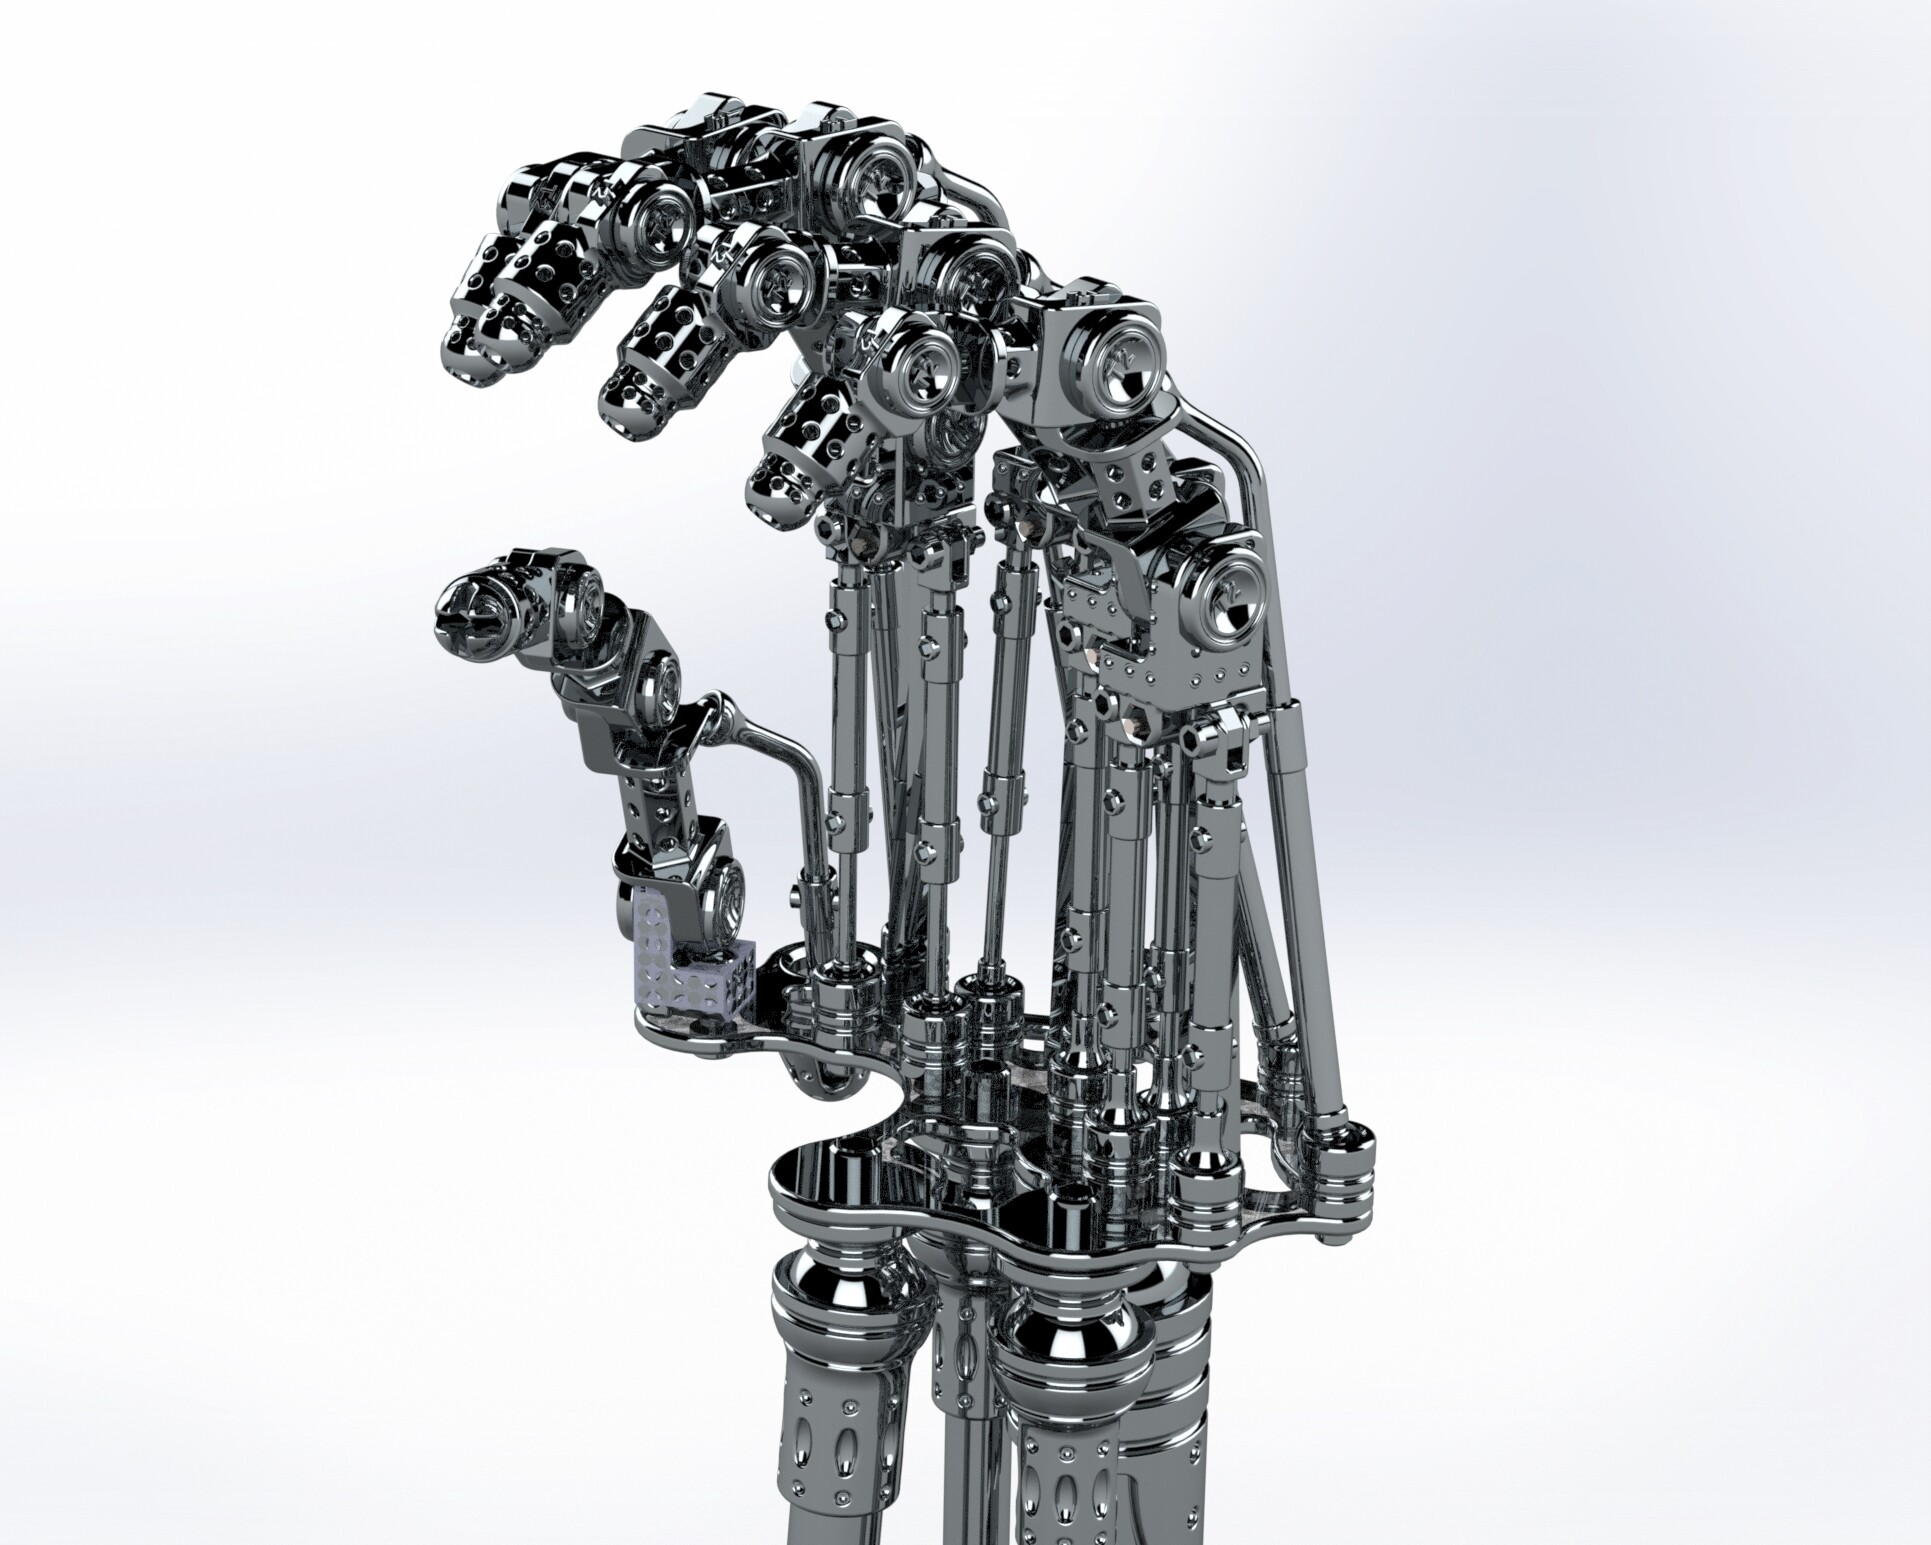
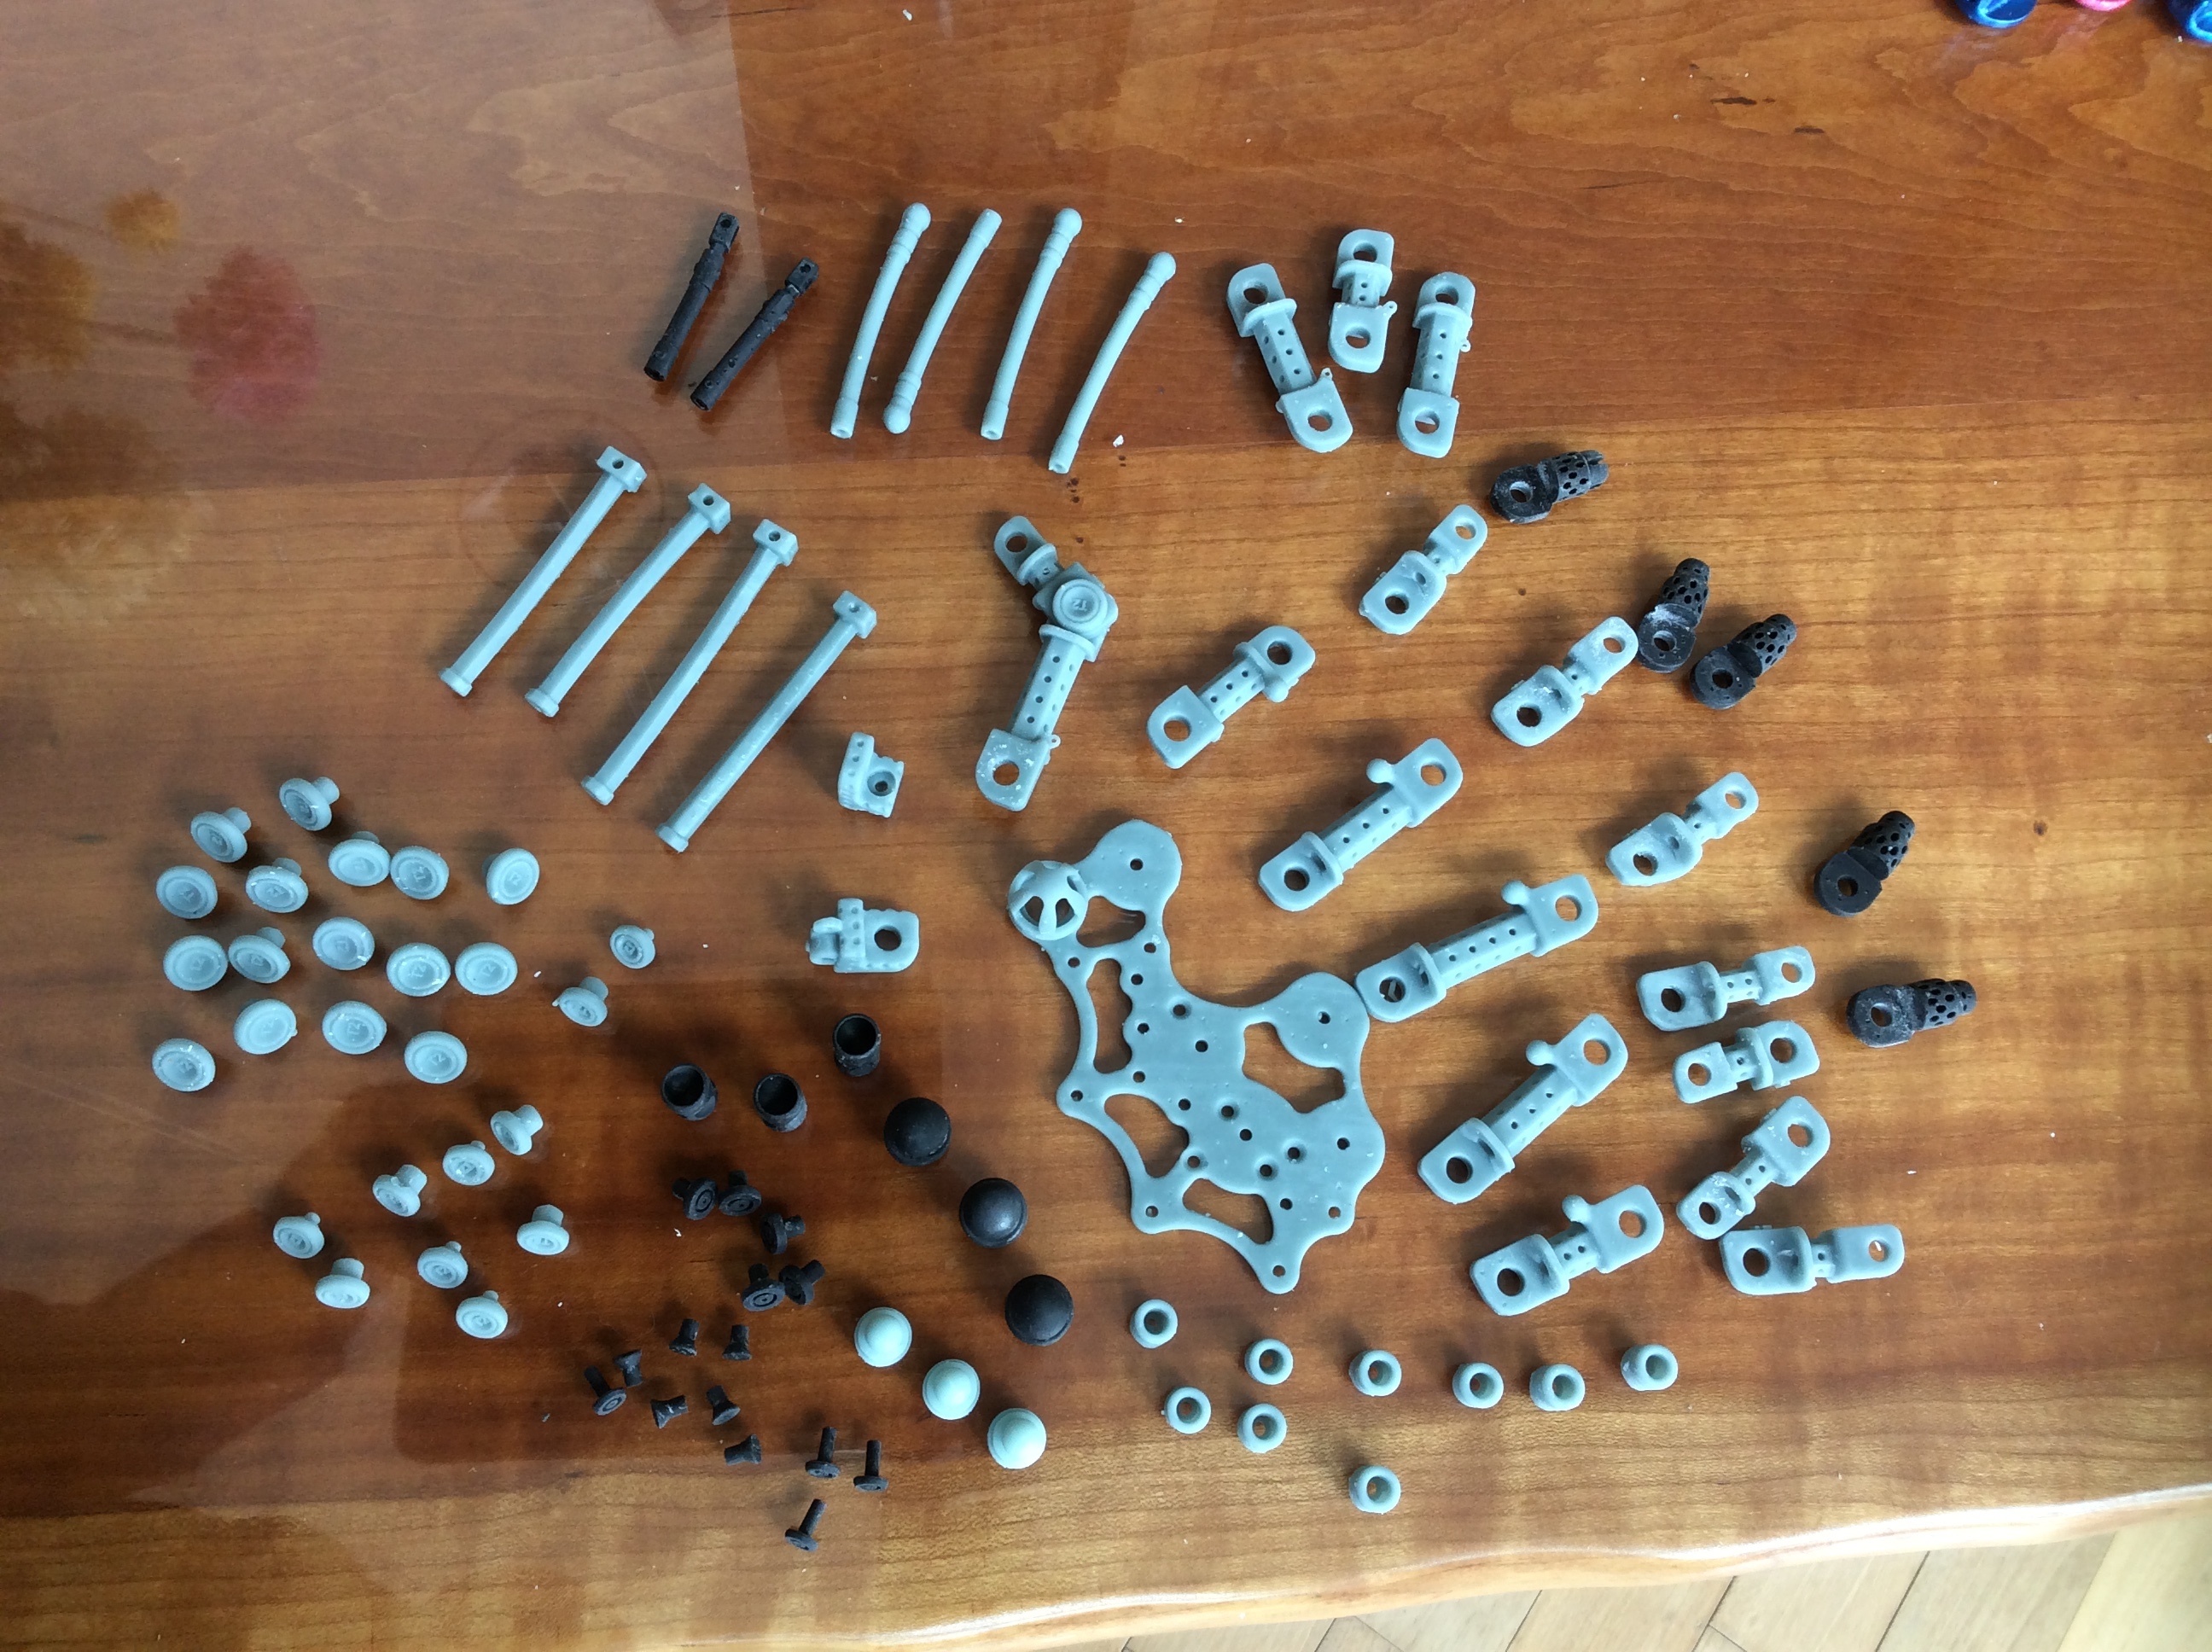
Fingers all completed and now have screws in the joints. I originally made the pivots I two halfs and tried gluing them where they touched, but this did not work. The glue pivot joint is too fragile, plus I wanted to be able to rotate the fingers into a nice position when it’s all assembled. Note anyone wanting to do this projects needs to source some m2, m2.5 and m3 bolts, I was lucky to have them in stock.
I made a mistake yesterday and washed the assembled finger in hotish water so everything was clean before painting. I have used hero resin and water based resin. The hero resin did not like the warm water wash and cracked in some of the pivot points. Very annoying but a good lesson learned.
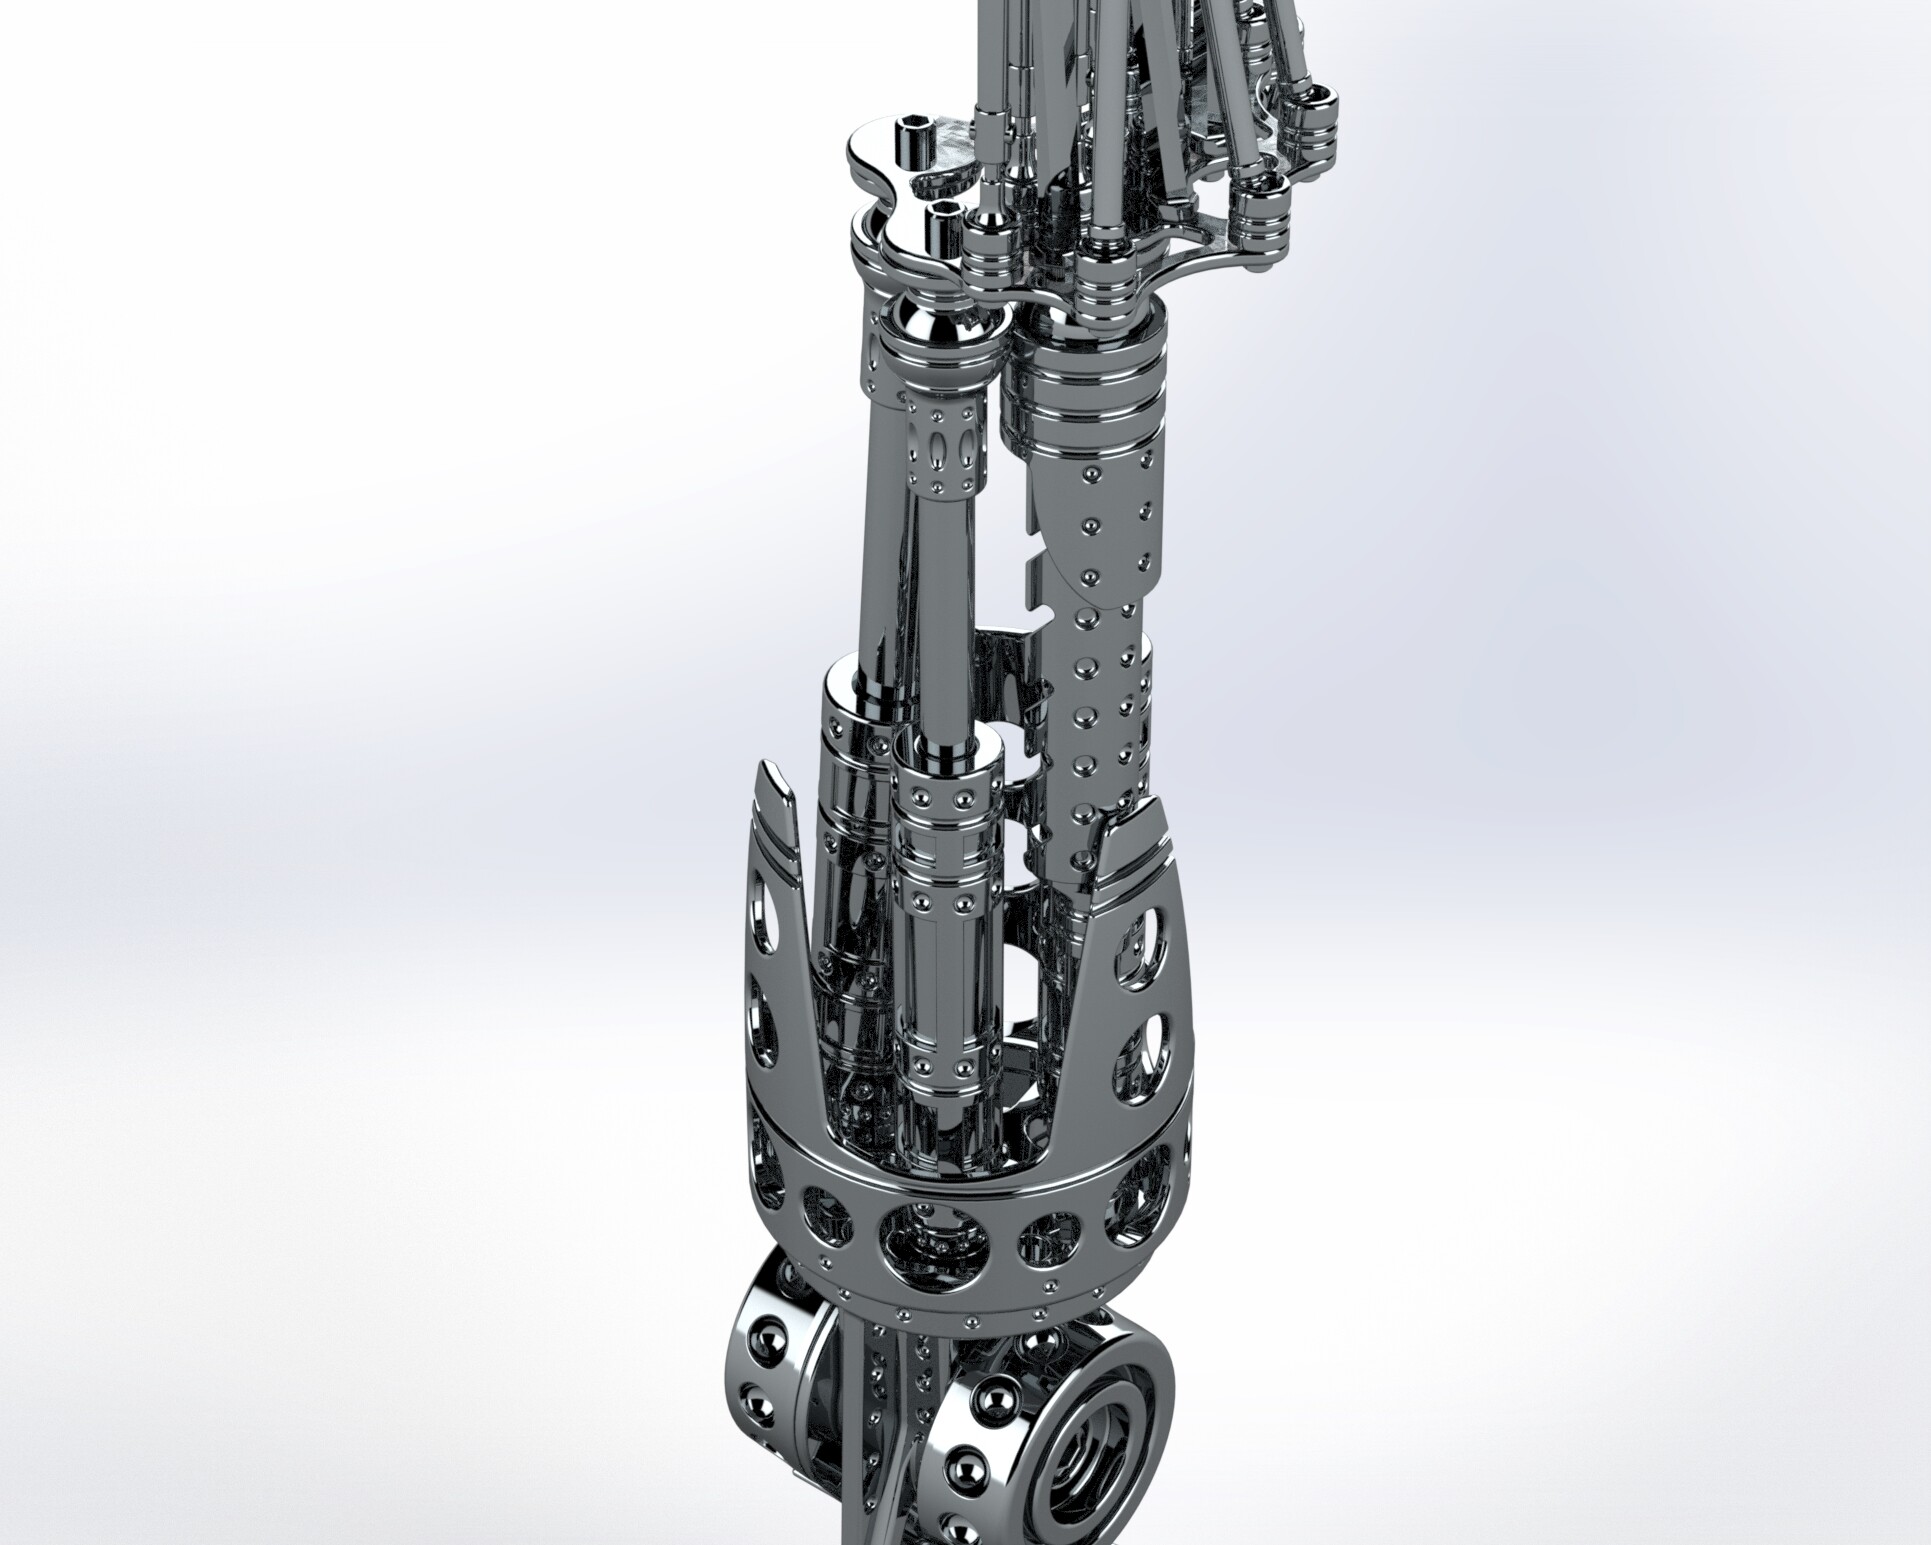
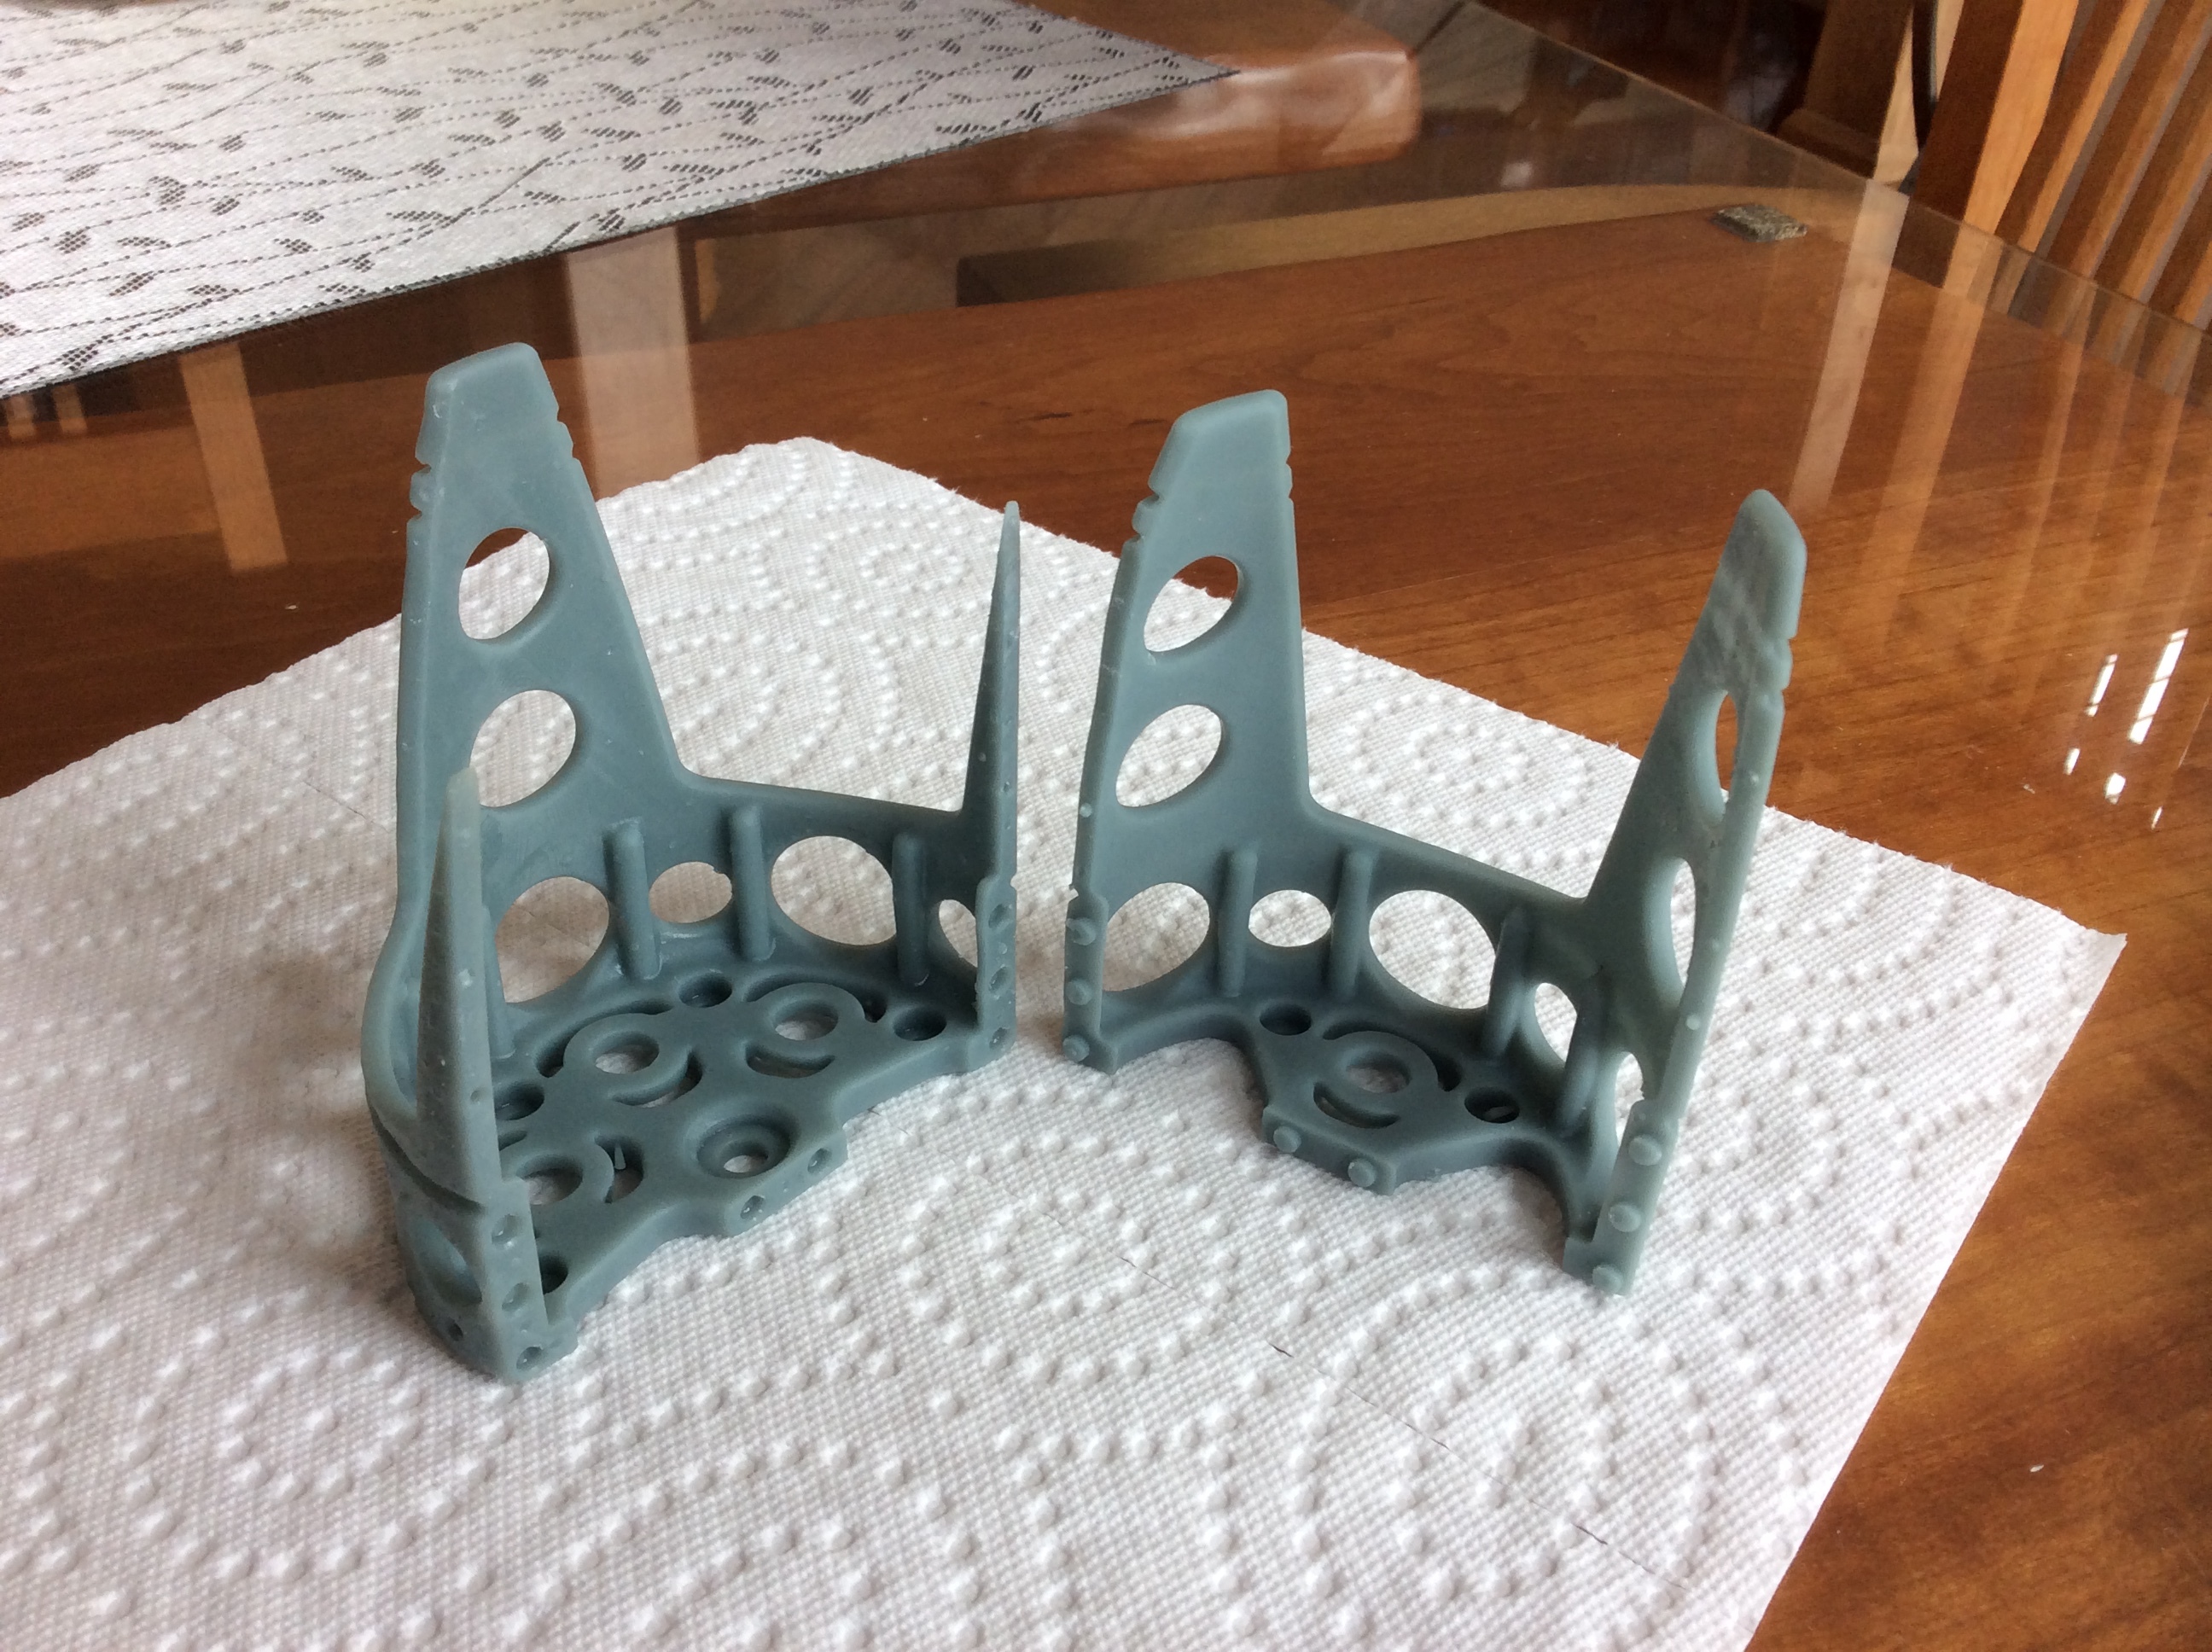
A bit more progress on the wrist part.
It’s worth buying a set of metric reamers to get nice round holes and fit in the joints. Resin printed parts rarely have accurate holes for a nice fit. Reamers are better than drill bits because they are not aggressive. Perfect for delicate resin parts.
I tried printing the thin piston rods, but they are not stiff enough, so used old steel coat hanger. Perfect inexpensive 2.25mm rod.
The blue resin is water based by Eyrone and prints really, really nice, it captures fine detail. The gray is hero resin and does not capture very much detail and is a little soft even after curing. The hero resin causes nasty skin burns if you happen to touch the skin with gloves on. When taking off my gloves, I touched my wrist and ended up with nasty chemical burns…
I prefer the Eyrone water based resin I purchase from amazon.

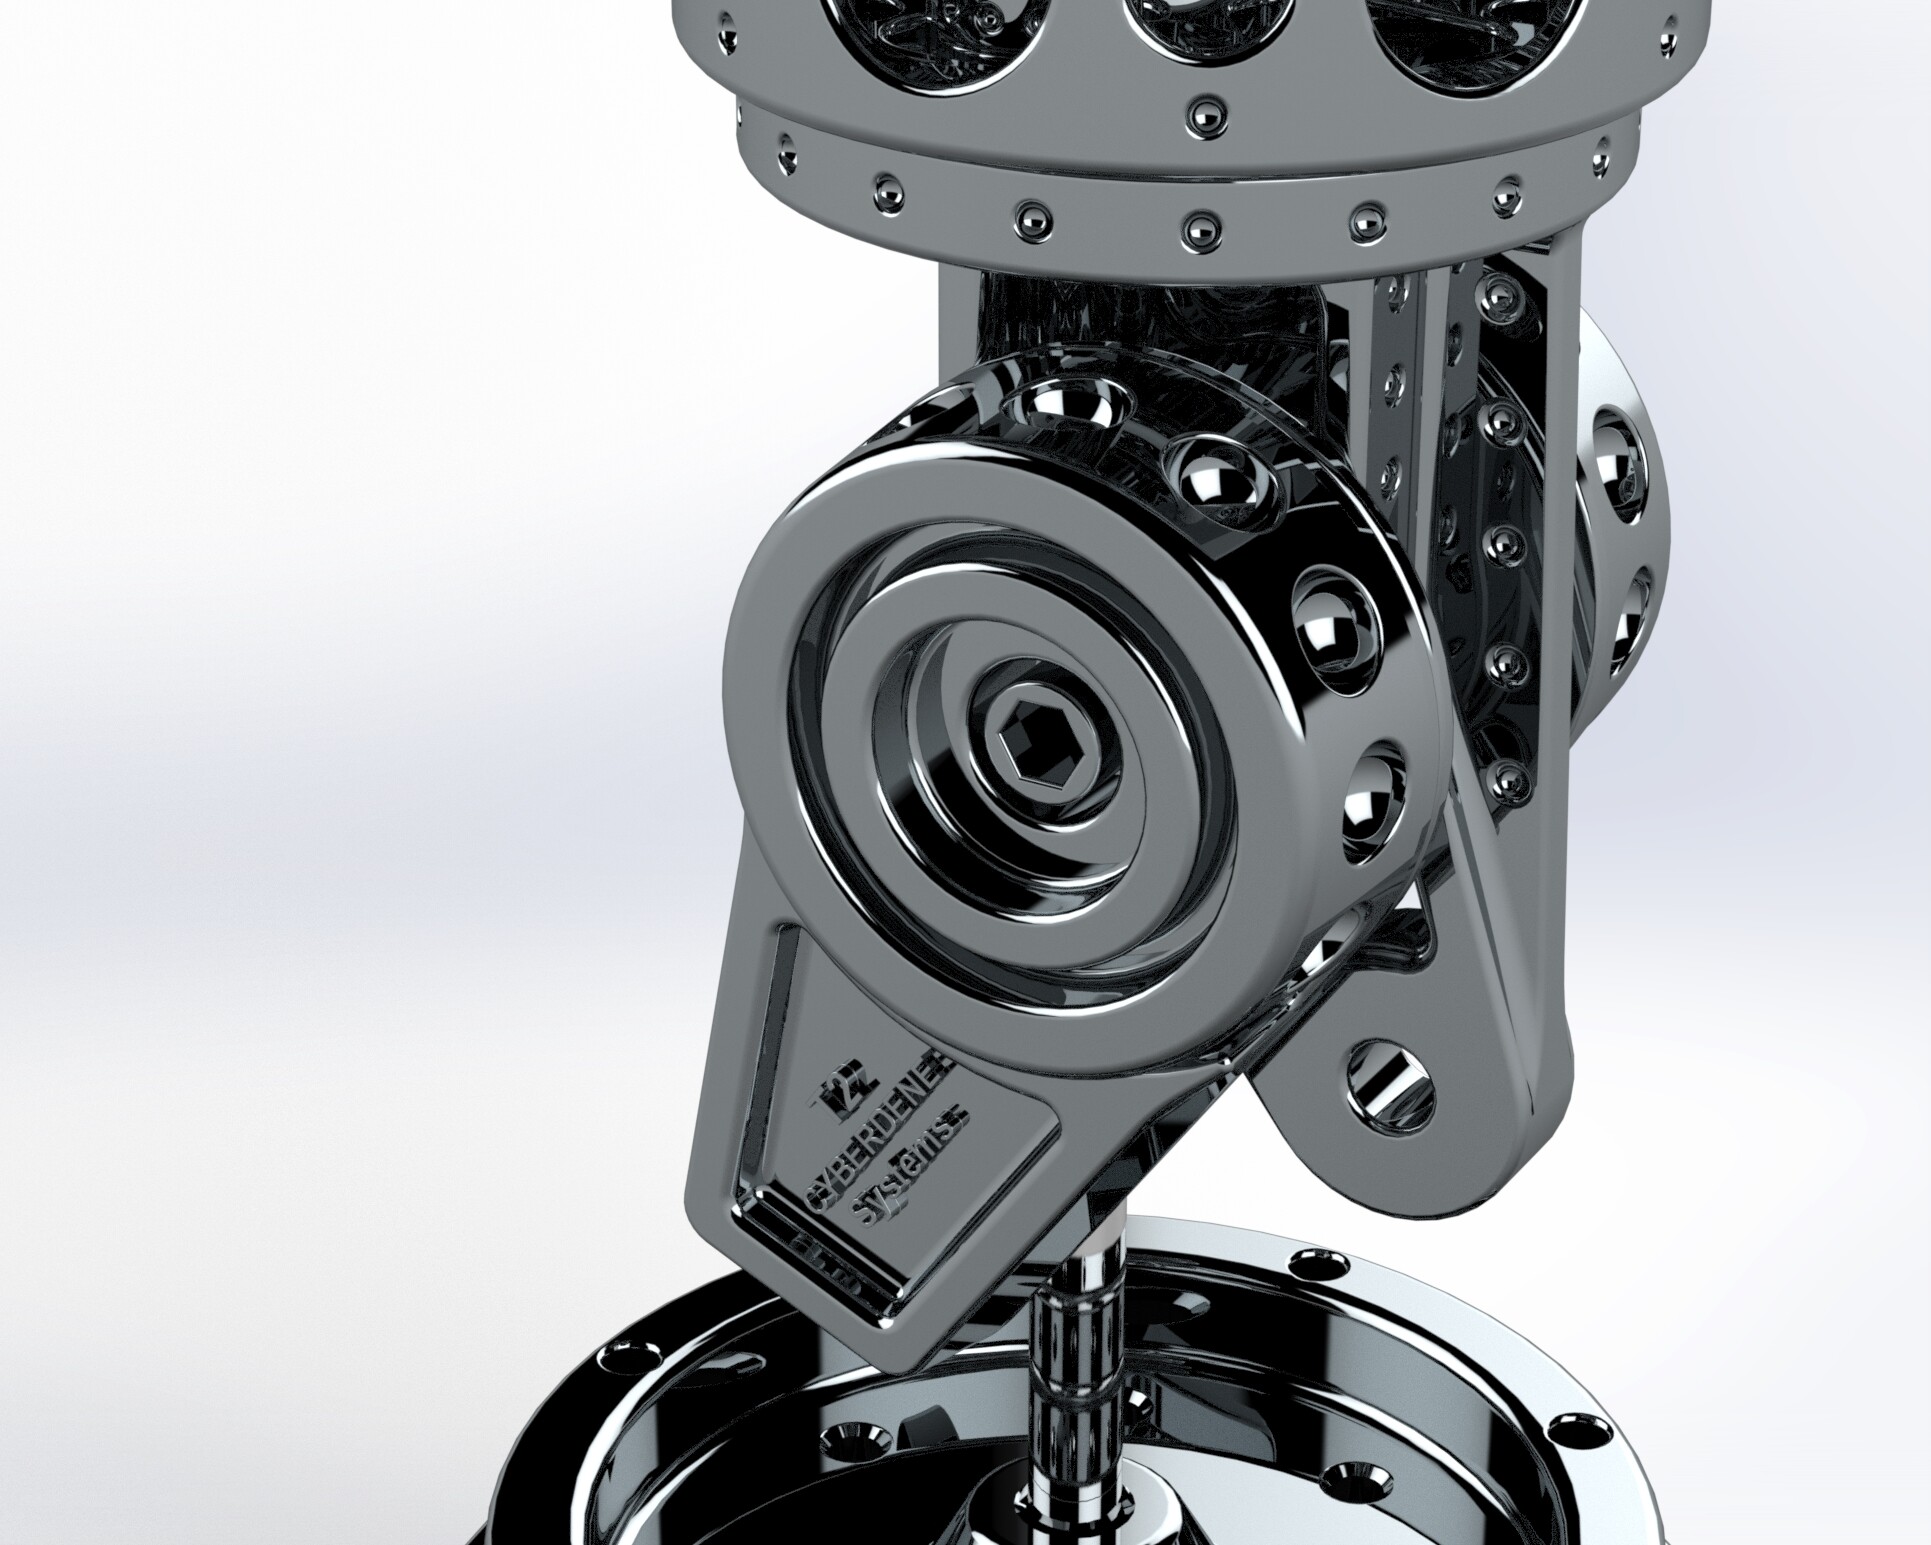
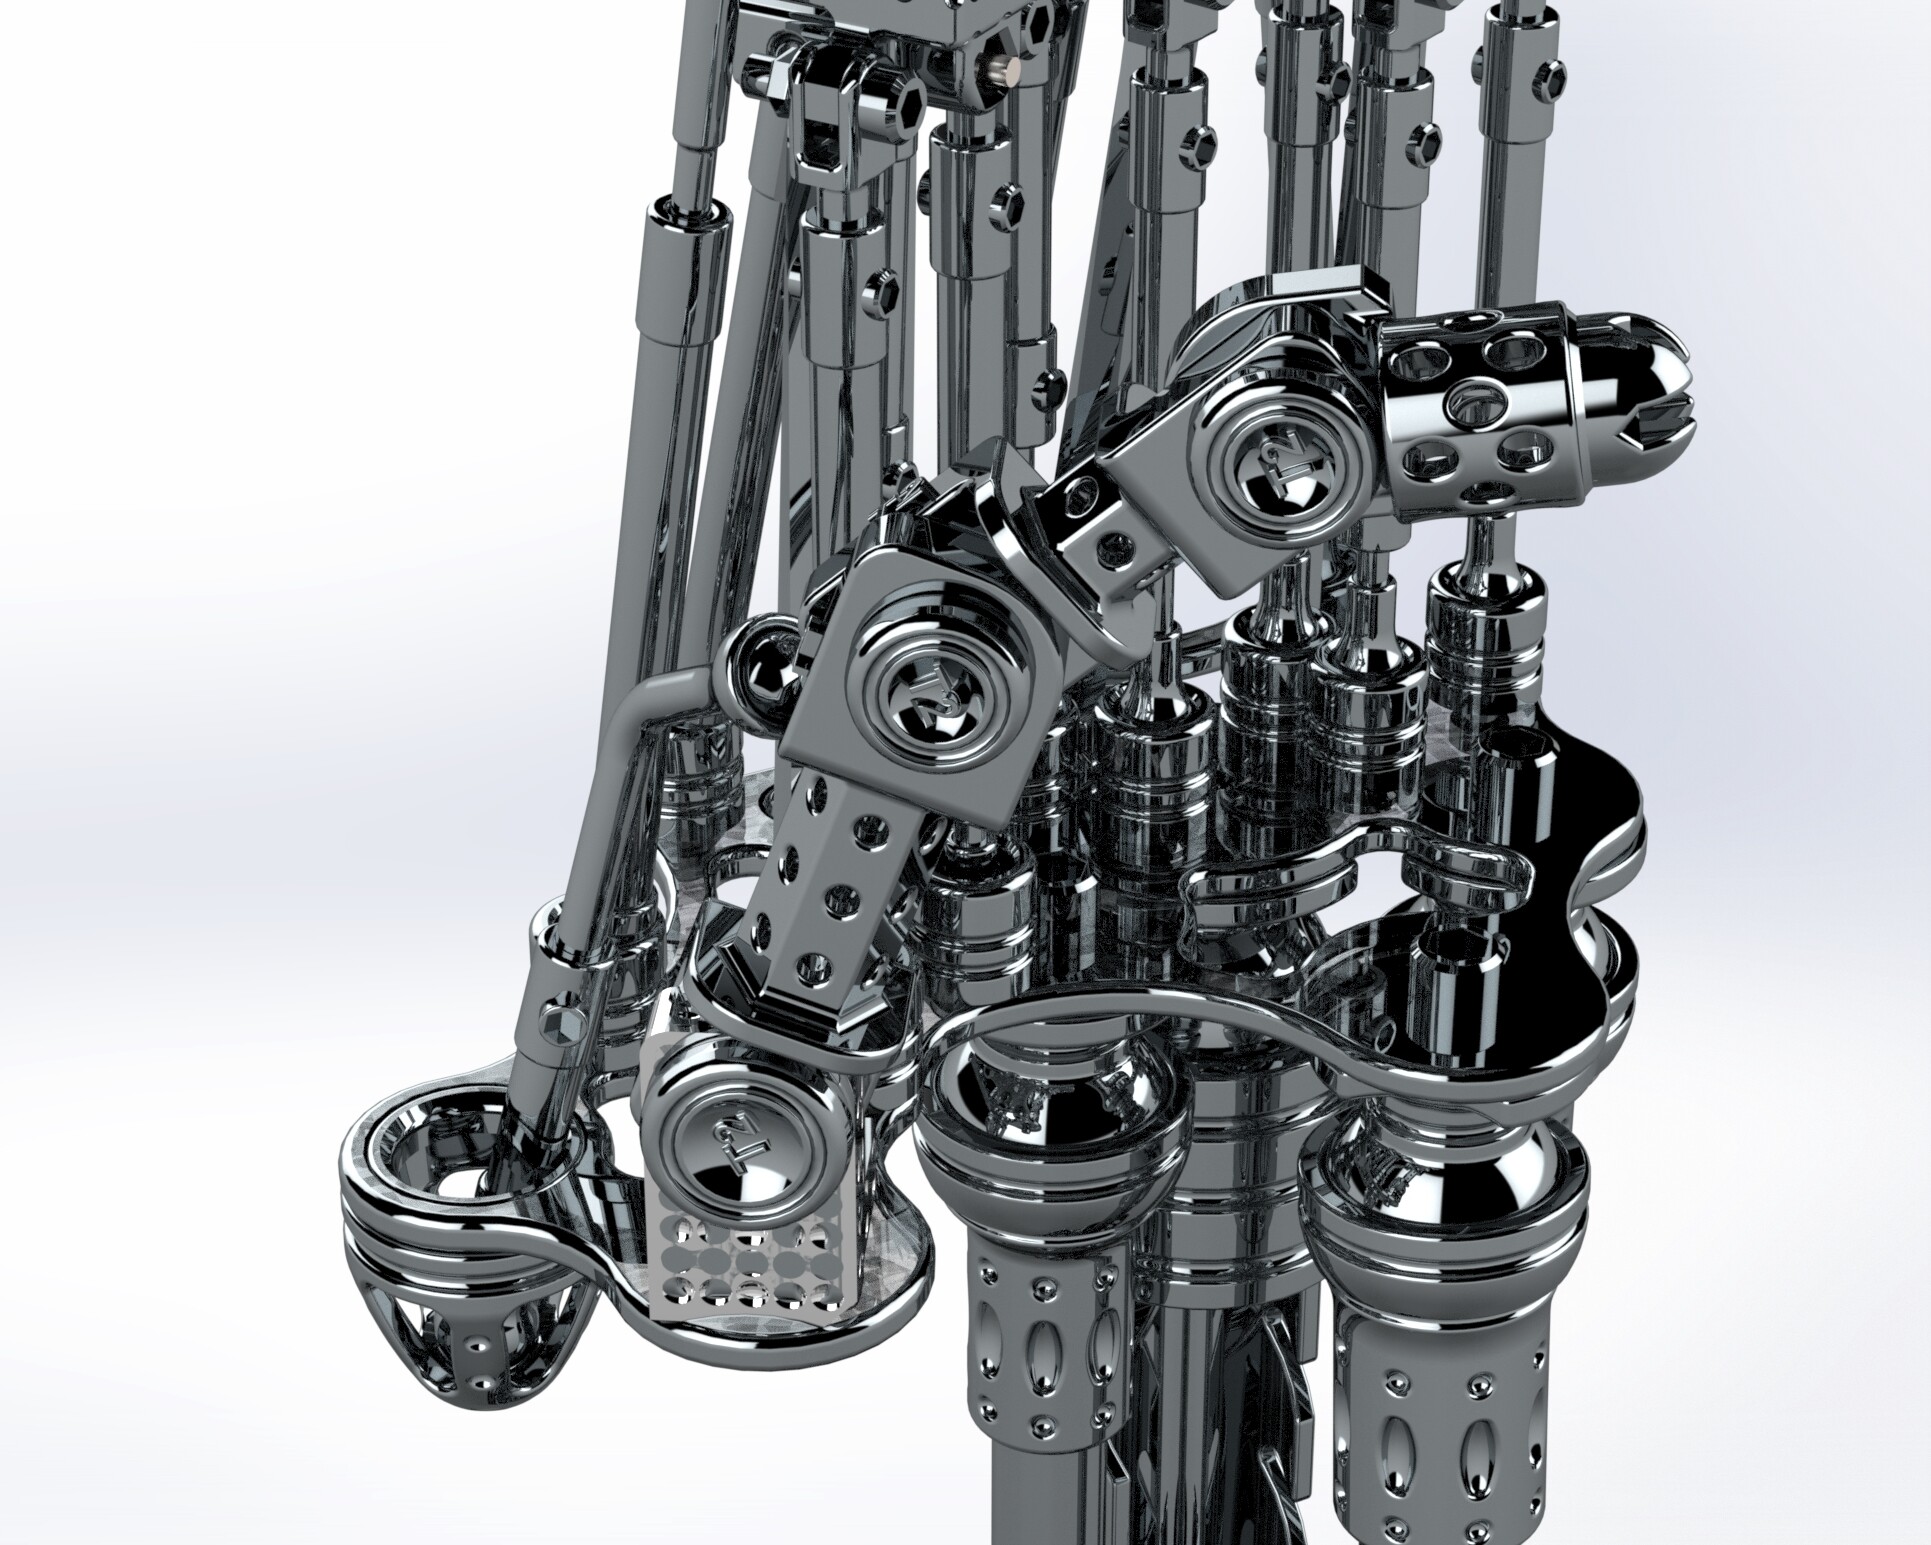
I added some extra eye candy parts to represent the wrist joint bones.

After studying the T2 movie shots I noticed the tendon were sculpted into the wrist plate at each joint, so add this detail to my model and printed these updated parts… The main reason for this change is the hero resin I used for the wrist plate was only 3mm thick and was too flexible, so this helped stiffen up the wrist assembly.
The hero resin prints and is a little flexible and not strong, the water based resin provides much better detail and stiffness, but can be a bit brittle. Ideally I would like a resin with a blend of these two qualities. Does anyone have any suggestions???
You still at ALIAS ? I worked at ILM just after Spaz left but we still hung out via hockey.
This model is amazing. Can’t wait to see it done.
Thank you SpankyGrant this means a lot given your career pedigree! Sadly no, retired now. I worked at Alias for 16 years from 1990 in the development team on AutoStudio, PowerAnimator, Maya and PortfolioWall. It was an honor to work with so many talented people and with so many great companies around the world. This is just a fun project a piece of art and tribute to so a special time. My goal was an art sculpture not a true replica.


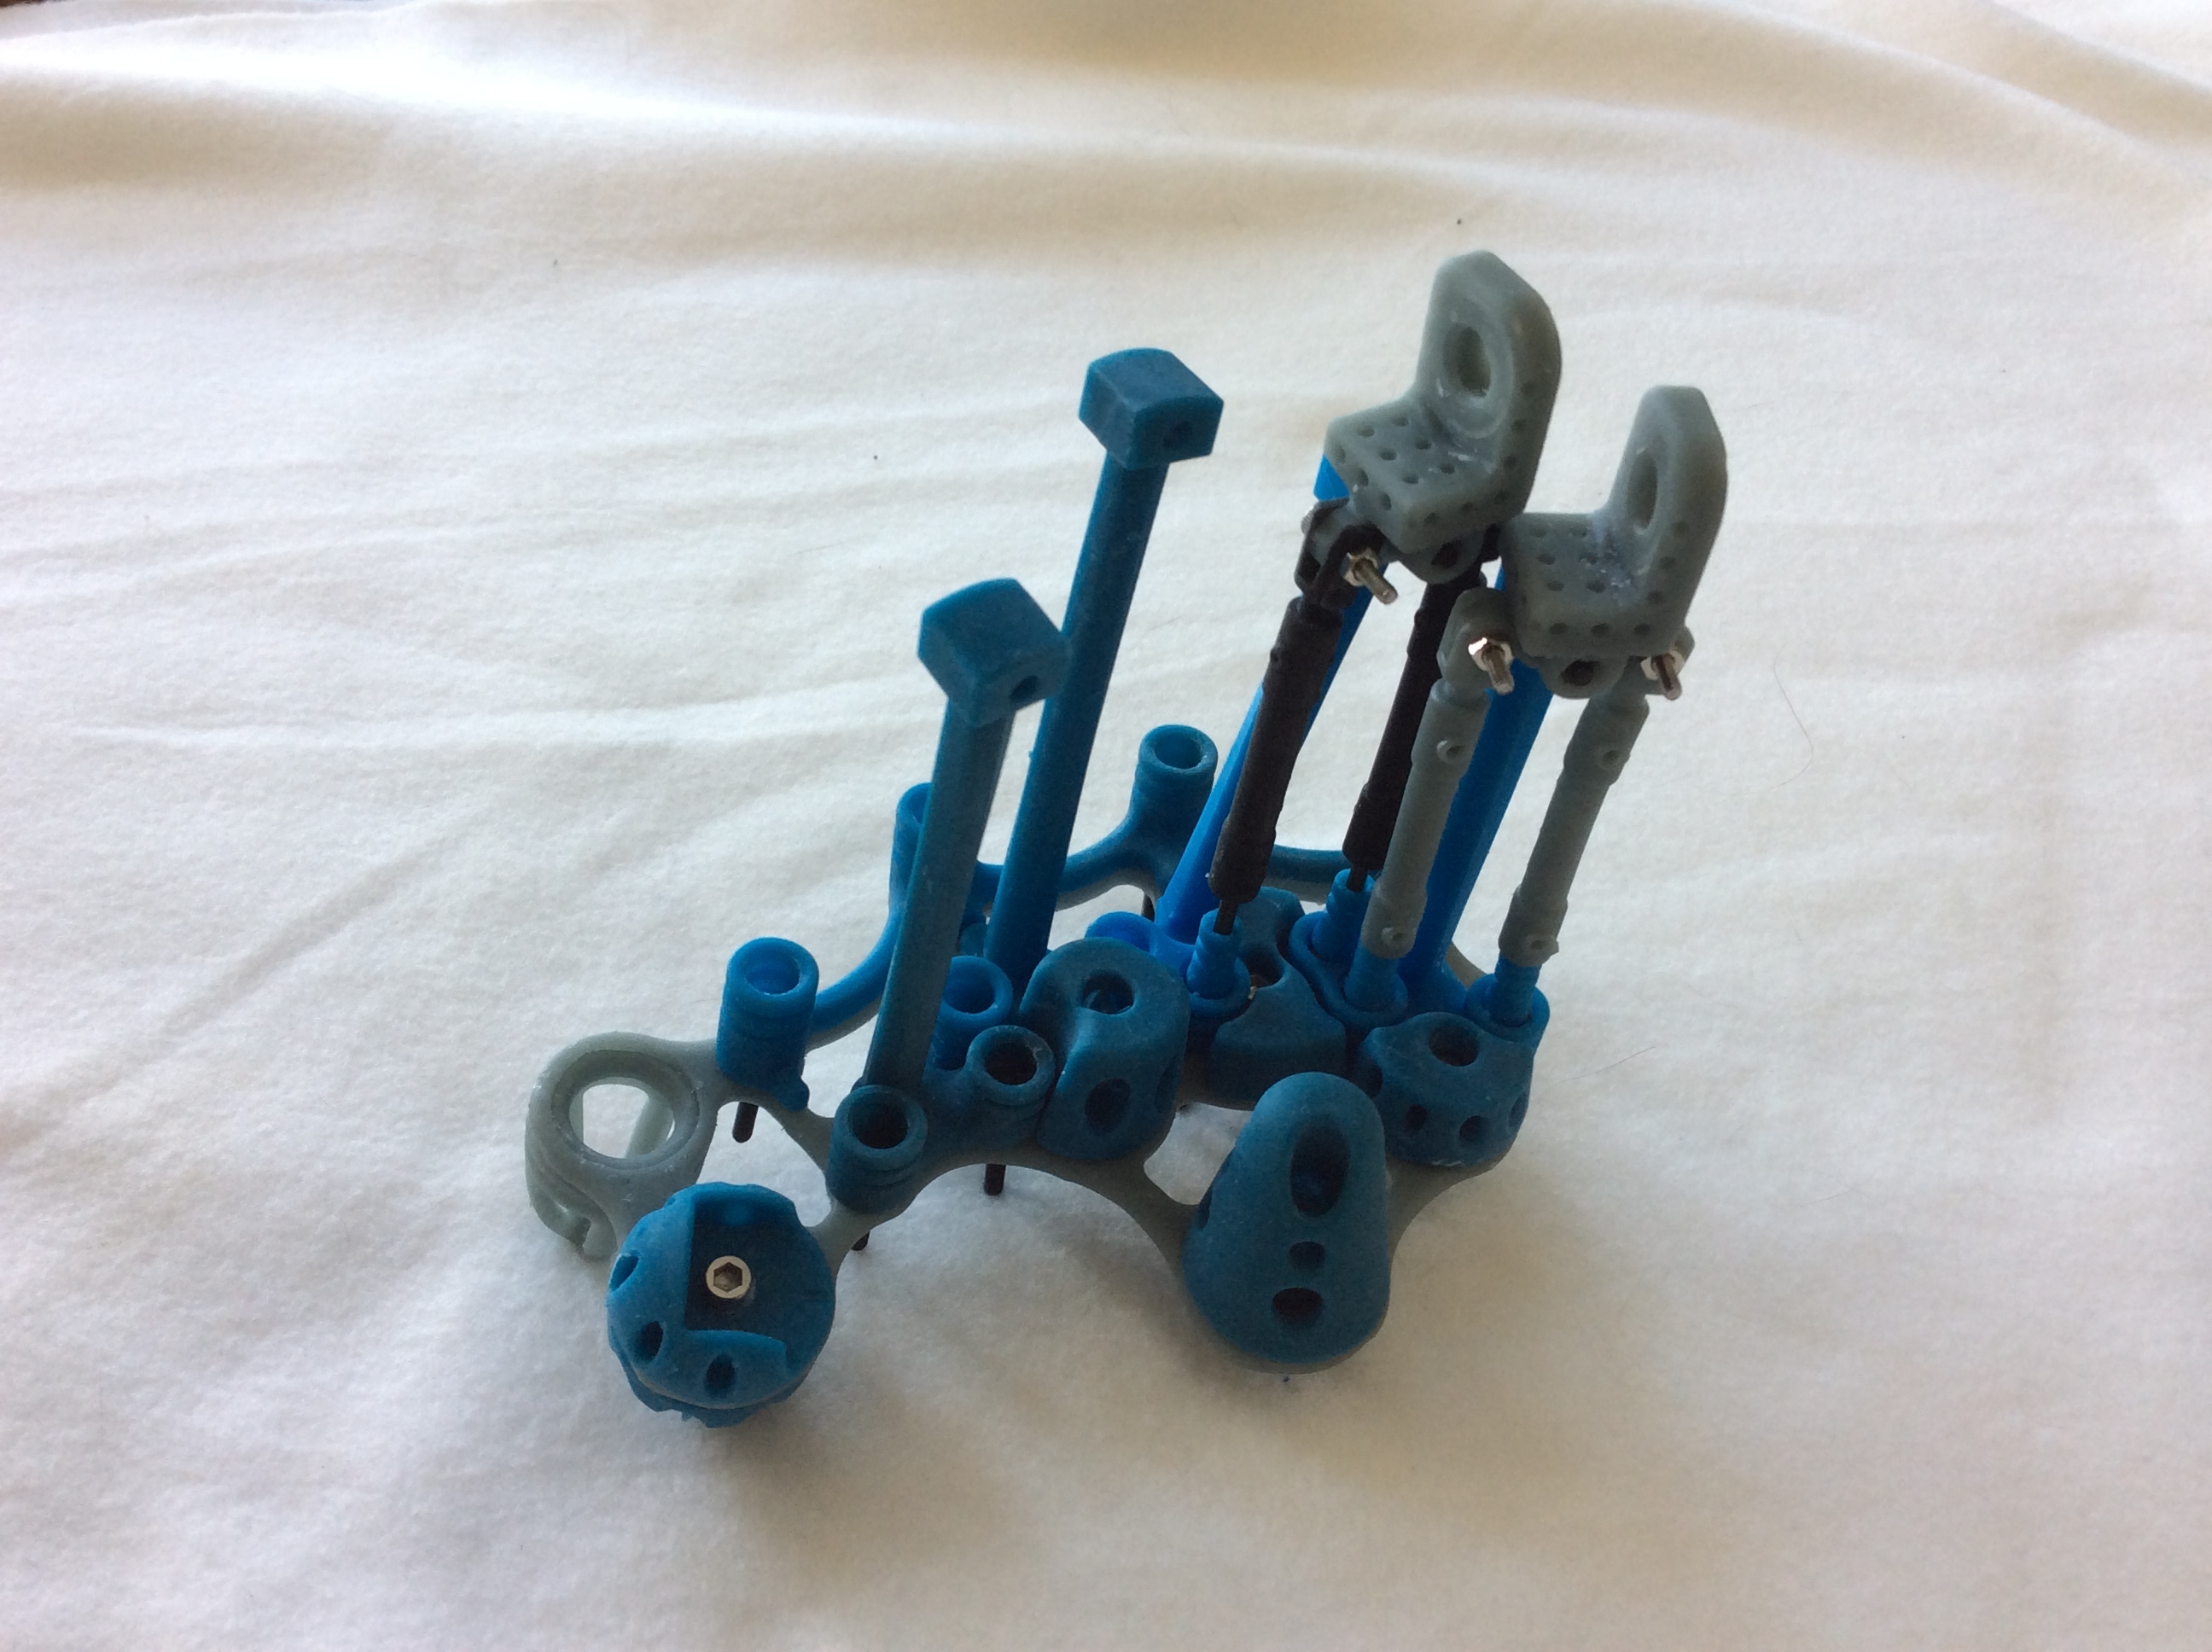
Last nights prints were ball joints & pistons for the knuckles.
The Eyrone water based resin comes out really nice. It’s my favourite printing resin, the surface finish is smooth and very detailed…
My knuckles are different from the original design, I wanted something more visually complex to catch the light & reflections.
I’m still in awe of how you do this. It looks too perfect to be real. How do you get the chrome finish? Is that the Eryone resin itself or a coating applied after?
Hi LEGOmanic, sadly the really nice images are CAD renderings, I tend to build everything I make in 3D modeling software first and refine the design through high quality rendering.
I plan to get a nice chrome effect, by air brushing and clear coating the model. But it will not be as perfect as the CAD renderings.
I’m happy to document my techniques for gold and chrome if anyone is interested. I just finished a resin printed gold Oscar which came out nice. I have also finished a resin printing StarWars chess set which will be gold and chrome.
Hehe. You had me convinced that was real. I even zoomed in on the large ball joint to check out the reflections 
Still, LEGO produces some ABS parts that have gold or chrome surfaces so there’s obviously a way to do it.