my first go at using temp tower didnt go as well as i hoped;
thus am seeking advice on where i may have gone off the rails;
what i did:
–went to all3dp and downloaded their .3mf file
in cura i imported the .3mf and exported as .stl;
imported the .stl and printed ( it seems cura was using the parameter defaults from my most recent print )
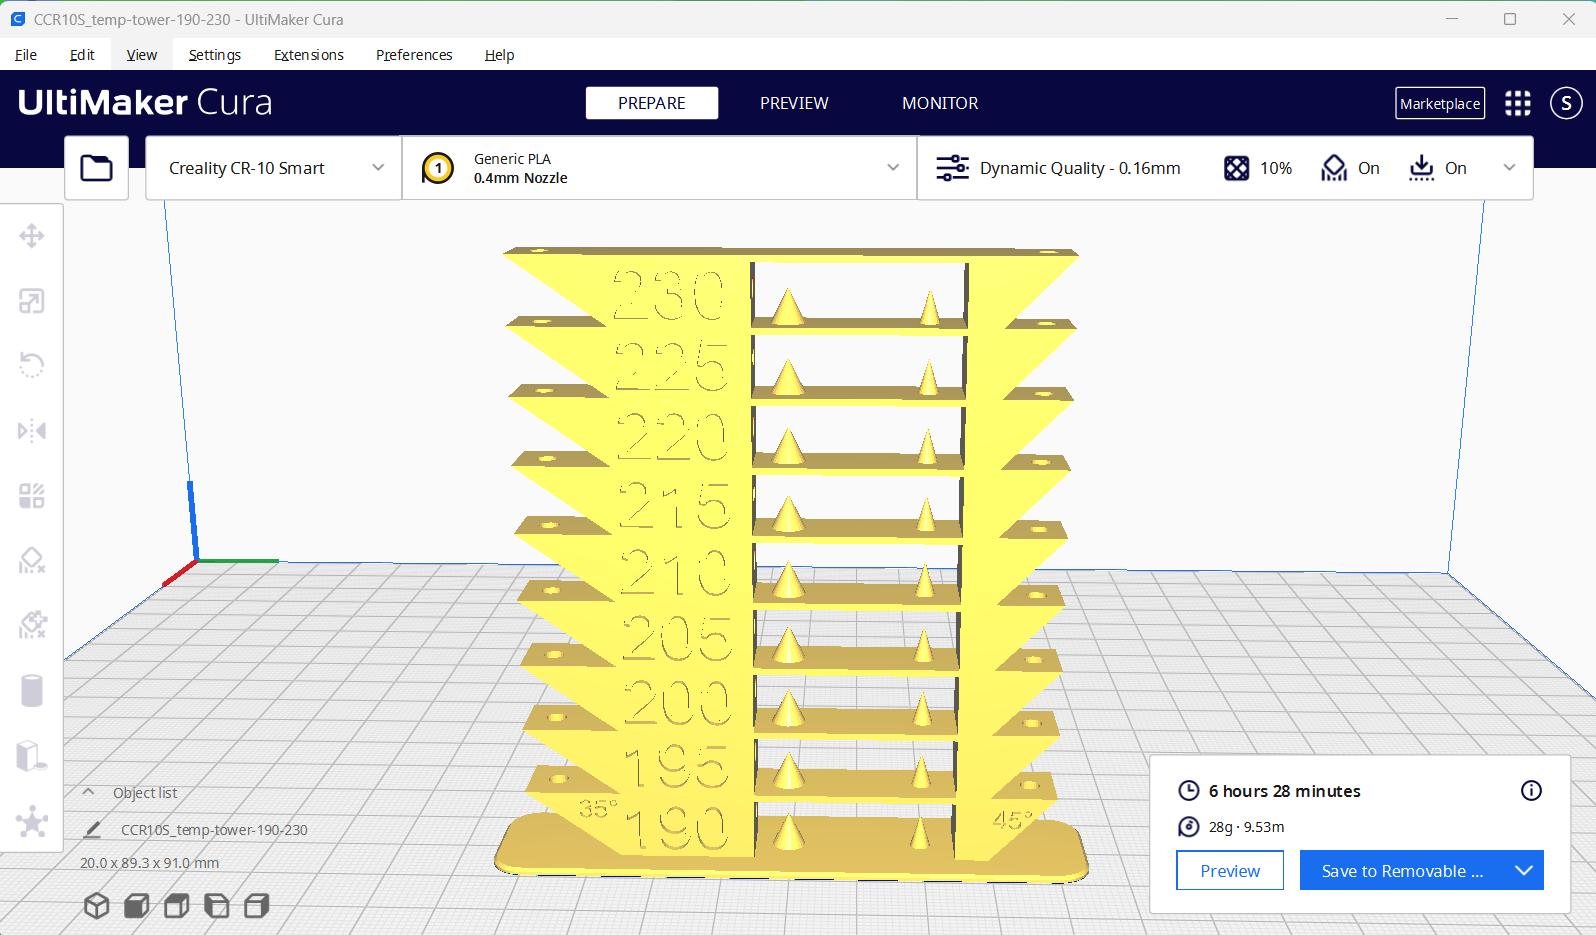
the results are shown below; at the 225 degree mark i stopped the print; at that time klipper was reporting 210 degrees, 210 is the printer profile default (FLSUN V400) ;
why wasnt it reporting 225 ?
or did the temps never actually change ?
or did klipper report the initial temp but doesnt actually report actual dynamic temps ?
absent some new change it seems the bridge stringing relaxes as temps increase but the spire stringing doesnt; in fact the spire stringing is pretty constant, suggesting the temps did Not change;
so too the bridge bodies dont seem to change…

You can drag a 3mf file from the folder where downloaded directly into Cura. The file once loaded should already have the correct settings so all you need to do is slice it and print it.
You could also download the temp tower plug in for Cura. You can do all sorts of calibration towers. There are preset ones, as well as custom ones where you can set your own parameters, and it spits out a temp tower(or fan speed tower) of your preference. All you have to do is slice and export. Works really slick.
Hi there,
@Blenky and @MicroFarmModels both have good suggestions here, if you downloaded the model online it should come with the settings pre-made for the temperature change to work.
If you have any more questions feel free to ask,
Matthew
You could download another test and hope you get one with temps already set or you can set the temps for the one you have.
Lets set the temps for the one you have.
Take a pen and paper for writing down the Layers and temps needed.
Slice the software first so you can do a layer view in the slicer. I use Creality Slicer but it and Cura are very similar.
Since Cura is the more popular I will Use Cura for this guide.

First slice the software then click preview so you can see the layer bar on the right side.

I have 755 layers.
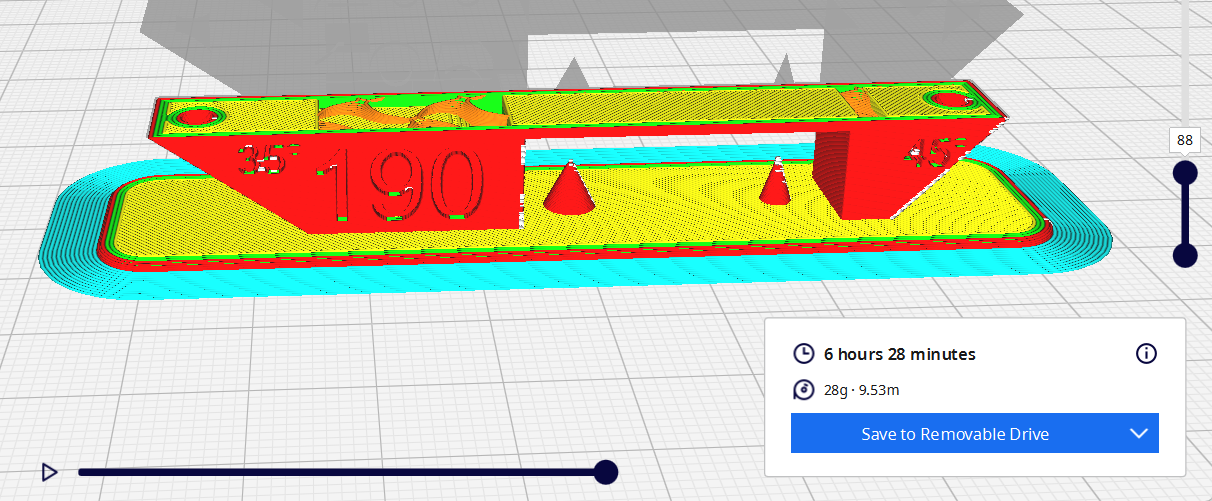
Drag the layer slider down to the top of the base. My last layer up before the 190 test begins is layer 5.
The pic below shows the start of my 190 section is layer 6. When I choose layer 5 the layer is still smooth. This means I want to start layer 6 at 190 degrees.


The base will be printed at your present assumed normal temp for the material you are printing. Leave this alone as it will ensure close to the correct temp for adhesion to the base.
Now find the number of each layer That is the start of the next temp section above.
My nest section is 195 degrees and starts at layer 89.

Repeat this all the way up your print to the bottom of the last section. In my case the bottom of the print starts at 190 and goes up to 230 degree. Yours starts at 225 and finishes at 190. Not an issue.
My last layer is 674 for the start of 230 degrees.

I have a piece of paper that shows the following.
6=190
89=195
175=200
255=205
340=210
424=215
506=220
588=225
674=230
Now we go to the postscript section of the slicer software with this info in hand.
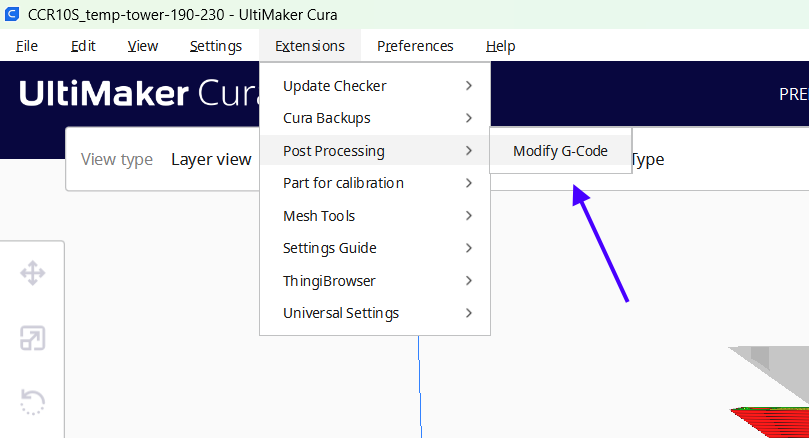
Click on Add Script

Choose “Change at Z (Experimental)”.
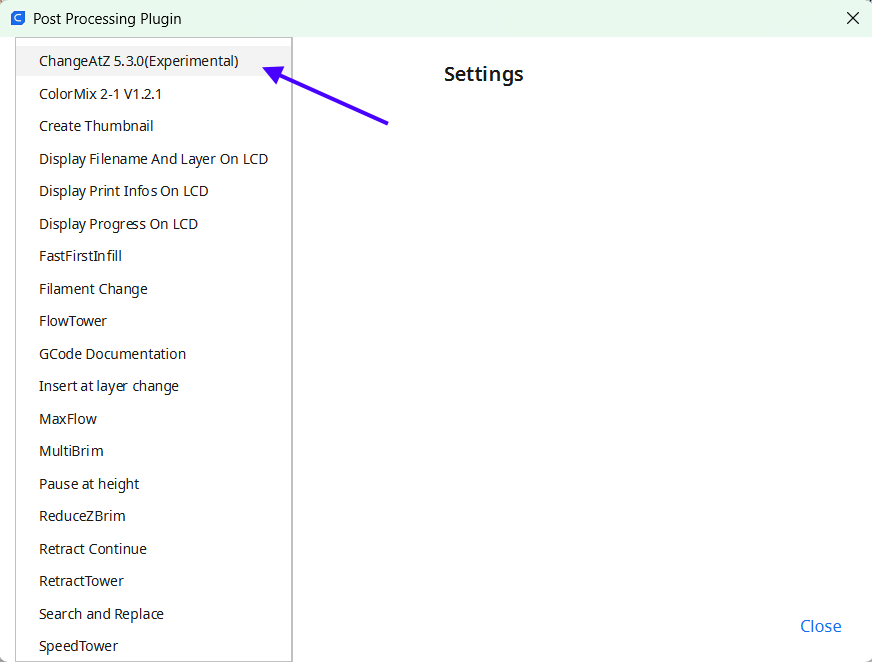
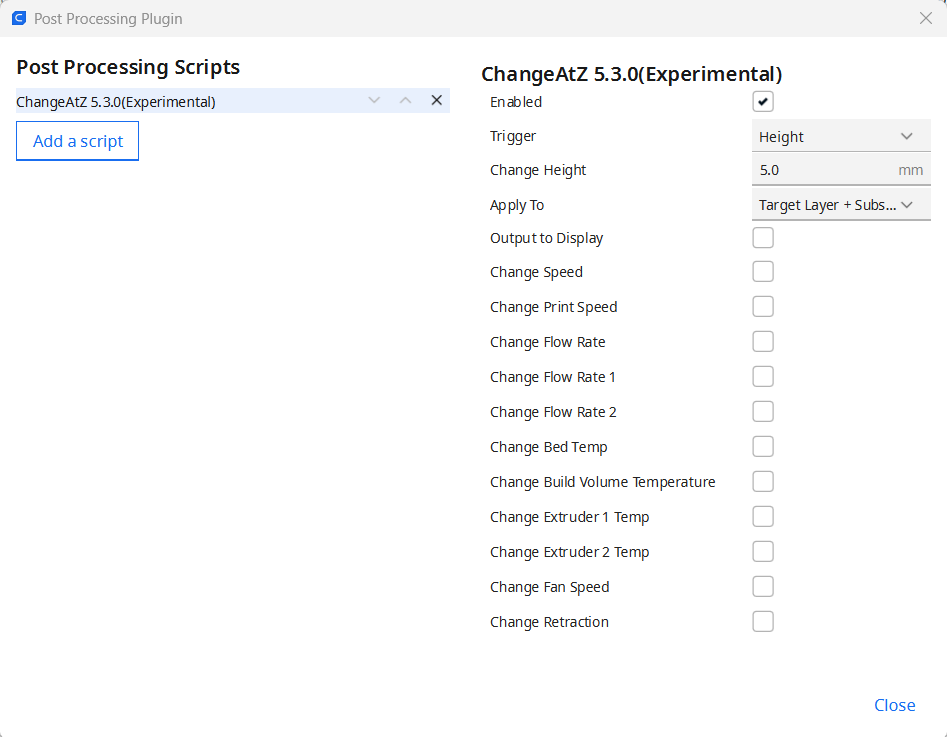
Now we have our first of many scripts we will need. One for each temp section.
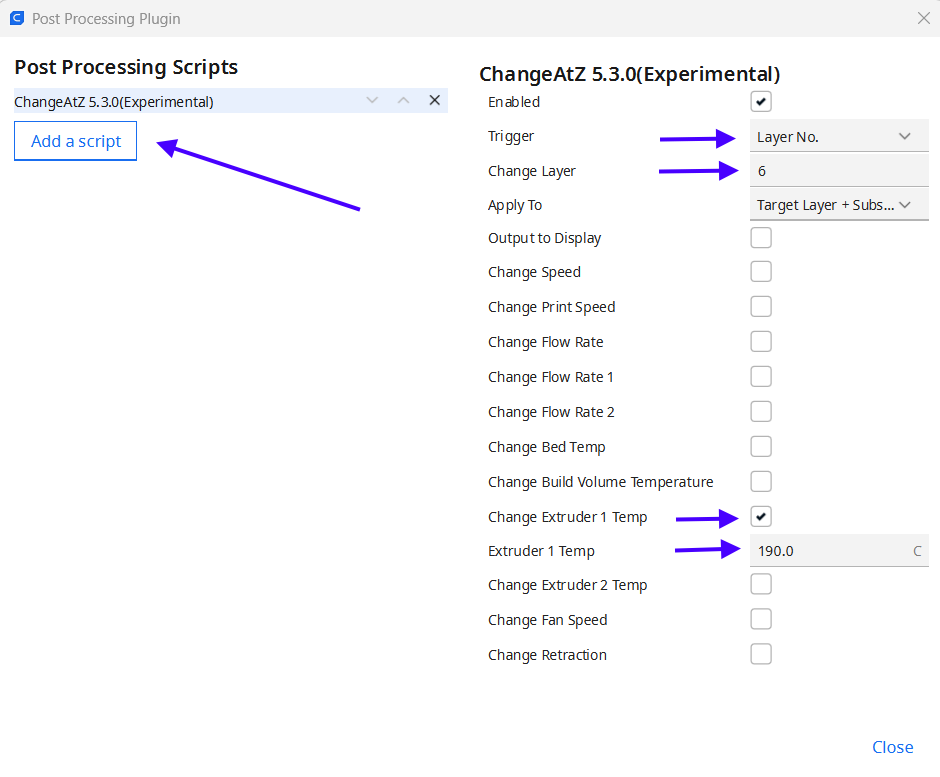
Change height to Layer.

Now we add the first layer up that needs a temp.
In my case it is layer 6 and 190 degrees. Yours is Layer ? and Temp 225.

We need to add a new script for each temp section. So next we click “Add Script” again.
Keep adding and setting the four settings each script until you build the whole print.

I need 9 scripts for my 9 temp sections in my print. Yours has 8. Not an issue, your test is not the same as mine.
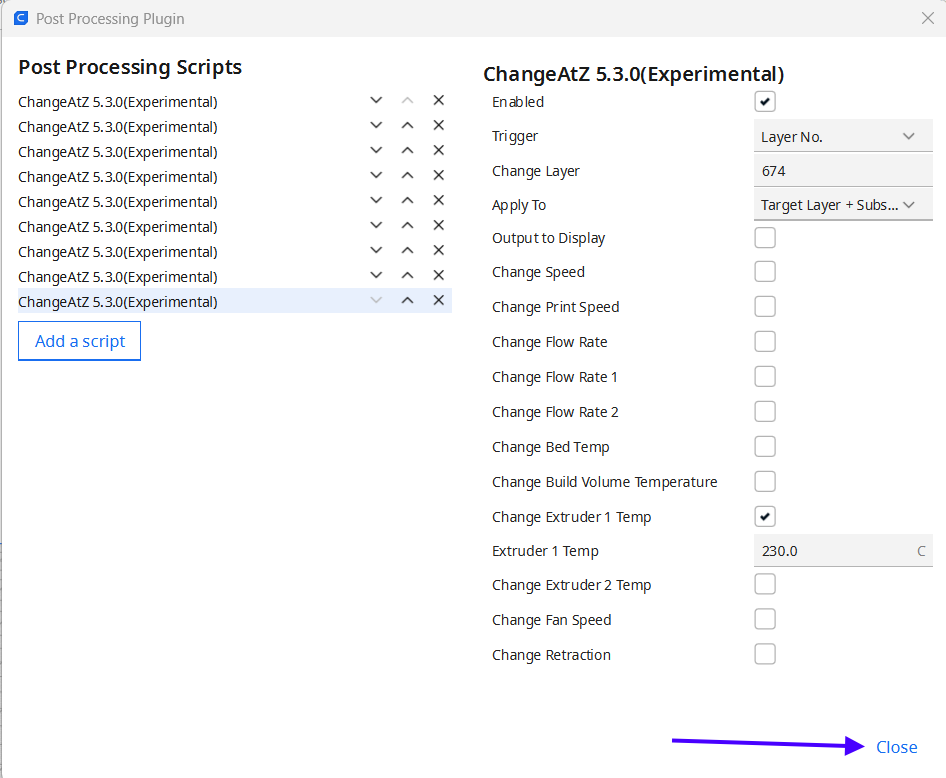
Click “Close” at the bottom right corner to return to Cura Build Plate.
You can see the 9 scripts available as shown below.
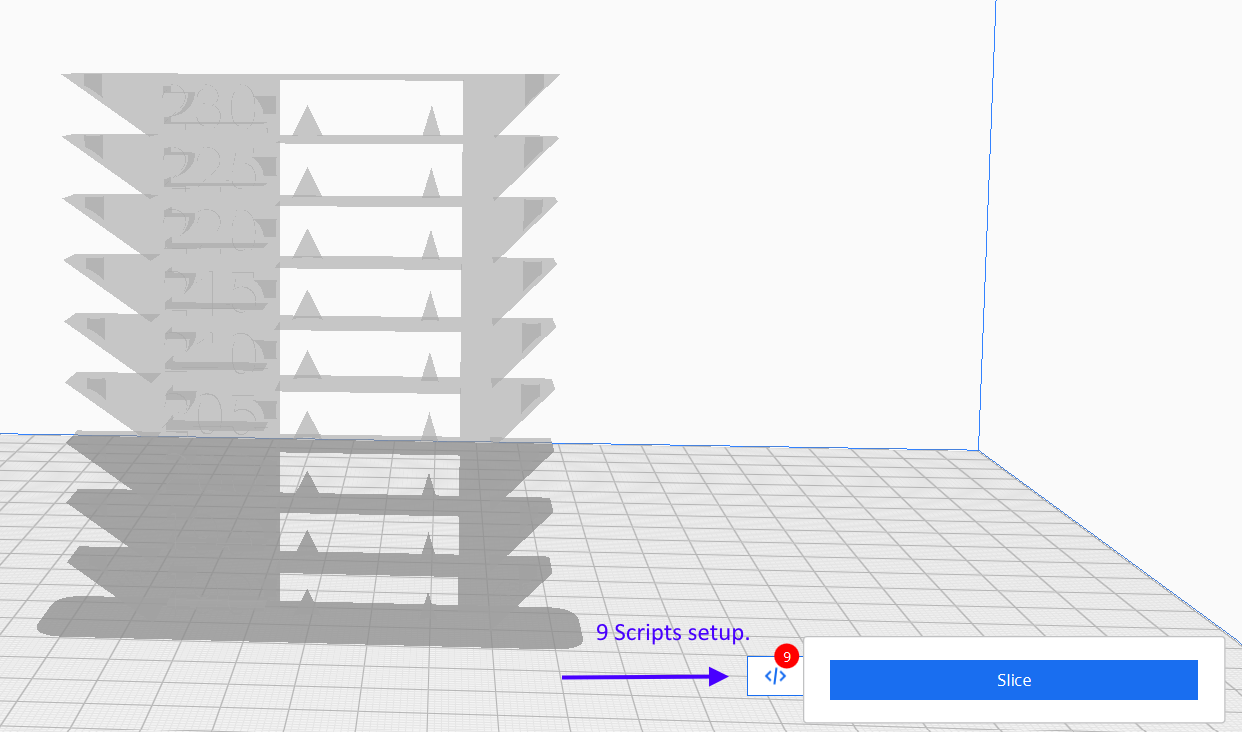
You are now ready to Slice and save the G-code file for printing.
Click Slice.
Save to Disk at your desired location and load to the Printer for the test.
You also want a speed test afterwards and you use the same Postscript section to change speeds rather then temp. Use the best temp from the Temp Test for performing the Speed Test.
Choose the same experimental Script and set layer heights and speed according to the speed test you get.

Repeat for each speed section just like the temp test.
Slice and print.
Have Fun.
I know I already said this, but if you are using Cura, there is a very simple way to do it. Download the Autotower Cura extension. Much simpler and quicker than using post processing script. Autotower is capable of fan speed towers, flow towers, retract towers, speed towers, and temperature towers. There are both preconfigured towers for various materials, and the option to generate your own tower with your preferred parameters. Works really well, and only a couple keystrokes and mouse clicks to setup pretty much any calibration tower. Easily the most useful Cura extension I have used, even though I haven’t needed to use it much.
thanks , you have teaching talent ![]()
I have the Autotower Cura extension installed since I first installed Cura and have generated temp towers etc with it but have never been able to confirm exactly what temps and where they are used. Without confirmation of the files behaviors’, I would never use them.
Is there some way to see where and when different temps are being used?
I tried to pick apart the G-code and search for the specific temps but could not find them. I like to learn and would appreciate help in understanding just what the files are doing.
This skepticism on my part is one of the reasons I still learn things everyday.
Is there a way to know exactly what the tower is doing and where?
The only thing I can find is a comment in the writeup that states you can simply generate and print.
That is never gonna happen in my world, I need to know exactly what it is doing and where.
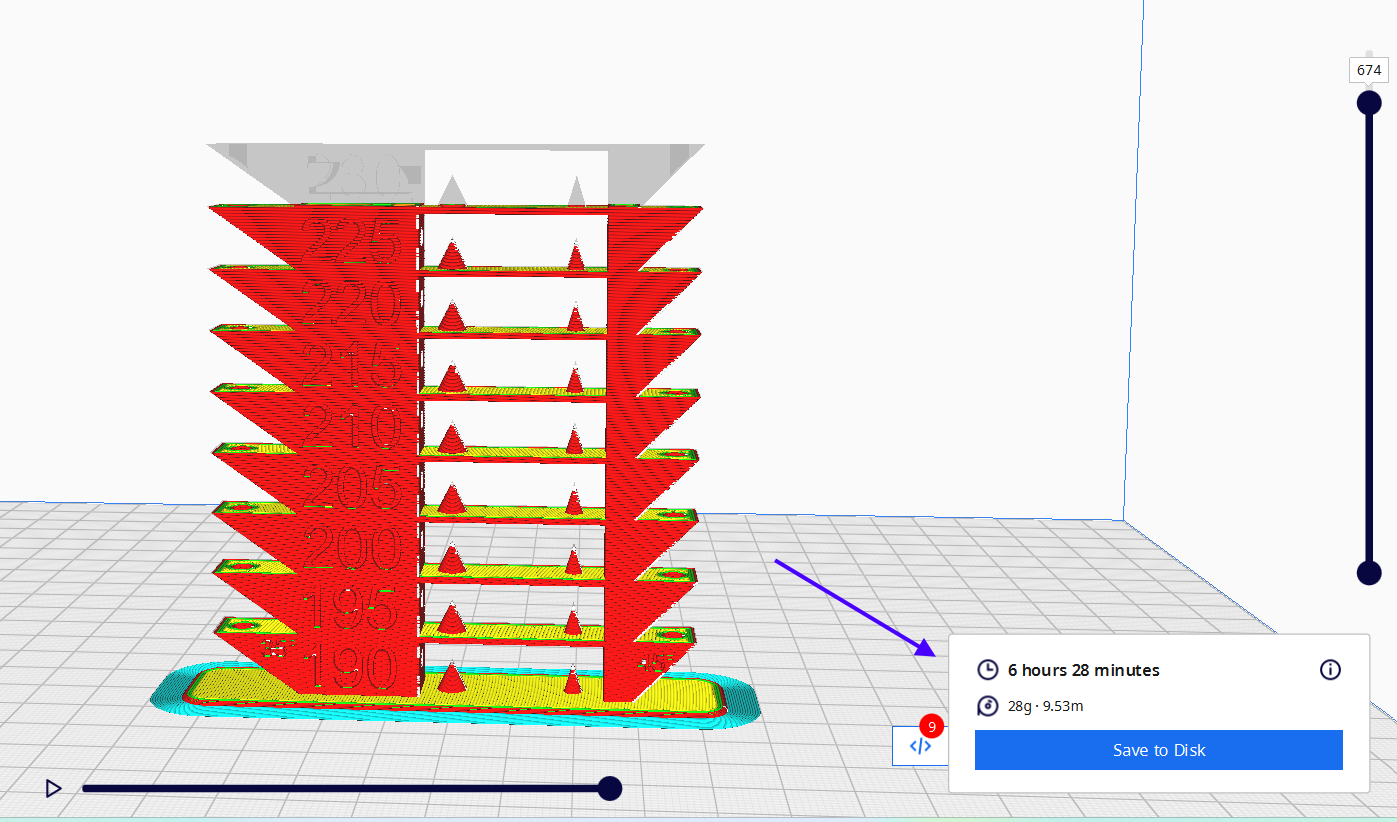
For the sake of learning I loaded a PLA+ Temp Tower.

Blindly sliced and printed.
It is printing the whole thing at 205 degrees which is not helping me learn how it prints at different temps.
I need to edit the temps as described above in order to achieve my goal of learning different temps.
I have also, always assumed this needs to be done based on the printer you have and not in a generic fashion. This thought led me to believe that I have to set the temps or speed etc. for myself since I need it to be based on my printer.
Sorry for any debate here just being me and trying to learn.
Huh, I did a custom temp tower, and it definitely changed temperatures on different segments, the printer screen displayed the temperature changes, and the print quality showed it as well. Not sure why it didn’t work for you.
Yea, sorry about our discussion we are having, I am not trying to be aggressive in any way. I was not trying to contradict you guys just wanted to add how to make your own just in case someone wanted to learn like I always do. I thought there should also be a way to learn how to set your own in case someone needed it like I did. Not that I am some great user, I am not. I am only 3 months old with a 3d printer but I am a quick study. I am also very adept at teaching technical things. Hope we are good, we are both just trying to help.
I have no idea why this did not work for me but I did keep it simple. I loaded the Temp test, Sliced it, Put it on a memory stick and then put the memory stick in the printer and printed it. All it did was print the whole test at 205 degrees. Cura is set to PLA generic at 205. This is normal as far as I know.
Is there a way to see when and where the temp test g-code is doing temp changes. After slicing I could not find any temps during the test in the G-code. Maybe we can figure this out.
No problem, I think I was coming across with a “my way is best” sort of attitude. I’m sorry about that. You are a quick study if you’re that in depth at three months in! It took me much longer to get anywhere close to that.
I’m not sure why it didn’t work for you. Maybe try generating a custom tower with your parameters to see if it changes temperature then? Maybe a bug in the extension. I am not using stock profiles either, maybe that is why it worked for me? When the tower printed, for me it did the “base” with the print profile I had set, and then for the rest of the print it followed the profile other than the temperature, which changed for each segment.
As to seeing where it changes temperature, I am not sure how you would, other than simply printing it and seeing what the temperature does. There is probably a way, but I have never really messed with reading the gcode, so I can’t be much help there. Hopefully this will all help the OP get things figured out, one way or another.

That isn’t the Autotower extension is it? There is a extension called “Autotower”. What you have looks very different, although it looks like it has some of the same features.
Have to leave at present but I will try to find the Auto tower generator.
Vernd
This is the link to the Auto Tower Generators.
https://marketplace.ultimaker.com/app/cura/plugins/Kartchnb/AutoTowersGenerator
Add it to Cura and try an Auto Temp Tower.
Notice that this Auto Tower Generator showed up.
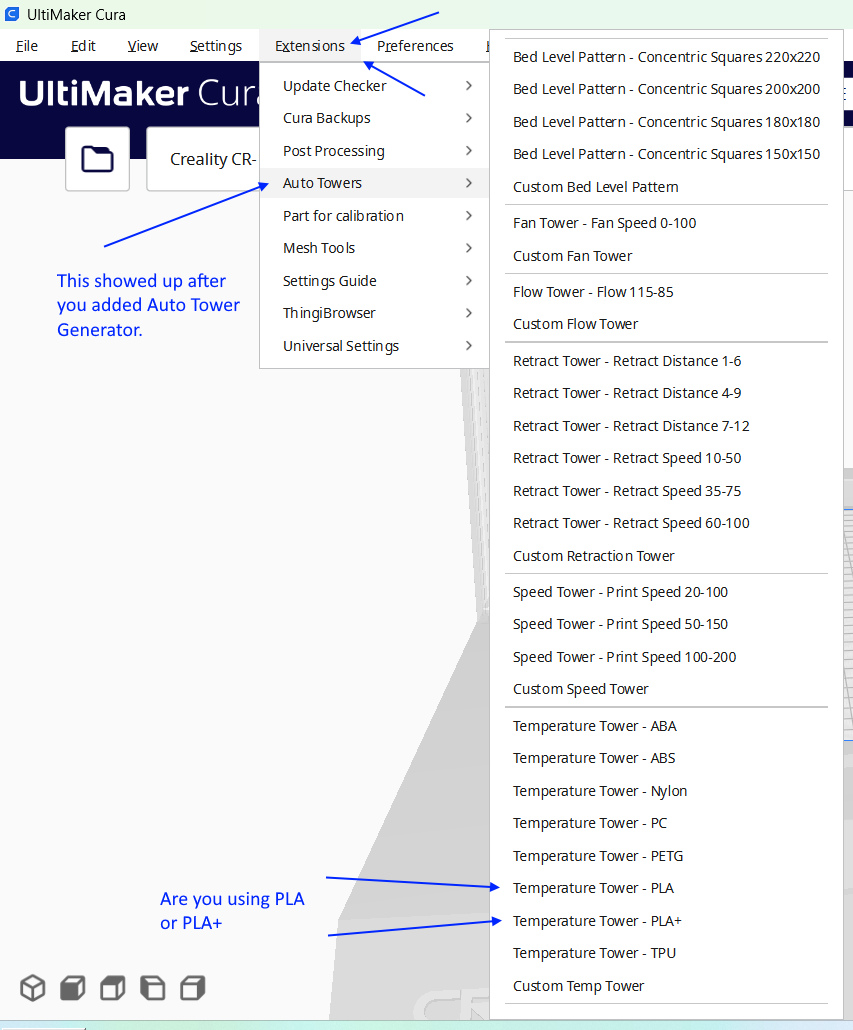
Choose for the material you are testing. PLA or PLA+ I assume is the material at present.
After a temp tower try a speed tower with the best temp the Temp Tower told you.
While it seemed like I went off in a separate conversation then your thread with MicroFarmModels, I did not, I learned from him where the Auto Towers were and then came back to your issue. Hope this helps.
MicroFarmModels
Thank You we have the auto tower Generators now, I thought the towers that were there was what we needed but they require my how to above. I will check these out. I also like knowing how to do it for myself as well. Knowledge is bliss but laziness works well too. I will check out these auto towers. Really like the idea just never found them before so learned to make them what I needed.
After the Install of Auto Towers I then needed to install open Scad and restart Cura.
That’s right! I forgot about that, since I already had Openscad for other reasons when I installed Autotower
it is a pity that each spool doesnt come with an optimum temp specified rather than a wide range that really doesnt help much;
possible that the manufacturers themselves do not really know that temp ?
I would imagine it comes down to the fact that there are other variables. While there is no doubt an optimal temperature for the filament to be extruded at, the hotend temperature required to achieve the optimal extrusion temperature would vary depending on a few factors such as nozzle material (for example, brass is more conductive than steel, and so, generally doesn’t require quite as high a temperature as a steel nozzle would), printing speed would also affect the required temperature.