When you auto home, does the hotend actually hang out 12.5mm above the glass?
If you use the ‘move axis’ function for the Z axis, can you move it to 0mm after homing? and does the hotend actually go to 0mm (about a 0.2mm gap from the bed, not perfectly zero)?
You can use the move axis feature on the LCD to move the nozzle up and down, and the z probe offset function to set the 0 offset distance from nozzle to bed.
There are a few ways to move and level/tram things, I personally shut off all stepper motors, mannually hand drop the nozzle above the bed to a point I am happy with and just move everything by hand to check the tram/level across the bed. I really don’t recommend doing it like me.
However, I highly recommend checking out this YouTube video by CHEP, it covers the basics really well: https://youtu.be/_EfWVUJjBdA
If you wanted even more detail regarding mesh bed levelling and the BL Touch, teachingtech has a great video on it.
I’ve noticed a weird thing with Creality machines and the home + move axis function when a BL Touch is added.
Can you try this?
Use the Auto home function, then go to move z axis, if it already shows 0mm, move the dial one click to the right and bring it to +1mm, then one click back to the left back to 0mm.
Does the machine actually go to zero position if you do this? Or does it return to the higher +12.5mm position?
Ahaha yeah… It does that sometimes to me too… The stock creality firmware isn’t great when you add in a BL Touch.
Sometimes it’ll show the correct z-height, sometimes you have to go 1mm forward then back to make it show.
But now that is says 12.5mm you can bring it down to 0mm with the dial and then check the tram/level of the whole bed against the nozzle!
First I would check that at 0mm you have just enough room to slip a piece of paper between the nozzle and bed and feel a very light resistance, then check that it’s the same height or feeling between the two at all four corners of the bed.
Looking at your pictures, I’d guess it’s because of how much of the part is just flat closed in space, on my printer when I was having problems it was always on parts that had a large surface area against the bed.
When I bring z axis to 0 the middle and when looking at printer the the front right and front left all three I can slide a paper in with no resistence. The back right and back left will not allow me to slide a paper in.
There is your answer!
The bed is out of tram/level from back to front; If the paper can’t fit in the rear and fits easily up front. It should be the exact same at all four corners.
It’s an easy fix from here, you need to adjust the knobs under the glass bed (they should say what direction to spin them on the knob itself). That will bring the glass down or up depending on which way you rotate it.
You need to rotate those knobs until the paper passes between the nozzle and the bed right above those knobs the same way on all four corners (also don’t forget to check the center! ).
After you get the bed and the nozzle height the same on all four corners, I would try a test print to double check my z-offset.
If you were able to print and get good adhesion with the bed out of tram, it sounds like BL Touch is functioning and making minor adjustments but the bed just needs a bit of tramming to get better results
Ok. So I adjust all four corners to 0.4mm and then l do a test print and what would I be looking for. Does the bl touch do anything to compensate during initial start up when it probes the nine spots?
Yes I do 5 points the corners and the middle. I then use a calibration file. Which one isn’t super important. I use the Baby step command to adjust the nozzle perfectly. Once this is done the BL will hold the calibration. Remember you now have two calibration tools on one surface. They need to work together. The printers that come with self leveling like a Prusa the bed cannot be adjusted.
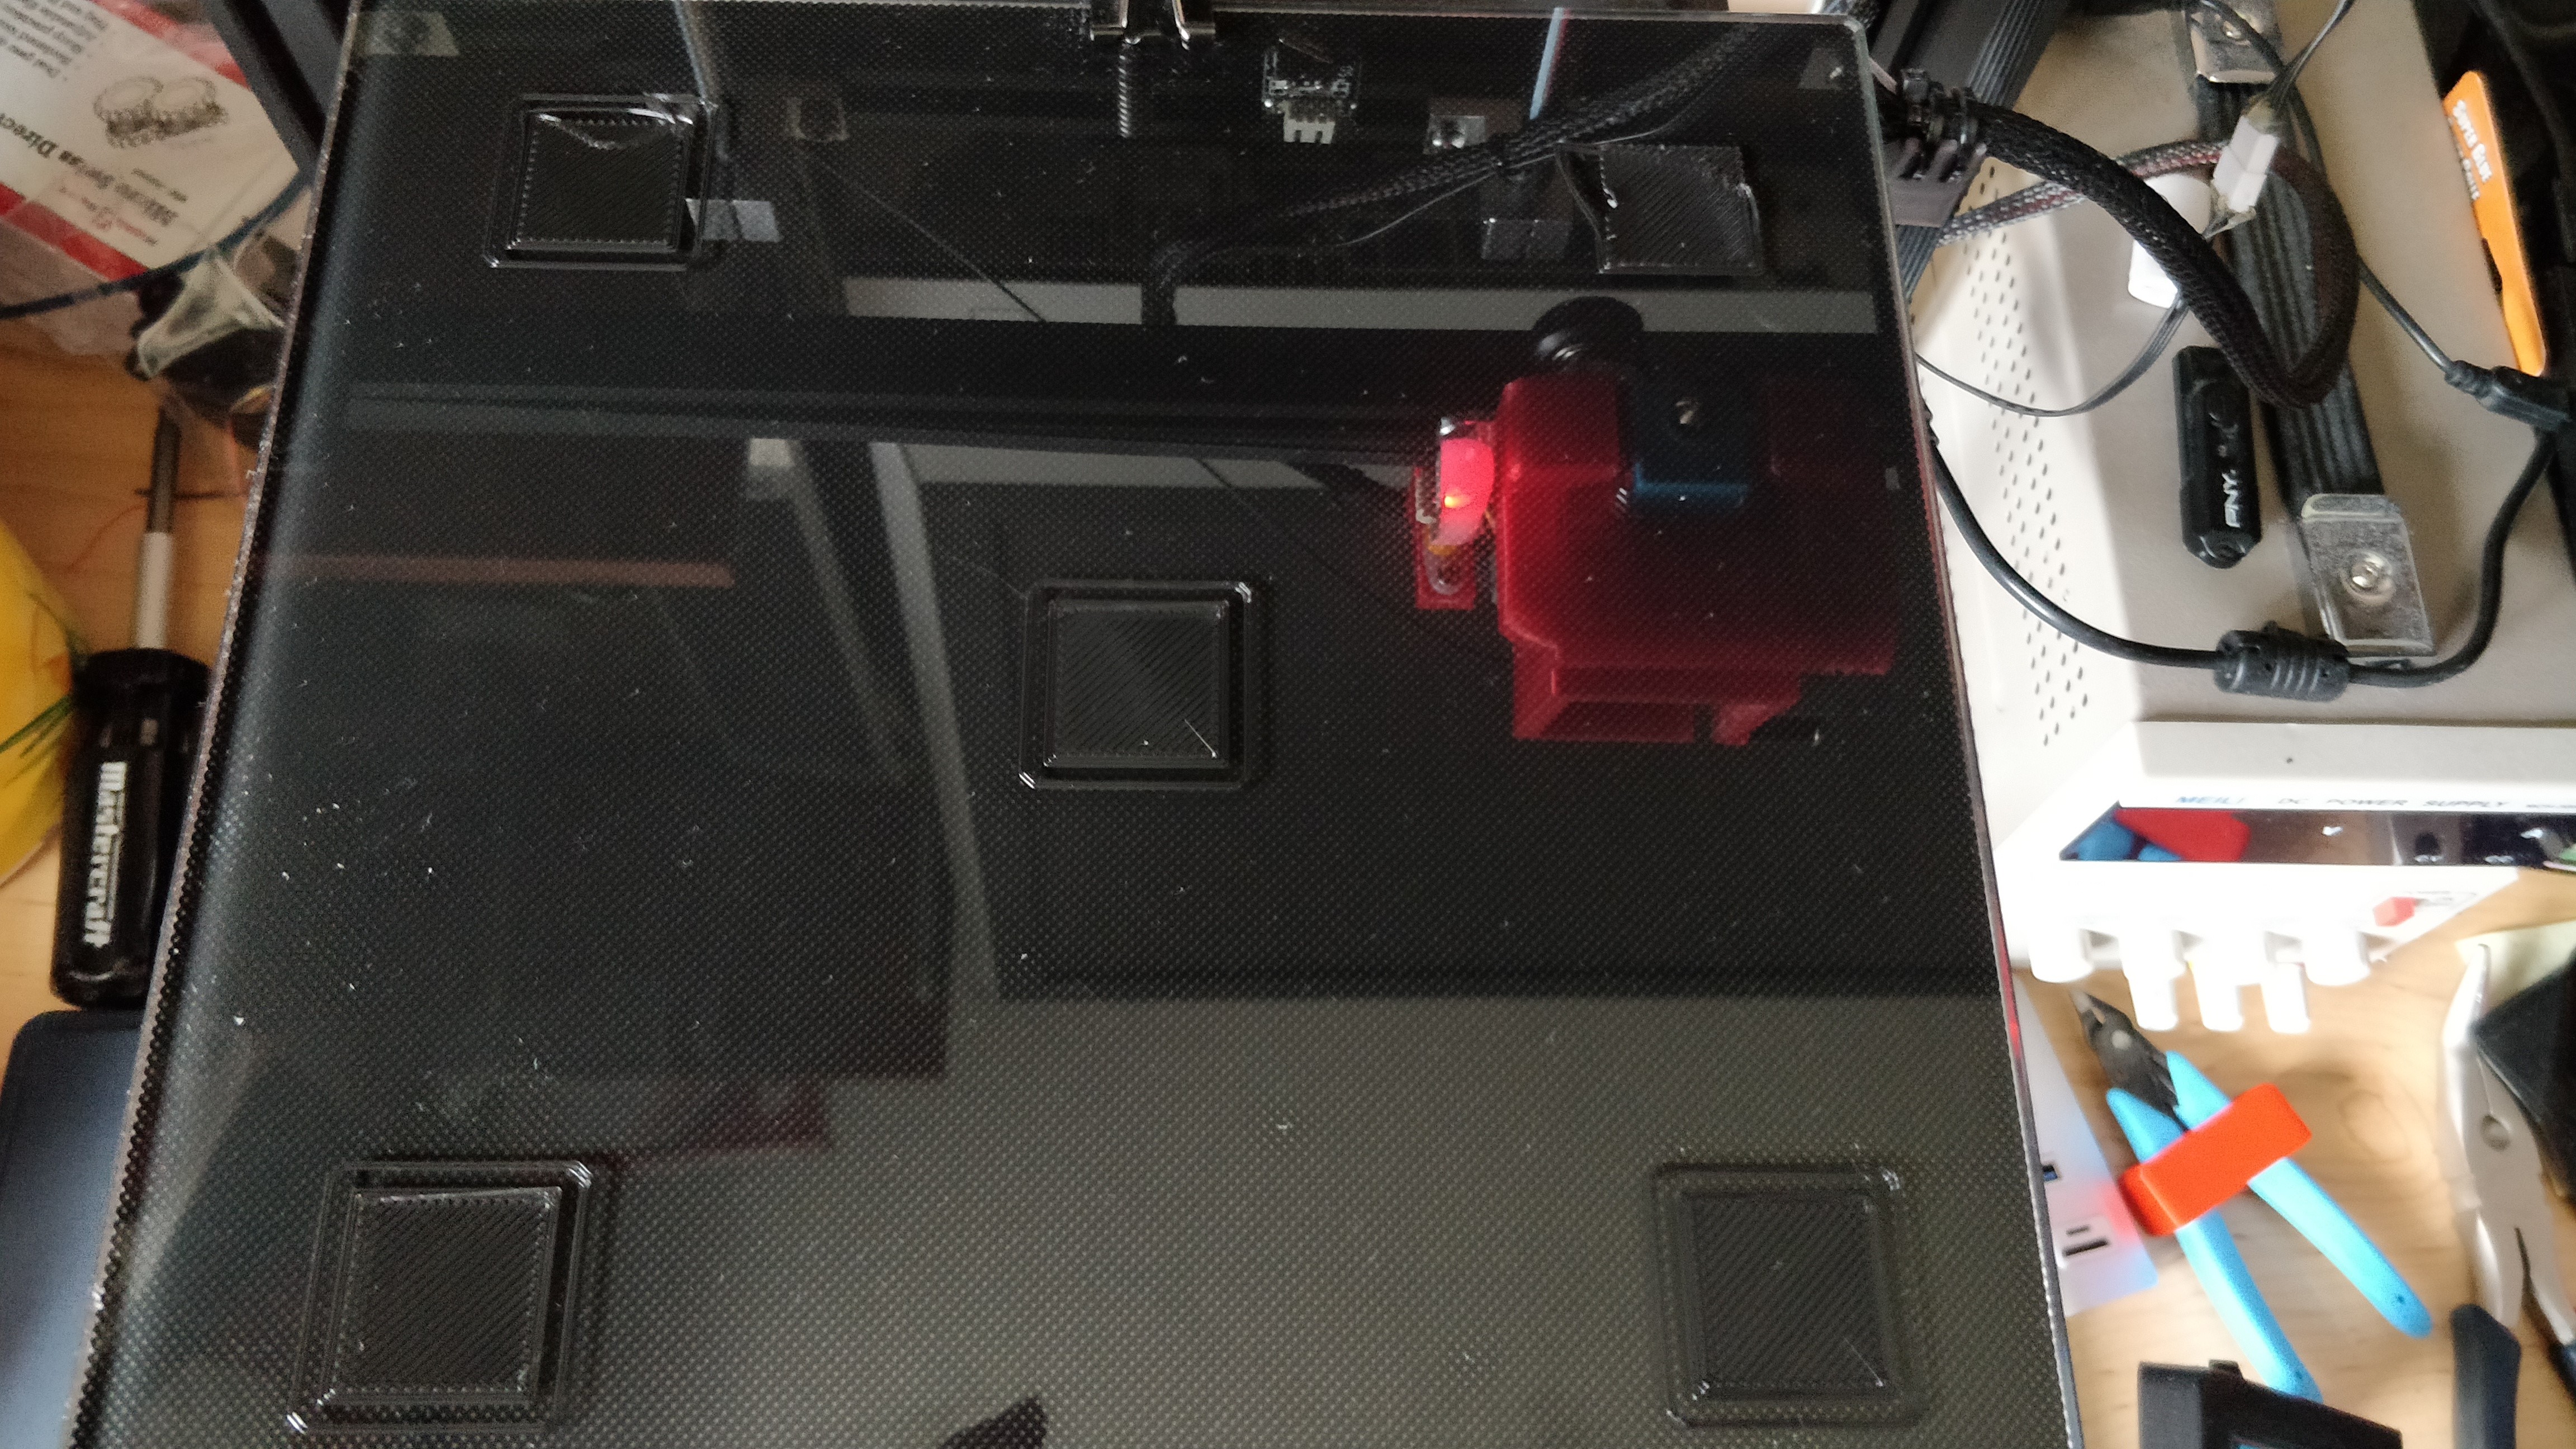
Ok I set my z offset to 0. Then I adjust all 4 corners and checked middle till I felt resistence. Did my calibration print. Here is the picture. First one the border didnt stick but the others look good I think?
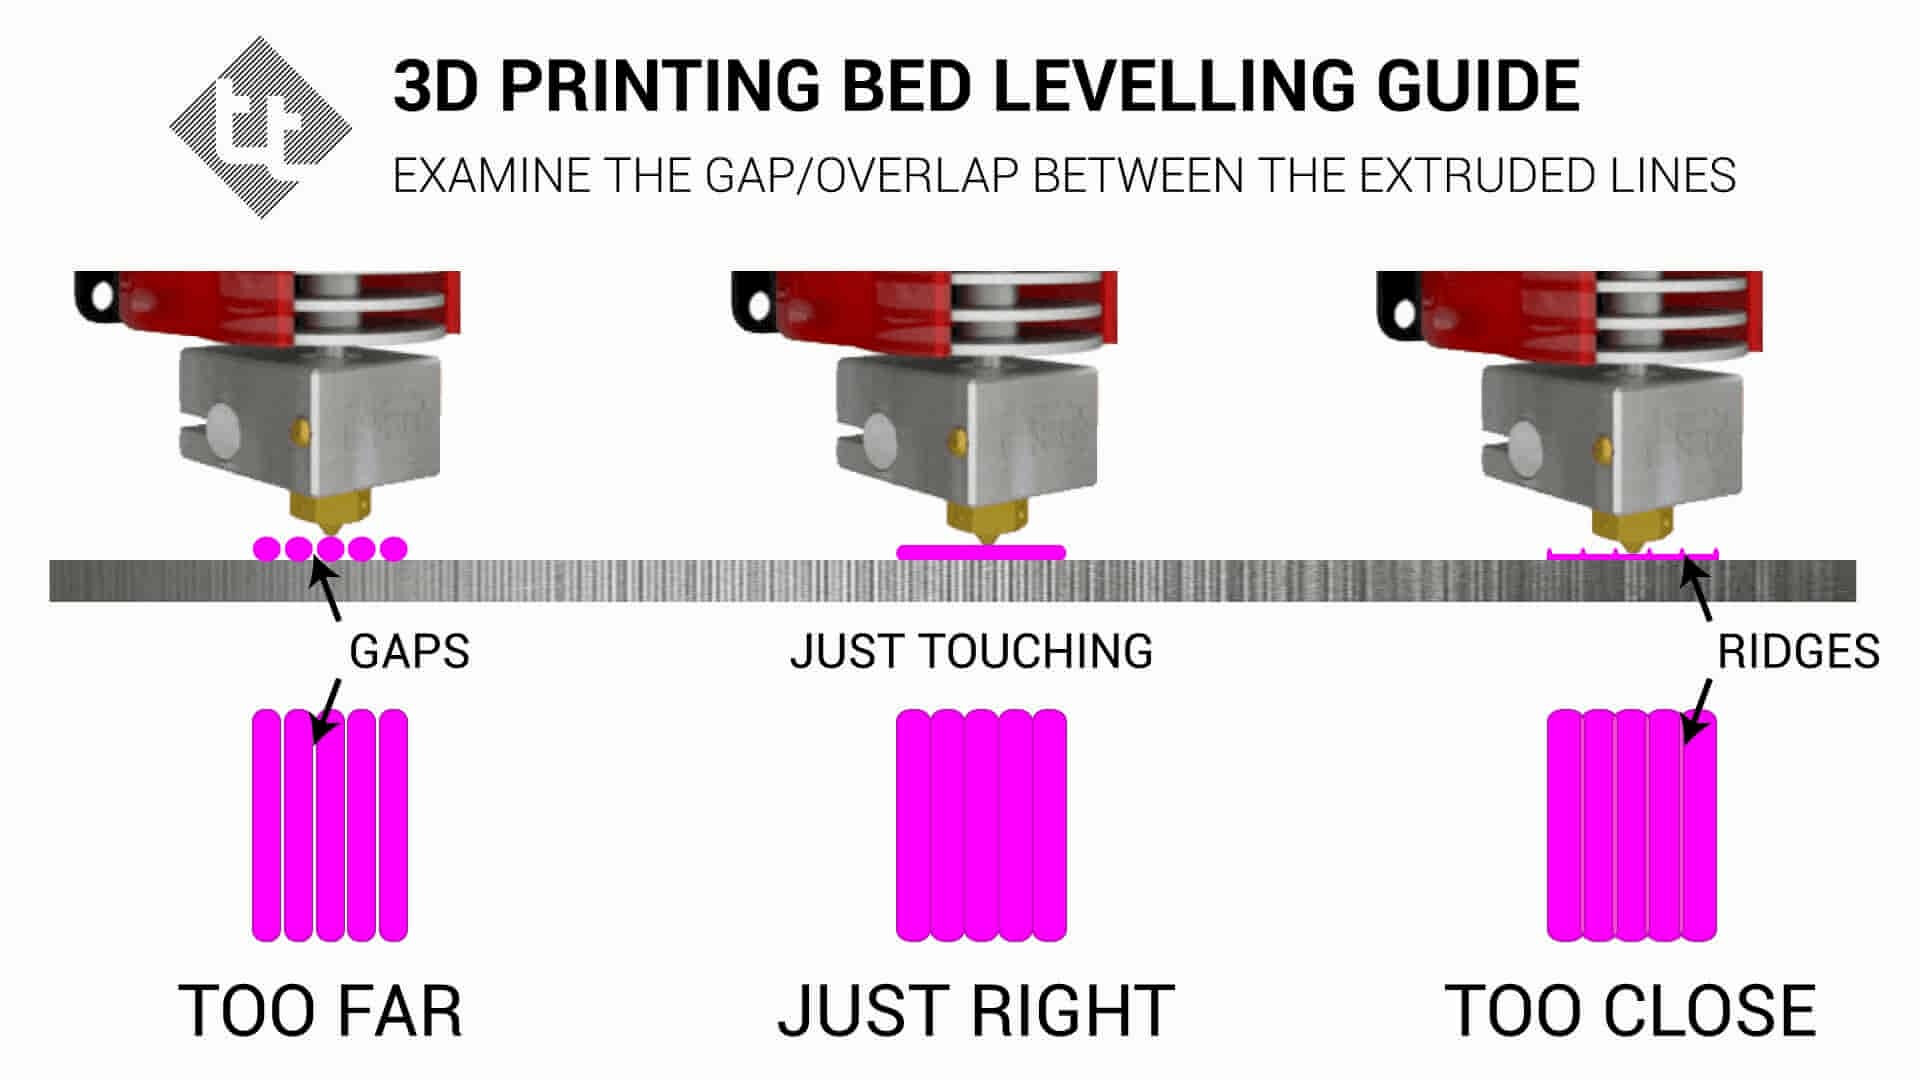
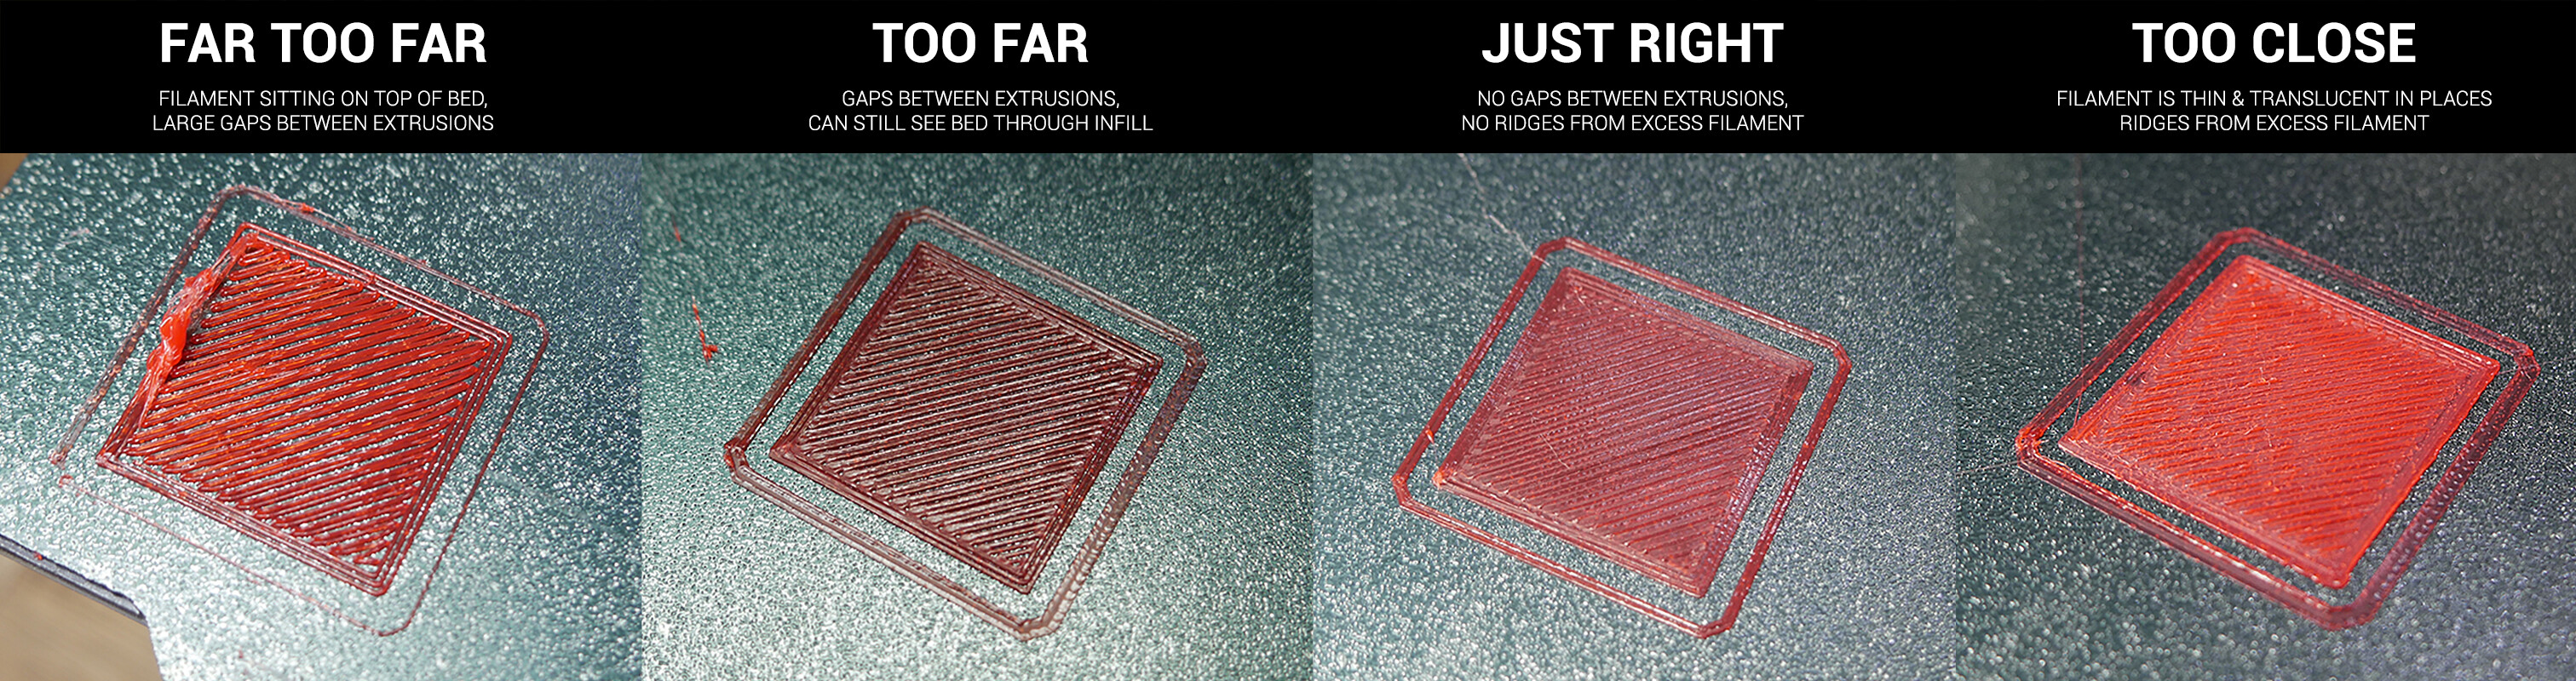
Well they should be perfect, I think they are all very close to the same comparing them but I think your nozzle is too close, it seems from the photos there are ridges. do they feel bumpy to the touch as if the nozzle dragged through the hot plastic? if so find the baby steps control and print a new one and baby step a couple of .01mm up a bit at a time so it looks more like the above diagram